
PUBG Mobile is already available on both Android and iOS. The game was a huge hit and gamers all over the world are loving it. PUBG is a survival game where you need to survive the battleground without being killed.
The gameplay and the visuals of the games are beyond amazing. However, it’s an online game which means that you need to have a working internet connection in order to enjoy the game on your Android or iOS. Since its an online game, you can expect a few bugs.
There are a PUBG Mobile bug making rounds that’s restricting users from playing the game. PUBG lovers are getting internet error while connecting with the servers. So, if the same bug is ruining your gaming experience, then this post might help you. In this article, we are going to explore a few ways which could help you to fix the ‘Internet’ error on PUBG mobile.
How To Fix ‘Internet Error’ On PUBG Mobile for Android & iOS
Well, the internet error on PUBG Mobile is been troubling both iOS and Android users. So, in order to proceed to the main fixes, we need to ensure a few things:
- Check whether your internet connection is working or not
- Make sure that your internet speed is good to play the online multiplayer game
- If possible, restart your smartphone or router and then check whether you still get the error.
How To Fix Internet Error In PUBG Mobile?
If you have checked all the basic things and the problem is still there, then you need to apply the possible fix listed below. You need to change the DNS in order to fix the internet error in PUBG mobile. So, let’s check out some of the methods that would help you to fix internet error in PUBG mobile.
For Android:
Changing DNS settings on Android is rather easy. However, we need to use Google DNS in order to get the proper result. Changing DNS will also give you better internet speed. Here are the DNS settings which you can use:
OpenDNS
208.67.222.123208.67.220.123
Google DNS
8.8.8.88.8.4.4
To change the DNS settings, follow the simple steps:
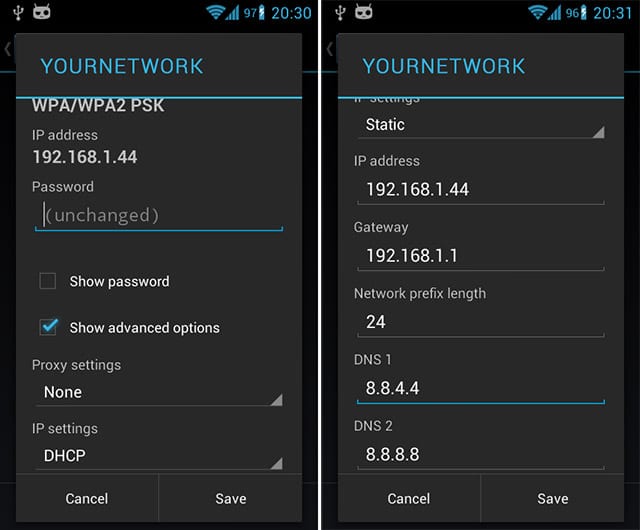
- Browse to the Settings > WiFi
- Long press on the WiFi network (connected) and then tap on ‘Modify network’
- Enable ‘Show advanced options’
- Change the IP Settings to ‘Static’
- Now you need to add DNS servers IPs to the ‘DNS 1’ and ‘DNS 2’ fields
- Tap on the ‘Save’ button and then reconnect with the network.
That’s it, you are done! Now you need to run PUBG mobile and you will not see the ‘Internet Error’ issue anymore. For a detailed guide on how to change the DNS settings, read our article – How To Change Default DNS To Google DNS For Faster Internet
Using DNS Changer (Android)
Well, Android users can also use DNS Changer App to change DNS without going through the technical stuff. The DNS Changer app for Android works on both rooted and non-rooted Android devices. Another best thing about DNS Changer is that it’s highly customizable, lots of features. Here’s how you can use DNS Changer on Android to change DNS.
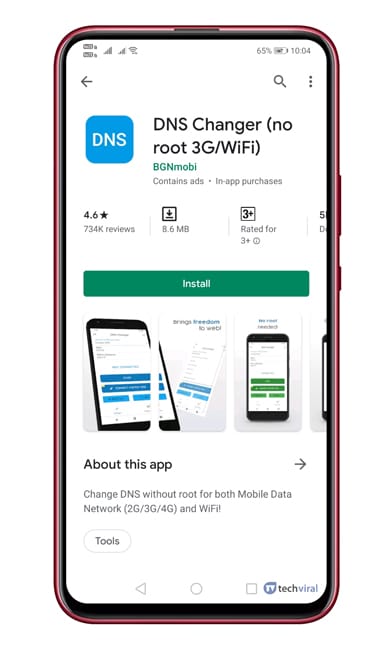
Step 1. First of all, download & install DNS Changer on your Android device from the Google Play Store. You can get the download link from here.
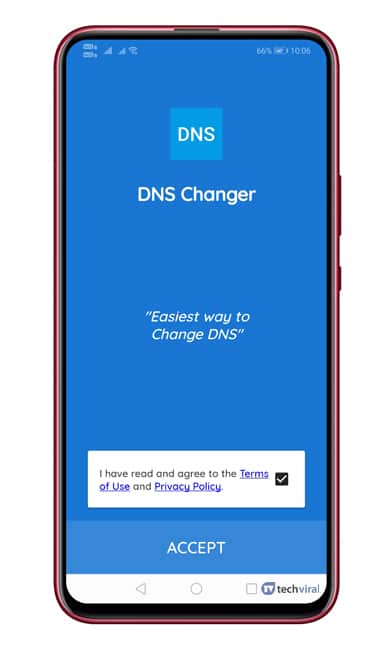
Step 2. Now, you will see an interface like below. Here, you need to accept the policy.
Step 3. Now you will see a screen like below. Here you need to tap on the drop-down button next to the ‘Choose a DNS Provider’ and select ‘Google DNS’ from the list.
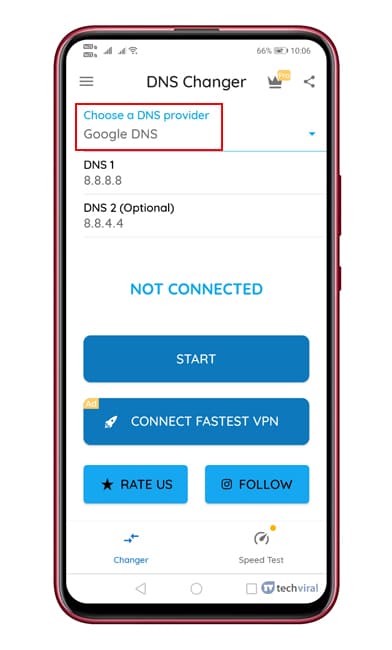
Step 4. Once done, tap on the ‘Start’ button.
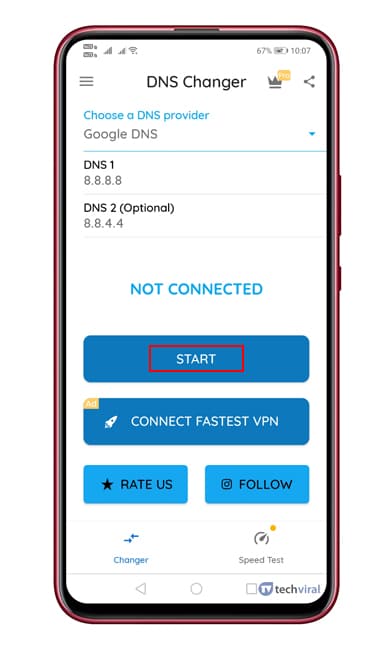
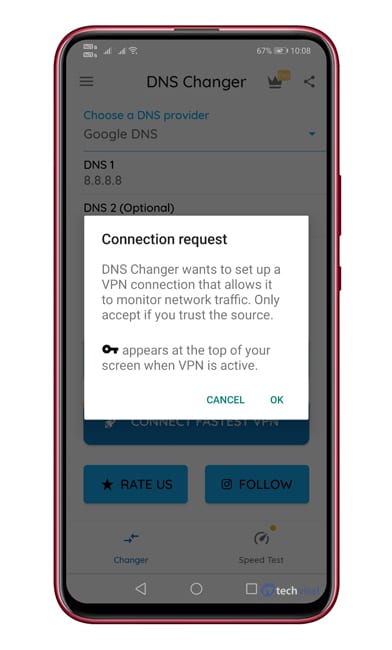
Step 5. Now you will see a Connection request prompt. There you need to tap on ‘Ok’
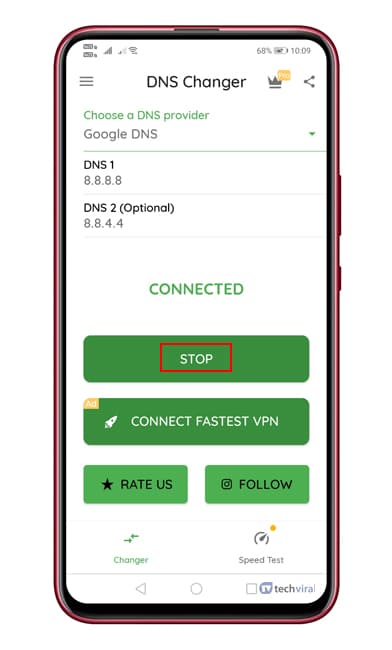
Step 6. Once connected, you will see a screen like below. To stop the connection, tap on the ‘Stop’ Button.
So, this is how you can use DNS Changer to change DNS on your Android device. If you have any other doubts, then discuss it with us in the comment section.
For iOS:
Well, just like Android, you also need to alter some DNS changes on iOS. We will be using the same Google DNS or OpenDNS for iOS too. For iOS, you need to follow some simple steps listed below.
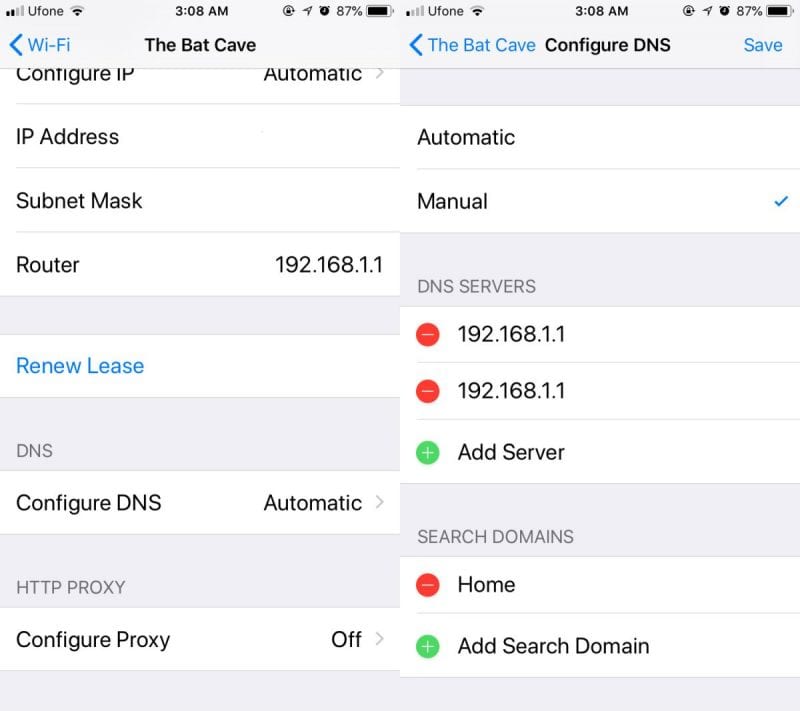
- Browse to the Settings > WiFi
- Now tap on the connected network and find ‘Configure DNS’
- In the next screen, select ‘Manual’
- Tap on ‘Add Server’ and enter the DNS address.
That’s it, you are done! Now you just need to run PUBG mobile on iOS to check whether the issue resolves or not.
So, this is all about how to fix internet error on PUBG Mobile. We have listed the working methods to fix the internet error on PUBG Mobile. If you need some further help, then make sure to discuss it with us in the comment box below.
The post How To Fix ‘Internet Error’ On PUBG Mobile for Android & iOS appeared first on Tech Viral.
from Tech Viral https://ift.tt/2LnEFAj
No comments:
Post a Comment