A coalition of 35 state attorneys general is supporting the Fortnite-maker's appeal against an in-app purchases ruling.
from BBC News - Technology https://ift.tt/1Nvi2n5tT
Monday, January 31, 2022
How to Use Windows’s File History To Back Up Your Windows 11 Data
Windows 11 provides users with several backup options, including File History, the main backup tool. The file history option of Windows allows you to restore previous versions of files.
Yes, Windows 11 also includes an option to upload files to cloud storage via OneDrive, but it’s limited to only 5GB of storage free storage space.
Another option to backup Windows 11 files is by using third-party backup & restore apps. Compared to third-party backup apps, the File History of Windows 11 is easier to set up and use.
Once you have configured Windows 11’s File History, you need to connect your USB drive to your computer, and Windows 11 will automatically backup the file to that drive. You can even schedule a backup feature to run on a schedule.
Steps to Use Windows’s File History To Back Up Your Windows 11 Data
So, if you are interested in enabling and using Windows’ File History to backup your data, you are reading the right guide. This article will share a step-by-step guide on using Windows File History to back up your data.
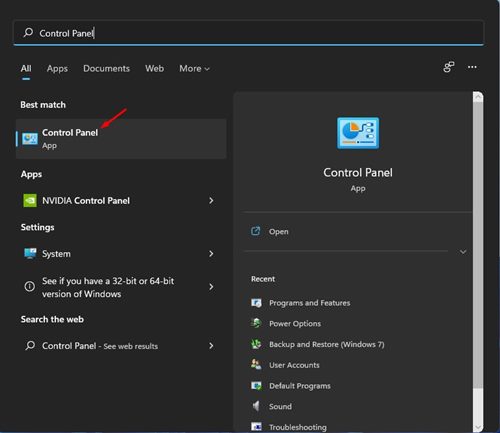
1. First of all, click on the Windows 11 Start and type in Control Panel. Then, open Control Panel from the list.
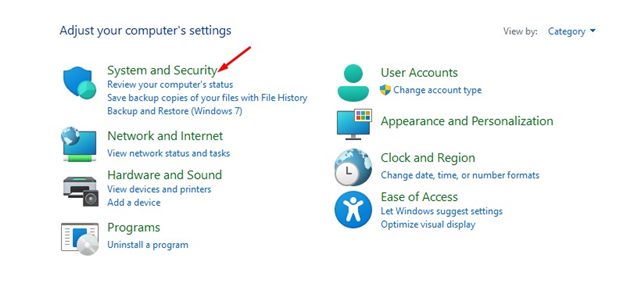
2. On the Control Panel, click on the System and Security option as shown below.
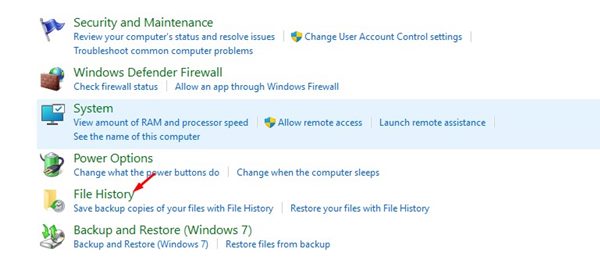
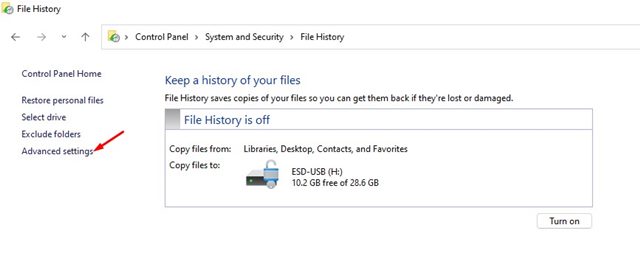
3. On the next page, select the File History option.
4. Now connect an external drive and refresh the Window. Next, click on the Advanced Settings on the left sidebar.
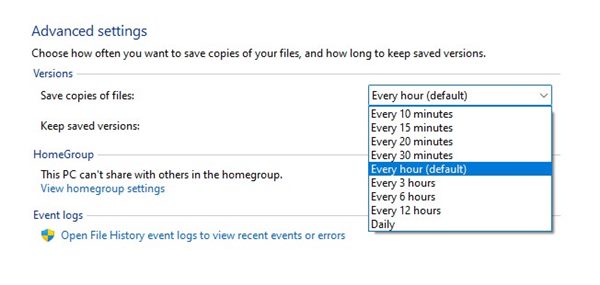
5. You need to set a schedule to run the File History on the next screen. The default is Every Hour; you can change the time frame from the drop-down menu.
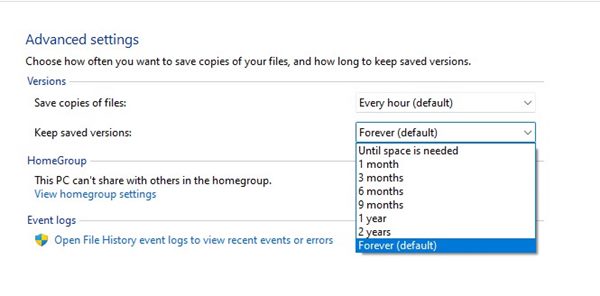
6. Next, select the dropdown for Keep saved versions and change it as per your preference.
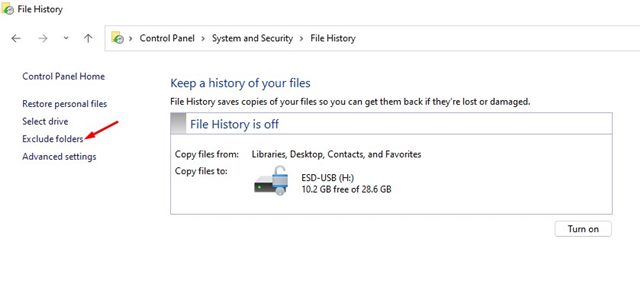
7. If you want to exclude any folder, click on the Exclude folders option and add the folder you don’t want to backup.
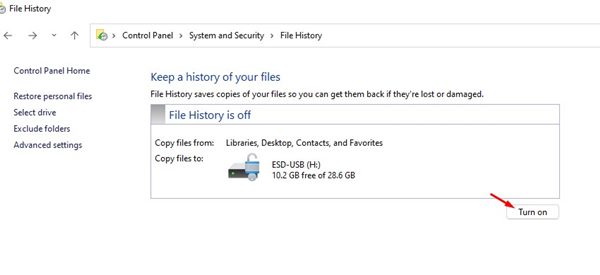
8. Now, you need to return back to the main File History screen and click on the Turn on Button to enable the feature.
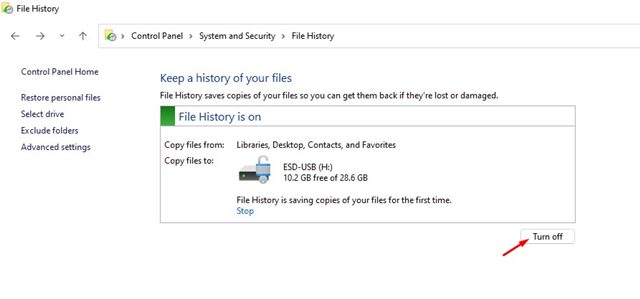
9. To disable the File History, click on the Turn off button as shown below.
Important: The File History will only back up files from Libraries, Contacts, Desktop, and Favorites folders.
Setting up File History on Windows 11 is pretty straightforward. You can rely on this feature to backup your Windows 11 to an external drive. I hope this article helped you! Please share it with your friends also. If you have any doubts related to this, let us know in the comment box below.
The post How to Use Windows’s File History To Back Up Your Windows 11 Data appeared first on Tech Viral.
from Tech Viral https://ift.tt/jRagvpfBh
The Belgians getting the right to disconnect from work
From next month, Belgium's civil servants may not be contacted outside working hours.
from BBC News - Technology https://ift.tt/DmrOLJNtx
from BBC News - Technology https://ift.tt/DmrOLJNtx
10 Best Photo Resizer Apps For Android in 2022

Over the past few years, the technology around us has changed. These days, smartphones have as many as four cameras. Naturally, we can’t resist our urge to capture pictures with such high-end camera specifications. Smartphones also serve as the best tool to quickly share captured images via social media apps.
However, often at the time of sharing, we find that the image is too large to be shared. Not just size, but we also deal with problems related to image size like different aspect ratios, different file formats, etc.
So, to deal with such issues, we need to use photo resizer apps. With photo resizer apps, you can easily set a different aspect ratio or crop out the unnecessary parts of a photo.
List of 10 Best Photo Resizer Apps For Android
So, in this article, we have decided to share a few best Android apps that would help you resize any image. With these apps, you can easily resize and reduce the size of the images without compromising on quality.
1. Pixlr
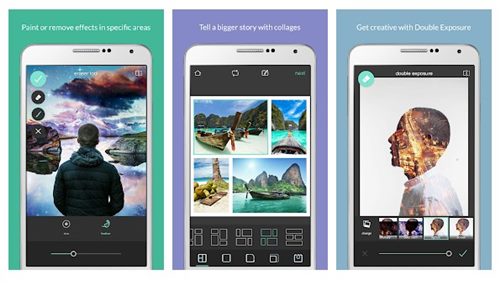
Pixlr is a full-fledged photo editing app available on the Google Play Store. It offers you every photo editing tool you can think of. The latest version of Pixlr for Android also has a resizer tool.
The resize tool of Pixlr can be used to crop and resize images. Some other features of Pixlr include adding effects, borders, and other elements to photos.
2. Instasize
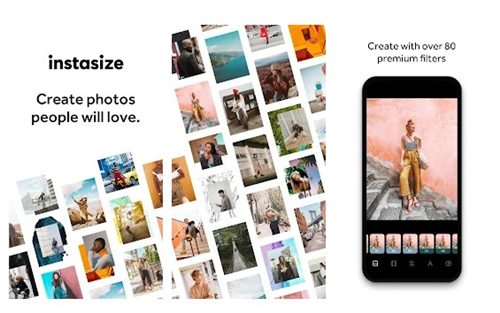
Instasize is an Android app that lets you resize any image to fit on any social networking platform or instant messaging app. It’s basically a toolkit for social content creators to apply premium filters, borders, and adjustments to the photos.
Apart from the resize tool, Instasize also includes a collage maker, text editor, 80+ filters, and more. Overall, Instasize is an excellent app for resizing photos on an Android smartphone.
3. Image Size – Photo Resizer
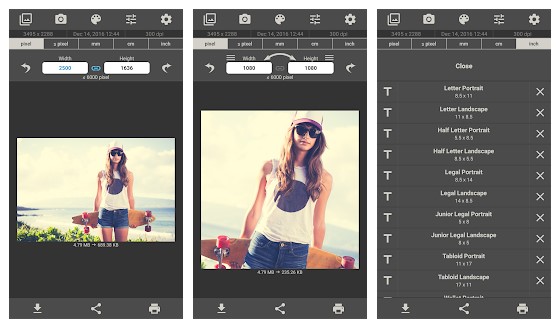
It’s one of the best Android apps available that can be used to resize an image to whatever size you would like.
The key thing is that it lets you specify the output format using one of the following four units of measurement – Pixels, Millimeters, Centimeter, Inches, etc.
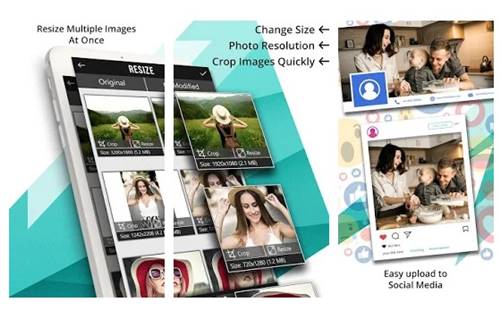
4. Photo & Picture Resizer
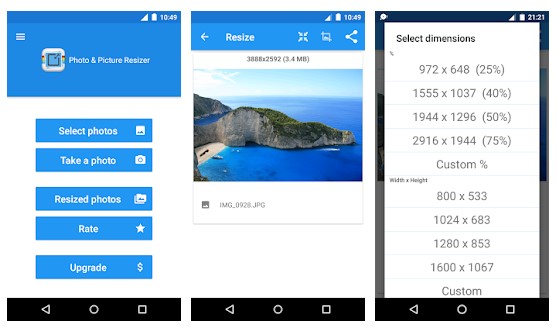
As the app’s name says, Photo & Picture Resizer is another best Android app that could help you resize and reduce your picture size.
The application is pretty fast and easy to use. It’s a free app that supports batch resize as well. Apart from that, it doesn’t alter the original pictures.
5. PicTools

Well, if you are searching for a multi-purpose image tool for your Android device, then PicTools might be the best pick for you.
It lets you resize, crop, convert and compress the images. What’s more interesting is that it can convert images to PDF format. Not only that, but it also has offline support, Exif support, and batch file processing.
6. Image Crop
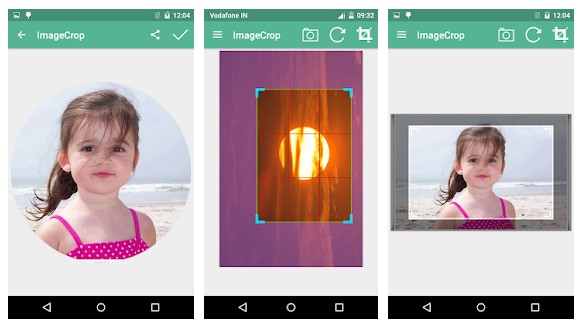
Image Crop is for those searching for an easy-to-use Android app for cropping photos and videos. It lets you rotate, resize, flip, and crop pictures.
The app also provides users with photo editing features like text effects, background removal, color adjustment, etc. So, Image Crop is another best Android app to resize photos.
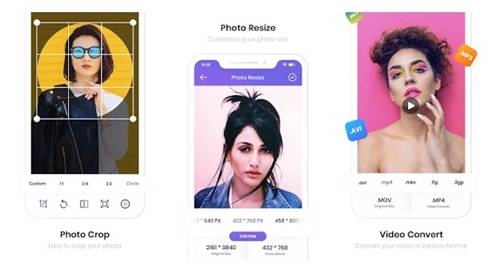
7. Photo Resizer
Well, it’s a fast and easy-to-use image optimizer tool that gives your digital images a perfect size to suit a wide range of applications.
With Photo Resizer, you can either resize your photos or compress them. It also offers a few other useful features like batch conversion, batch resizes options, etc.
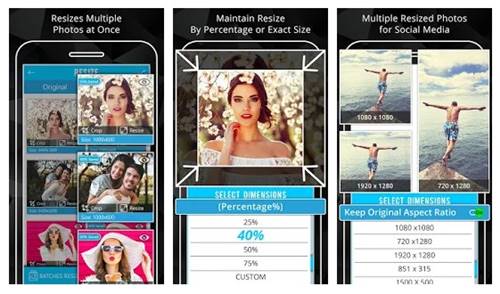
8. Photo Resizer – Image Compressor
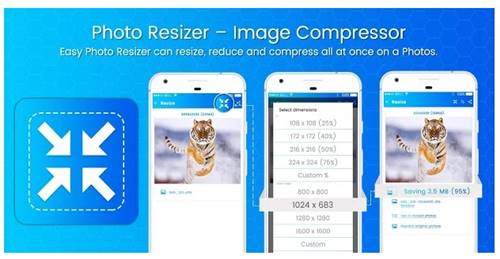
Photo Resizer – Image Compressor is one of the best image editing tools you can use on Android. Although the app is meant for cropping images, it also has some other advanced features.
For instance, you can set compression quality before compressing images; you can choose your width and height to resize photos, etc.
9. TinyPhoto
Although not famous, TinyPhoto is still one of the best Android apps to resize photos. The great thing about TinyPhoto is that it offers features like batch conversion, photo resize, and photo cropping. You can also use the app to convert your images.
It supports JPEG to PNG or PNG to JPEG conversion. So, TinyPhoto is another best photo resizer app for Android.
10. Image Crop
Although it’s made for cropping images, it can be used for other purposes as well. For instance, you can use Image Crop to flip an image, rotate an image, resize images, etc.
The good thing about Image Crop is that it also supports video cropping & resizing. That means you can also crop videos with a different aspect ratio as well.
Photo Resizing is easy on Android; thanks to these free apps. I hope this article helped you! Please share it with your friends also. If you know of any other such apps, let us know in the comment box below.
The post 10 Best Photo Resizer Apps For Android in 2022 appeared first on Tech Viral.
from Tech Viral https://ift.tt/jdJyn1OaY
10 Best App Switchers for Android Device in 2022

There’s no doubt that Android is the most dominating mobile operating system right now. This is because Android provides users with more features and customization options than every other mobile operating system. Not only that, but Android is also known for its massive app ecosystem.
On Google Play Store, you will find apps for every different purpose. If we talk about multitasking, Android is pretty great in it. Even though Android provides users with many multitasking options, it’s still less.
Plenty of third-party app switchers are available on the Play Store to improve your multitasking experience.
List of 10 Best App Switchers for Android Device
So, in this article, we have decided to share a list of the best app switchers for Android. You can easily switch between apps without closing the first ones with these apps. So, let’s check out.
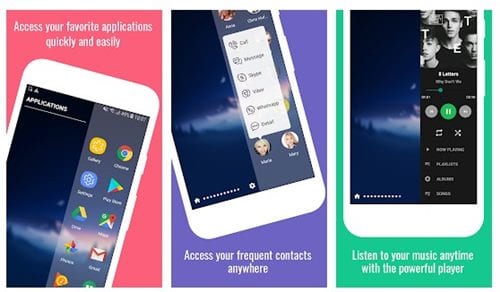
1. Everywhere Launcher
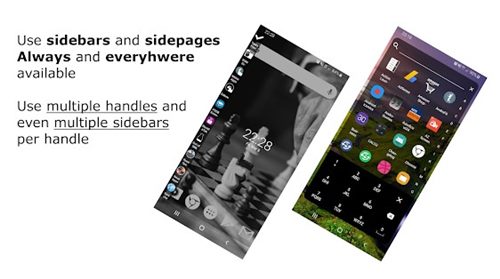
Everywhere Launcher is a very useful app available for Android smartphones. It’s basically a sidebar app that allows you to open sidebars by touching/swiping any screen edge.
The good thing about Everywhere Launcher is that it allows you to set multiple different regions at the screen edge. Each of the regions can open a different sidebar.
You can customize the sidebar to add your own apps, shortcuts, widgets, contacts, etc. Overall, this is a great app switcher for Android.
2. App Switcher
If you are searching for an easy way to switch apps regardless of where you are on your device, look no other than App Switcher. Once installed, App Switcher adds an overlay button that sticks to your screen.
Tapping on the button opens a bubble containing your most-used apps. You can customize the app to add up to 5 apps on the floating bubble. In addition, you can adjust the floating bubble style, transparency, and a few other things.
3. Lynket Browser
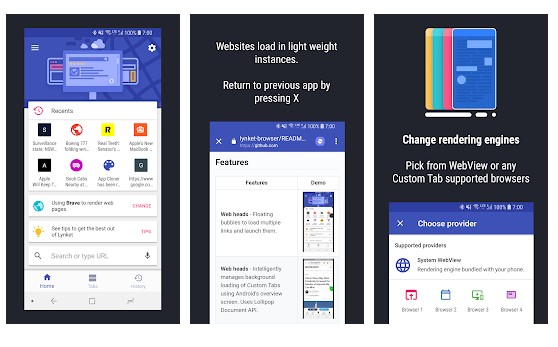
Well, it’s one of the most advanced web browser apps for Android that serves as a better way to browse on Android. It’s a unique web browser based on the Custom Tabs protocol.
Lynket Browser slides over the website on top of your apps, enabling you to transition into the website seamlessly. One of the great features of Lynket Browser is the ‘Web Heads’ that loads links in floating bubbles in the background.
4. Floating Apps Free

If you want to experience real multitasking on an older Android version, then Floating Apps Free might be the best pick for you. It lets you open multiple apps in a floating window.
That means, with Floating Apps Free, you no longer need to leave the current app for any small task. Not only that, but Floating Apps Free also got the ability to open links in a floating browser.
5. Taskbar
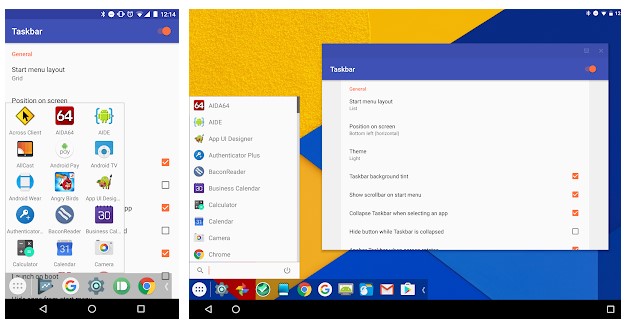
Well, Taskbar is pretty much similar to the Floating apps listed just above. Like FLoating apps free, Taskbar also lets you launch multiple apps in a floating window.
In addition, it brings a PC-Style start menu and recent apps tray on the top of your screen. You can access the Start menu and recent apps tray at any time that increases your productivity.
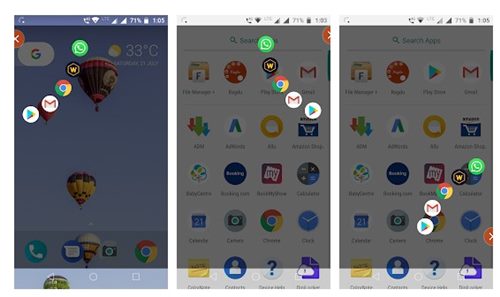
6. Swiftly Switch
Swiftly Switch is one of the most helpful multitasking apps you can ever use on Android. It adds a floating circle sidebar on your home screen.
You can use the floating circle sidebar to access your most used or favorite apps. It also has some swipe features like launching recent or last used apps with just one swipe.
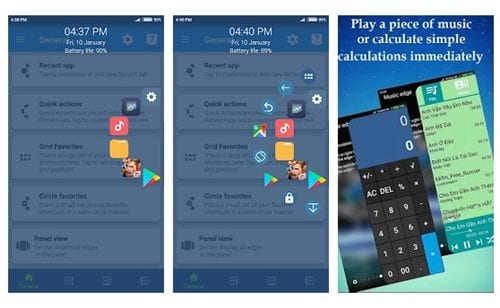
7. Edge Screen
As the name suggests, Edge Screen brings a sidebar panel to the edge of your screen. You can add your favorite and most-used application in the Edge panel and open them in just one swipe.
It also offers you a virtual key panel to add software buttons like Home, Back, Screen Recorder, Power button, etc.
8. DIESEL

This is another best and most unique app switcher for Android available on the Google Play Store. The app helps you keep your home screen clean by giving you access to recent apps right from the notification menu.
In addition, it adds a sticky pull-down app switcher on the notification panel. You can easily add your favorite apps to the notification area with DIESEL.
9. Fast – The fastest app switcher
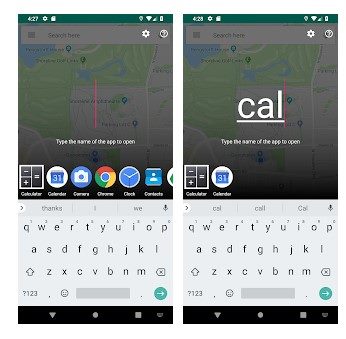
Although not very popular, Fast – The fastest app switcher is still one of the best and most effective app switchers that you can use today. Guess what? Fast – The fastest app switcher is entirely free and without ads.
To switch between apps, you need to type in one or two letters, and the app will suggest you all available apps on top of your Android keyboard, allowing you to access your apps directly.
10. Navigation Bar
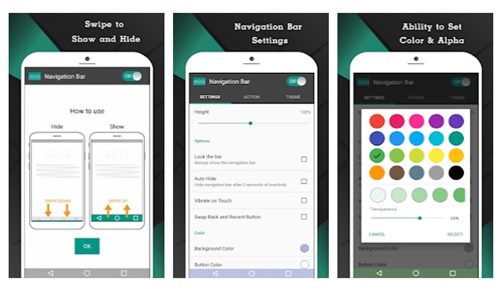
Although not meant for multitasking, Navigation Bar can still be used for multi-task purposes. In addition, the app brings a Back, home, and recent button.
The good thing is that Navigation Bar allows you to set up custom long press actions. For example, you can set up the home button to launch the camera application. In addition, you can set long-press actions for all three virtual buttons that the app brings.
You can easily switch between apps with these free app switchers. If you know of any other such apps, let us know in the comment box below. I hope this article helped you! Please share it with your friends also.
The post 10 Best App Switchers for Android Device in 2022 appeared first on Tech Viral.
from Tech Viral https://ift.tt/oguVTSdIv
Sunday, January 30, 2022
Spotify: Streaming giant announces plans to clamp down on Covid misinformation
The streaming giant says it will add warnings to all podcasts discussing Covid-19 on its platform.
from BBC News - Technology https://ift.tt/JvqKRpDB7
from BBC News - Technology https://ift.tt/JvqKRpDB7
True story? Lie detection systems go high-tech
A number of teams are working on advanced ways to tell more accurately if someone is lying.
from BBC News - Technology https://ift.tt/vtuGkP4Iy
from BBC News - Technology https://ift.tt/vtuGkP4Iy
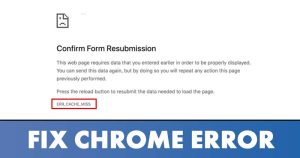
7 Best Methods to Fix Err_Cache_Miss Error in Chrome
Despite being the most popular desktop web browser, Google Chrome has many flaws. Users often experience DNS errors, cache errors, etc., while opening web pages on the Chrome browser.
If you are a regular Google Chrome user, you might have come across the Err_Cache_Miss error at some point. Err_Cache_Miss is a common Chrome error that usually appears while accessing sites.
What is Err_Cache_Miss in Chrome?
The Err_Cache_Miss generally appears when loading a web page in the Google Chrome web browser. The error code itself says that the error is related to the Cache file.
Usually, the Err_Cache_Miss results from a mismatch between the website and the version of the cache stored on your device.
The error could also be a result of a network issue, a problem with your web browser, or the website you are visiting itself.
Since it’s pretty hard to assume the actual reason for the Err_Cache_Miss, we need to follow some basic methods to get it fixed.
7 Methods to Fix Err_Cache_Miss in Chrome browser
Now that you are fully aware of Err_Cache_Miss, you might like to fix it. Below, we have listed a few best methods to fix Err_Cache_Miss in the Google Chrome web browser. Let’s check out.
1) Hard Refresh the Web Page
The first thing you should do to fix the Err_Cache_Miss error is to hard refresh (Shift+Reload button) the webpage you are trying to load.
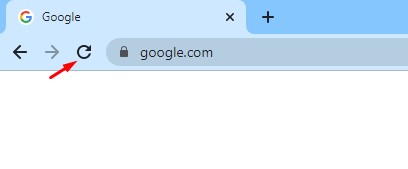
To reload the webpage, you need to click on the Restart button on your Chrome browser. Alternatively, you can also press the F5 key on your keyboard to refresh the webpage.
2) Restart the Web Browser
If you are still getting the Err_Cache_Miss error message after refreshing the web page, you need to relaunch the web browser.
It’s simple to relaunch Google Chrome on Windows 11; close the browser and open it again. After the restart, open the website again to check whether the Err_Cache_Miss had been resolved or not.
3) Update Your Chrome Browser
Few users have reported updating their Chrome browser to fix the Err_Cache_Miss error message. So, you can try updating your Chrome browser to fix the Cache issue.
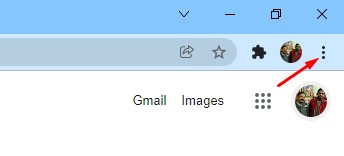
1. First of all, open the Google Chrome web browser and click on the three dots as shown below.
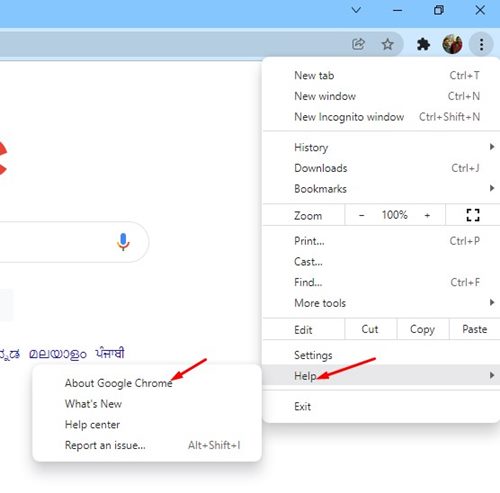
2. On the menu, click on the Help > About Google Chrome option.
3. Now, Google Chrome will check for the available updates. After the update, click on the Relaunch button to restart the web browser.
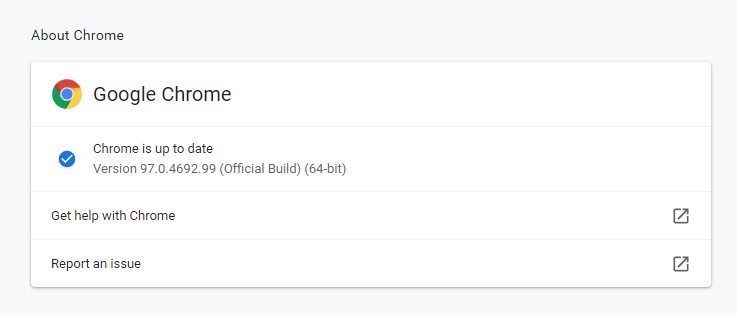
That’s it! You are done. This is how you can update your Chrome browser to fix the Err_Cache_Miss error.
4) Disable the Chrome Extensions
Although Chrome extensions were meant to expand the functionality of Chrome, several extensions can create problems with the Cache files. Some extensions can even prevent a website from loading fully.
So, if you have just added a new Extension to Chrome, it’s best to disable and check the website. Here’s how to disable Chrome extensions.
1. First of all, open Google Chrome and click on the three dots as shown below.
2. From the list of options, select More Tools > Extensions.
3. This will open the Extensions page. You need to click on the slider below the extension description to enable/disable the extension.
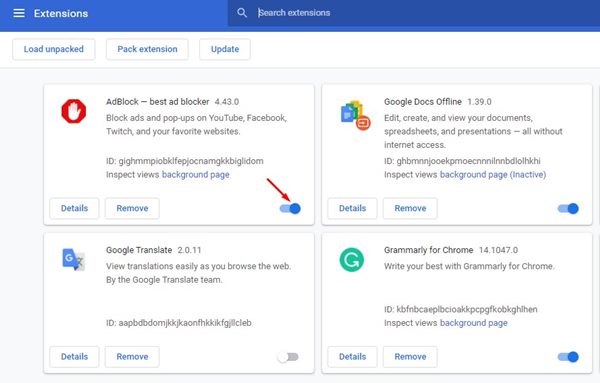
After disabling the extensions, restart your web browser and visit the website where you are getting the Err_Cache_Miss error message.
5) Disable Chrome Caching
If you are still getting the Err_Cache_Miss error message even after following the above methods, you need to disable the Chrome caching. Here’s how to disable the Chrome caching to fix the Err_Cache_Miss error.
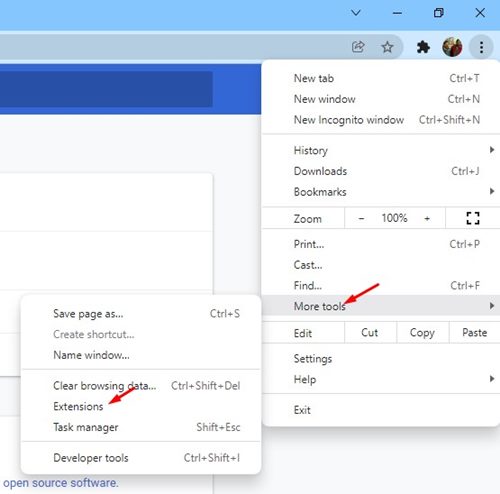
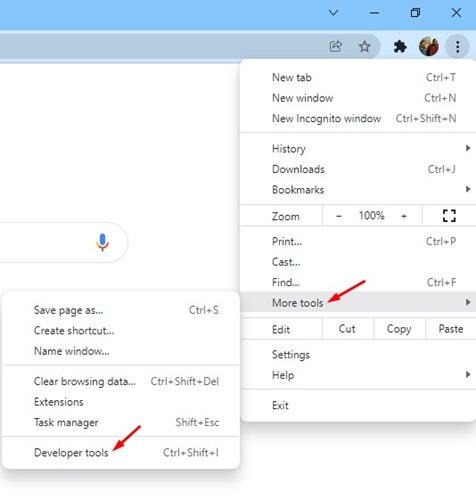
1. First of all, open the Google Chrome browser and click on the three dots as shown below.
2. On the drop-down menu, select More Tools > Developer Tools.
3. Now, you need to switch to the Network tab, as shown below.
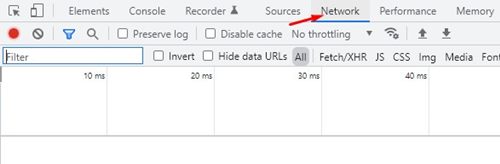
4. On the Network, you need to check the ‘Disable Cache’ option.
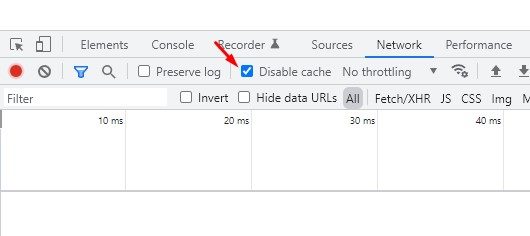
That’s it! You are done. Now reload the webpage, and you won’t get the Err_Cache_Miss error message anymore.
6) Reset Network Settings
The Err_Cache_Miss might also be a result of a network problem. So, in this method, we will reset the Network settings of Windows 11. Network reset will remove any conflict that stops your internet from working properly. Here’s what you need to do.
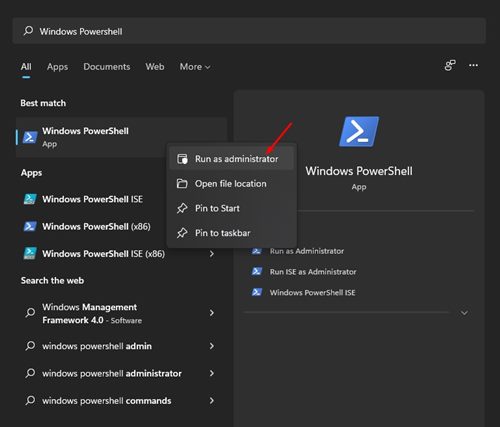
1. First of all, open Windows 10/11 search and type in Windows PowerShell. Right-click on the Windows Powershell and select ‘Run as administrator’
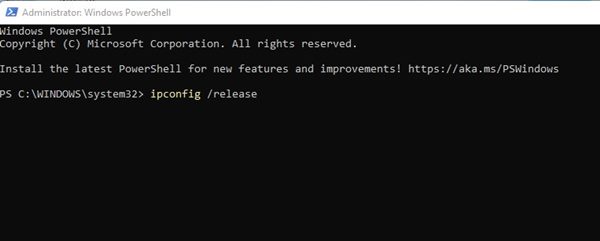
2. On the PowerShell Window, you need to enter the following commands. Make sure to execute the commands to reset your network connection.
- ipconfig /release
- ipconfig /flushdns
- ipconfig /renew
- netsh winsock reset
Alternatively, you can follow our guide – Reset Network Settings in Windows 11 to reset the Network without CMD or Powershell.
7) Change the DNS
Sometimes, changing the DNS settings also fixes various web browser related problems. Although it’s not a sure-shot fix, you can try changing the DNS server of your PC to fix Err_Cache_Miss.
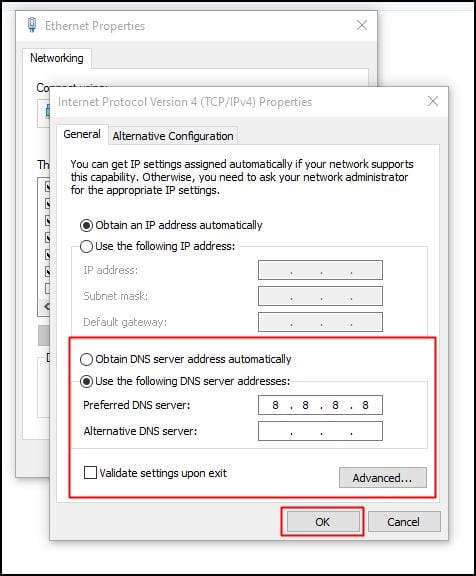 Changing the DNS server is pretty easy on Windows 10 and Windows 11. You need to follow our guide Change DNS server on Windows to know how to change the DNS server in easy steps.
Err_Cache_Miss is a common Chrome problem, but it can be easily fixed. You need to implement all methods to fix the problem on your Chrome browser. I hope this article helped you! Please share it with your friends also. If you have any doubts related to this, let us know in the comment box below.
The post 7 Best Methods to Fix Err_Cache_Miss Error in Chrome appeared first on Tech Viral.
from Tech Viral https://ift.tt/PCJV1RSvt
How to Access & Add Emojis to Documents in Windows 11
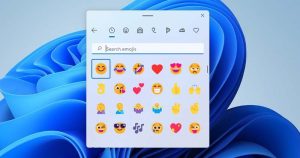
Using Windows 10, you will know about the new Emoji feature. Users can add emojis to documents with ease. The same feature is also available in Windows 11.
On Windows 11, you can also use the emojis on file and folder names. Although both Windows 10 & Windows 11 have the same emoji picker, Windows 11’s emojis look more modern and expressive.
With Windows 11’s emoji picker, you can add special characters as well as emojis to your documents, emails, text messages, and social media posts. So, if you are interested in adding emojis to documents in Windows 11, you are reading the right guide.
This article will share a step-by-step guide on adding emojis to documents or any text file in Windows 11. Let’s check out.
About Windows 11’s new Emoji Panel
The new emoji panel is available on selected Windows 11 operating system builds. Your system must be running on Windows 11 build KB5007262 or above.
Therefore, it’s best to install the system updates before following the methods. To update Windows 11, head to the Settings > Update & Security > Windows Update.
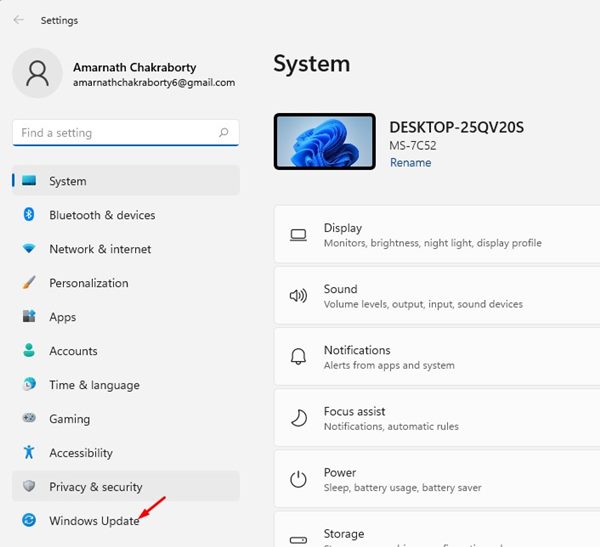
On the Windows Update page, you need to click on the Check for Updates button on the right pane. This will download & install the latest version of Windows 11 on your system.

How to Access Windows 11’s new Emoji Panel
You don’t need to edit any registry file or modify any system settings to access the new Emoji panel. Instead, you need to press the Windows Key + .(Period) to open the new Emoji Panel in Windows 11.
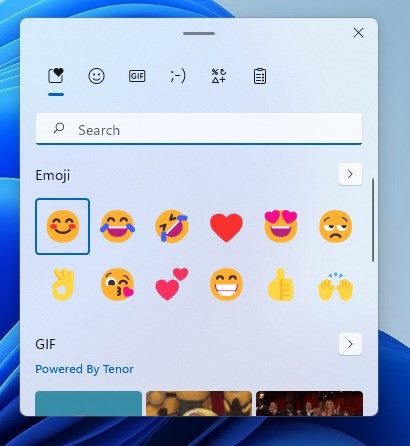
Alternatively, you can even press Windows Key + ; (semicolon) on your keyboard to access the hidden emoji panel in Windows 11.
Steps to Use Emojis in Windows 11
You can easily access and put emojis on any document, text files, emails, or social media post on Windows 11.
For example, if you want to add emojis on Notepad, you need to open Notepad and press the Windows Key + ; (Semicolon) button. This will open the hidden emoji picker.
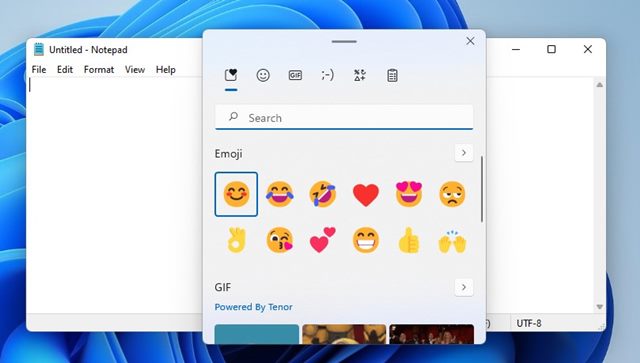
You only need to browse and select the emojis you wish to add. The emojis will be added to the text file as you click them.
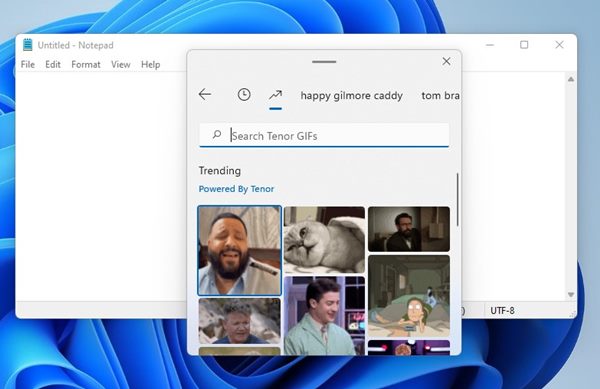
You can even use the same emoji panel to insert GIFs on their documents. For that, switch to the GIF tab and select the GIF you want to add.
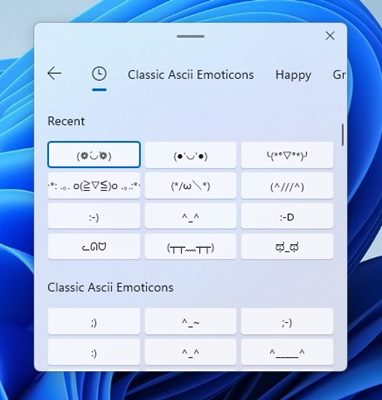
Windows 11’s emoji picker also includes Kamoji, Japanese text-based emojis. If you are a massive fan of Japanese text-based emojis, you can also use Kamojis. To use Kamojis, switch to the Kamojis tab and select the emoticon of your wish.
There are many things to discover in Windows 11’s emoji picker. You need to go through all the options to use it per your requirements. I hope this article helped you! Please share it with your friends also. If you have any doubts about this, let us know in the comment box below.
The post How to Access & Add Emojis to Documents in Windows 11 appeared first on Tech Viral.
from Tech Viral https://ift.tt/cO4mhn5EV
Subscribe to:
Posts (Atom)