Many long-standing customers pay more for broadband and mobile contracts than new customers do.
from BBC News - Technology https://ift.tt/IOa6M9i
Sunday, July 31, 2022
Starlink: Why is Elon Musk launching thousands of satellites?
The billionaire's SpaceX company hopes to provide an internet service from space.
from BBC News - Technology https://ift.tt/qeEvJAc
from BBC News - Technology https://ift.tt/qeEvJAc
Apple Starts Showing Ads in App Store & Apple Pay Expansion
Apple will start showing ads in the App Store, allowing you to discover more apps for your iPhone. Besides, Apple might also expand its Apple Pay support for more browsers. Let’s discuss the complete details below.
On Saturday, Apple announced that ads would be displayed in App Store for the apps, which will also help developers to promote their apps and make it possible to reach their vital users.
Apple’s App Store Will Now Display Ads
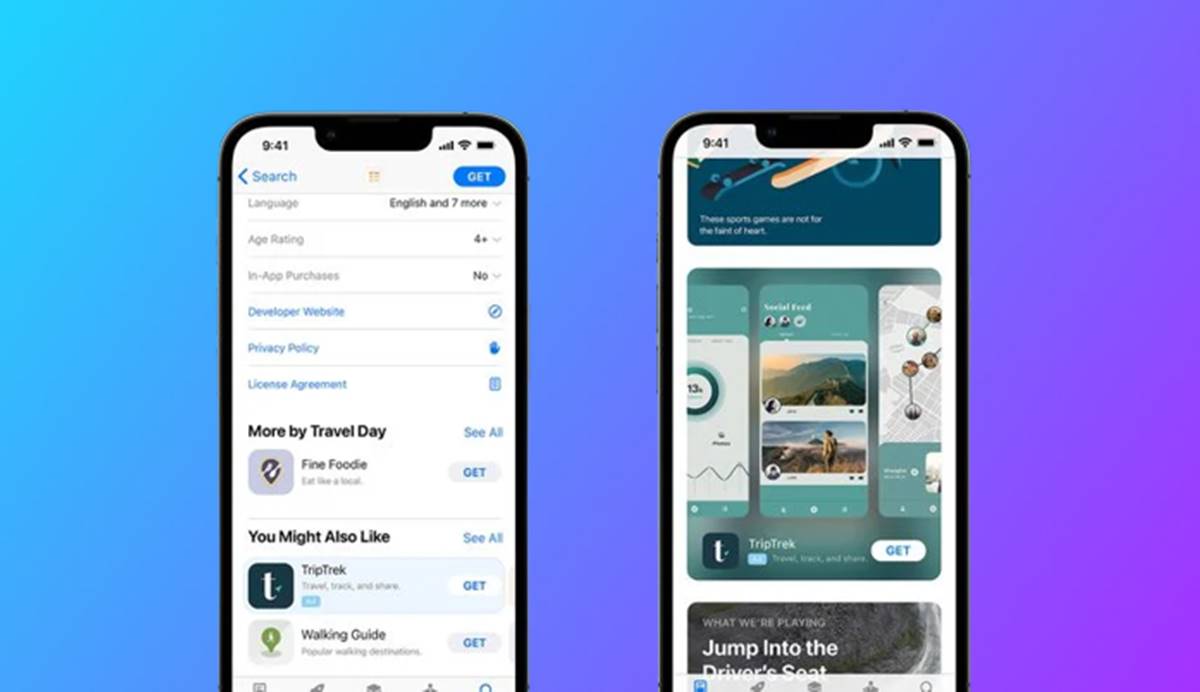
As you can see in the above screenshot, the ad will be placed in the “You Might Also Like” section and also on the home feed. Like other apps, it will show you an advertisement tag on the ads.
Earlier, the company was very restricted to showing you ads, but now it has opened a for many developers without ruining user’s experience, and there’s a strong reason for that.
Last week, Apple unveiled its third-quarter revenue report, which showed that the company is going well with its growth and is jumping 2 percent year over year, but for putting more effort, it announced ads in App Store.
You Might Be Able To Use Apple Pay In Chrome & Edge Browser
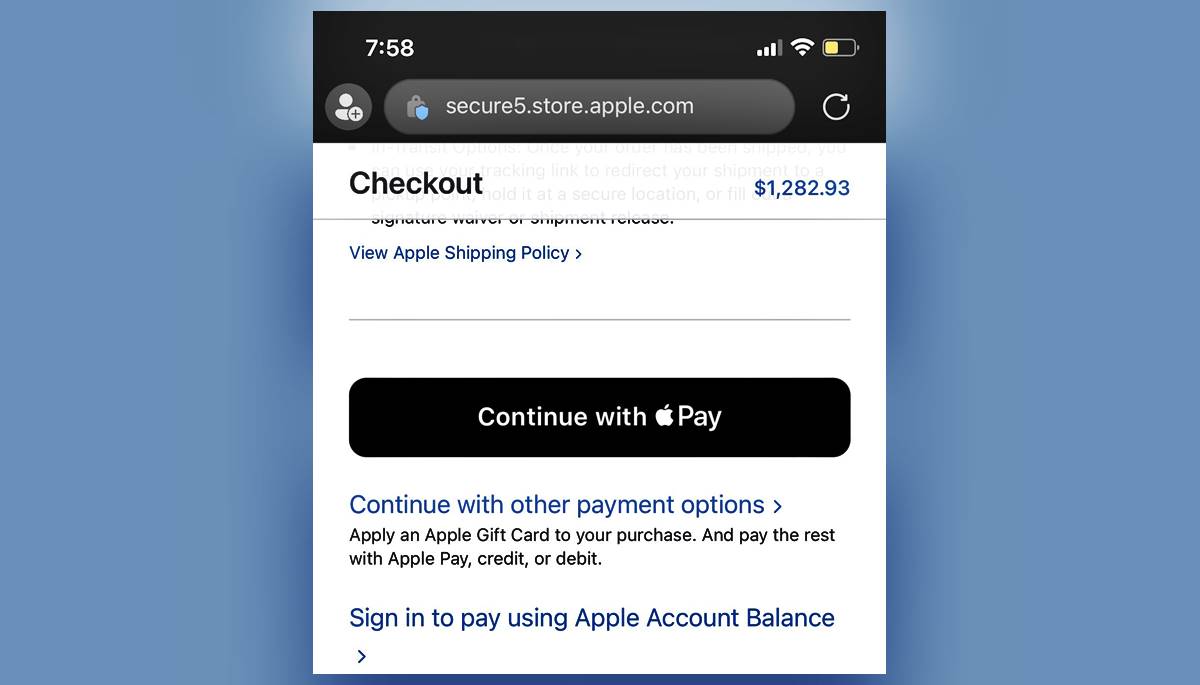 Apple could let Apple Pay work in other browsers with the launch of iOS 16. As you can see in the given screenshots, it is showing an option to “Continue with Apple Pay”.
As reliable developer Steve Moser reported in a tweet, Apple Pay would work in other browsers. He found this ability in iOS 16 beta 4. As last year, iOS 15 brings Apple Pay support in Safari.
Steve tested it in Google Chrome & Microsoft Edge and concluded that it would work in any third-party browser such as Mozilla Firefox and Brave.
On the latest iOS 16 beta Apple Pay works in Edge, Chrome and I assume any third party browser. On iOS 15 Apple Pay only works in Safari. pic.twitter.com/x7zV5xCuiC
— Steve Moser (@SteveMoser) July 30, 2022
Besides, Apple hasn’t confirmed this ability, so we have to wait for the iOS 16 launch, which will launch later this year.
The post Apple Starts Showing Ads in App Store & Apple Pay Expansion appeared first on TechViral.
from TechViral https://ift.tt/VMOwRaQ
How to Download & Install Windows 11 On PC/Laptop
Windows 11 has been out for a while now, but many users still don’t know how to download & install it. You might find this article useful if you plan to install Windows 11.
This article will discuss a few best ways to download & install Windows 11 on a computer. We have shared all possible ways to help you get Windows 11 on your PC/Laptop. Let’s check out how to download & install Windows 11.
Download Windows 11 ISO Files
Yes, there’s an option to download & install Windows 11 without the ISO files, but it will require enrolling your device in Windows Insider Program. Once enrolled, you will only receive the Beta, Dev, and Release Preview builds of Windows 11.
The builds released on Windows Insider Programs have bugs that can ruin your PC experience. Hence, it’s best to download a stable version of the Windows 11 ISO file and perform a fresh installation.
We have already shared a detailed guide on downloading Windows 11 ISO Files. We have listed all possible methods to get the latest version of Windows 11 ISO in that guide. So, go through that article and download the Windows 11 ISO files first.
How to Install Windows 11 on PC/Laptop
After downloading the Windows 11 ISO files, you must follow these steps to install Windows 11 on a PC/Laptop.
Important: It’s best to create a proper backup of all important files before installing Windows 11. Performing a fresh installation will remove all files and will wipe the disk partitions. So, you won’t have any chance for data recovery.
Creating Bootable USB Drive
First of all, you would need to create an installation media. Then, if you have a pen drive, you can flash Windows 11 into it. Follow the steps below to create a bootable USB drive for Windows 11.
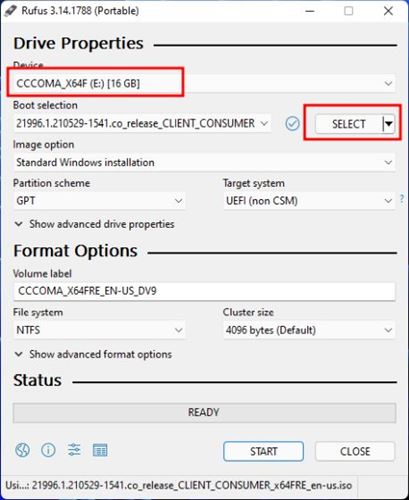
- First of all, download & install Rufus on your Windows 10 PC. Next, open the Rufus application.
- Click on the ‘Select‘ button and locate the Windows 11 ISO file you downloaded.
- Under the device, select your connected USB drive.
- Once done, click on the ‘Start button.
If you want to install Windows 11 on an incompatible device, follow our guide – How to Create a Bootable USB to Bypass Windows 11 Restrictions.
How to Bypass Minimum System Requirements for Windows 11
Windows 11 needs TPM 2.0 and Secure Boot for installation. If your PC doesn’t meet the minimum system requirements, you must follow our guide – Install Windows 11 on Unsupported PCs.
If your PC supports it, you can manually enable TPM 2.0 and Secure Boot on your device to install Windows 11.
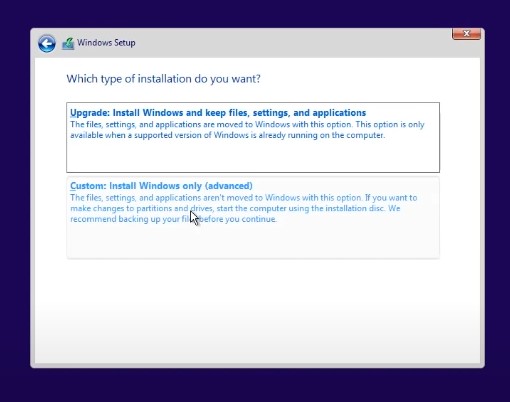
Installing Windows 11 on PC/Laptop
After creating a Bootable USB drive, you must follow some simple steps below to install Windows 11. The process will be quite lengthy, so follow the steps carefully.
1. First, restart your computer and press the Boot key continuously. The boot key is usually F8, F9, Esc, F12, F10, Delete, etc.
2. Select Boot from USB Drive or the USB Hard Drive option on the Boot screen.
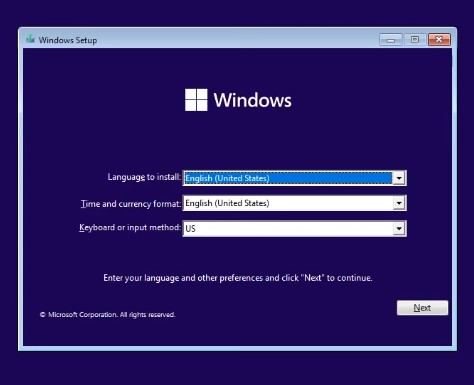
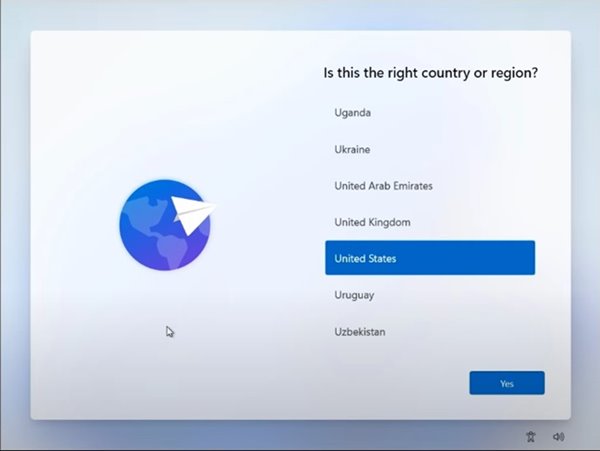
3. Now, the Windows 11 Installation wizard will start. First, you need to set the language, time, and keyboard. Once done, click on the Next button.
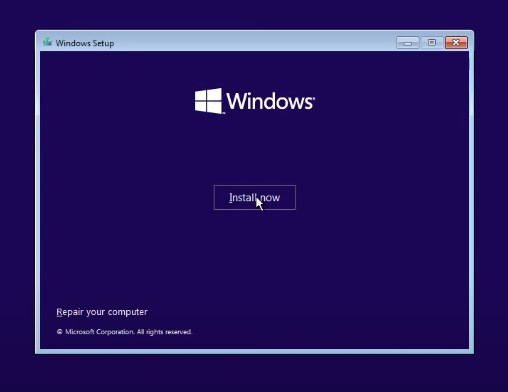
4. On the next page, click on the Install Now option.
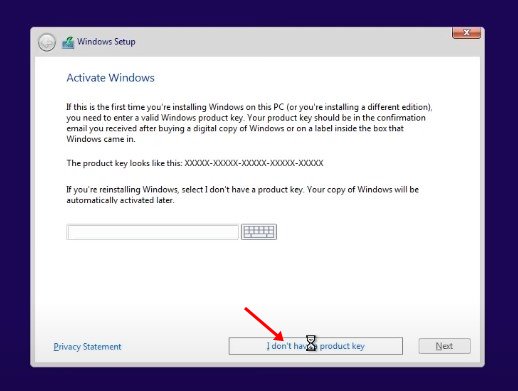
5. Next, click on the I don’t have a product key. Then, on the next page, select Windows 11 edition.
6. On the next screen, click on the Custom option.
7. On the next page, you will be asked to select the partition. Select the Partition where you want to install Windows 11 and click on the Next button.

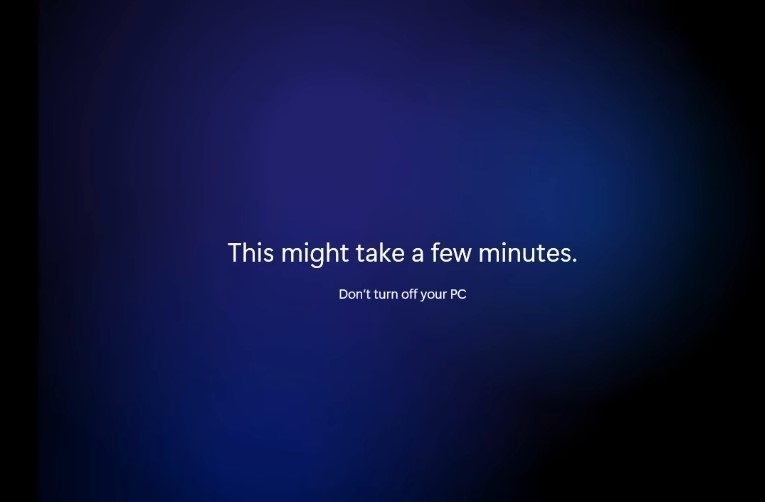
8. Now, wait until Windows 11 finishes the installation process.

9. Once completed, your PC will restart. After the restart, you will see Windows 11 setup screen. Follow the on-screen instructions to finish the setup process.
10. Once completed, Windows 11 will take a few minutes to make your selected changes.
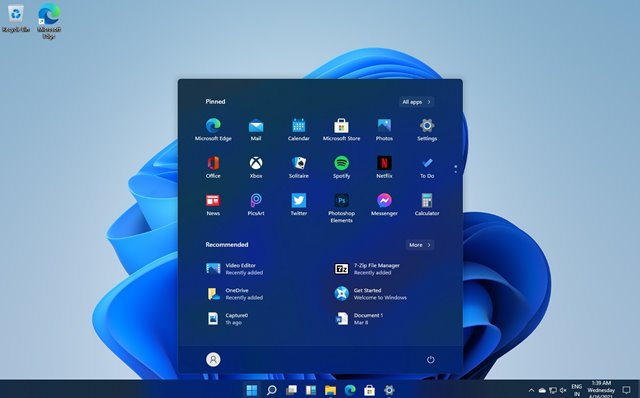
Once done, Windows 11 will be live on your PC. That’s it! You are done. This is how you can download & install Windows 11 right now.
Install Windows 11 Without ISO Files
If you don’t want to perform a clean installation, you need to join the Windows Insider Program and upgrade your existing Windows 10 to Windows 11.
This is a lengthy process, and it requires an active Microsoft Account. Previously, we have shared a step-by-step guide on installing Windows 11 Beta on PC. Check out the guide to enroll in the Windows Insider Program and receive the Windows 11 Upgrade.
After installing Windows 11, you will have 15 days to roll back to Windows 10. So, if you face problems with the beta builds of Windows 11, make sure to downgrade it before the time ends.
So, this article is all about how to download & install Windows 11 on a PC/Laptop. These are some of the easiest ways to install the latest Windows 11 on your PC. If you need more help, let us know in the comments below.
The post How to Download & Install Windows 11 On PC/Laptop appeared first on TechViral.
from TechViral https://ift.tt/9mTPtkW
10 Best Free Malware Removal Tools for Windows 10/11
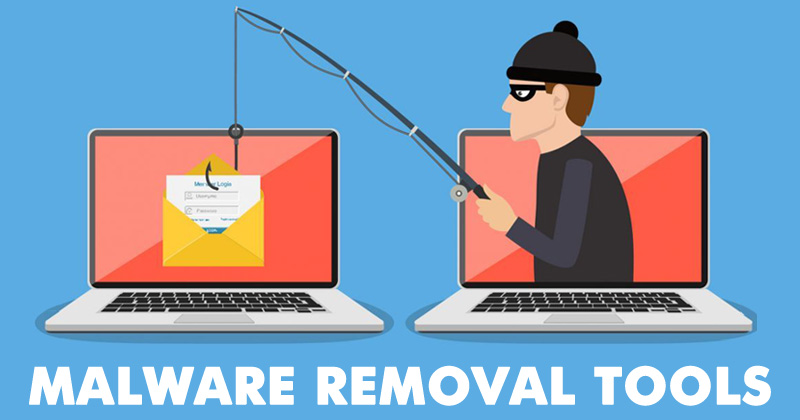
It doesn’t matter how secure your operating system is; a vulnerability in your browser or extension can serve as a gateway for malware to enter your system. These days, having a reliable antivirus solution is important because our computer is vulnerable to different attacks.
We have already shared many articles on security like best antivirus tools, best VPN for Windows PC, etc. Today, we will discuss the best free malware removal tool for Windows computers.
Also Read: Best Malwarebytes Alternatives For Windows
List of 10 Best Free Malware Removal Tools for Windows 10/11
This article will discuss the security tools that can find and remove hidden malware. So, let’s check out the best malware removal tools for Windows computers.
1. Bitdefender
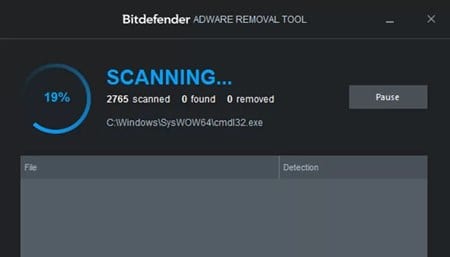
It is the best malware removal tool that gives you additional security to shield your computer from any threats. Essentially, this software is fit for filtering every single document that might be harmful to your PC.
The premium version of BitDefender protects your Windows 10/11 PC from threats and offers you tools to tune up the speed.
2. Adware Antivirus Free Edition
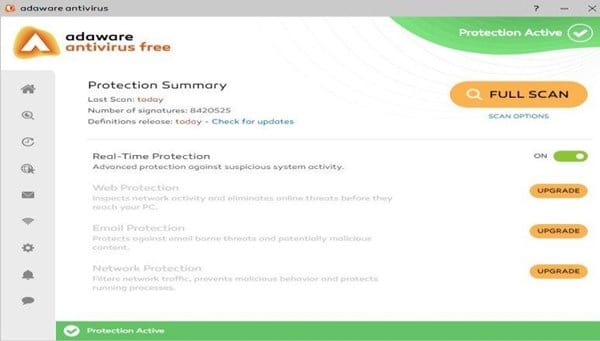
This one is slightly different compared from all others listed in the article. It follows the IP-based filtering system to block spam traffic. That means it scans the root file of the downloads and tells you beforehand whether the file has malware or not.
Even though Adware can find & remove malware, it’s always known for its robust adware detecting features. It can easily detect Adware bundled with the software, remove hidden Adware from web browsers, remove browser toolbars, and more.
3. Malwarebytes Anti-Malware Tool
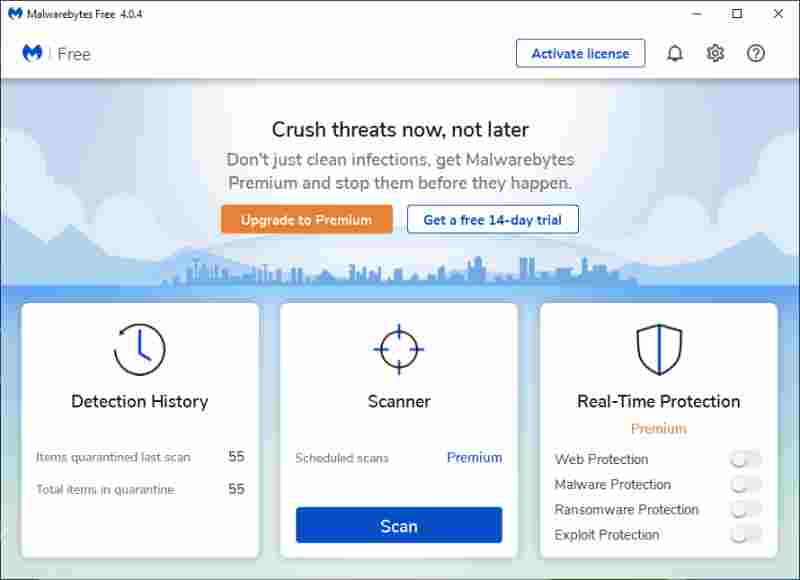
For those who don’t know, Malwarebytes is the leading Anti-malware tool available for computers/laptops.
Millions of users use the malware removal tool to safeguard their computers against potential threats like malware, virus, spyware, Adware, etc.
4. AVG Antivirus Free
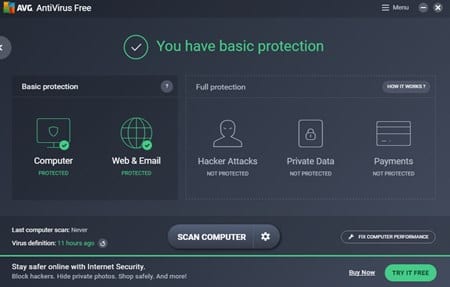
Well, it’s one of the best and top-rated antivirus solutions that can protect your computer against viruses, ransomware, and malware.
AVG Antivirus also has internet security features that effectively scan and warns you of phishing and malicious websites.
AVG also has a free version of its antivirus program that provides good enough security protection for your Windows 10/11 PC.
5. Emsisoft Emergency Kit
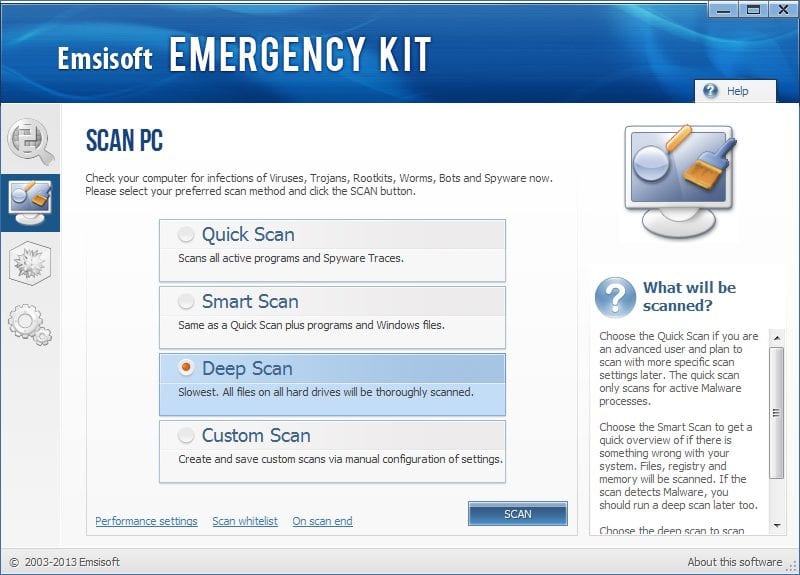
Well, it’s a portable malware removable tool you can store and run from a USB Stick. The best thing about Emsisoft Emergency Kit is that it is frequently updated and can remove hidden malware.
The tool first checks for an update and then scans the entire PC for threats. If the tool finds any malware, then it automatically quarantines it.
6. HitmanPro
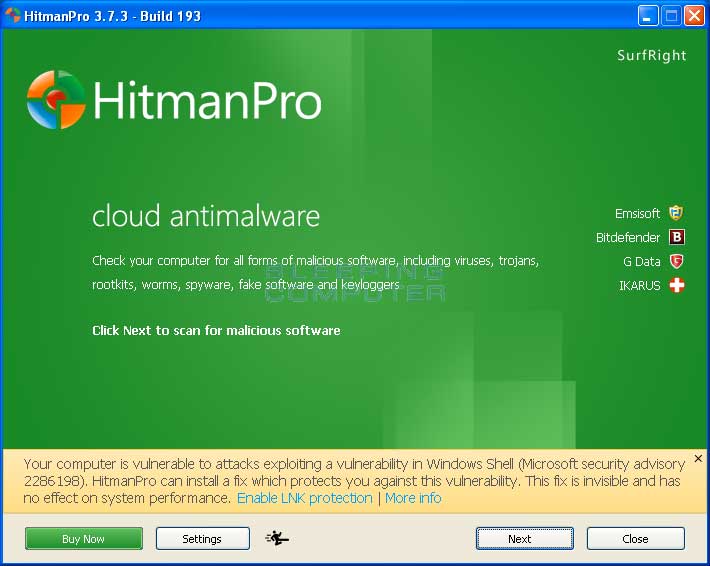
It is another effective security tool everyone would love to use on their Windows computer. The best thing about HitmanPro is that it can prevent malware attacks from happening.
Apart from that, it’s capable enough to detect and remove rootkits, trojans, malware, virus, and spyware.
7. Comodo Free Internet Security

Comodo is one of the leading security providers you can rely on. It is a free all-in-one PC protection program that promises to protect your computer against all online threats.
The free version of Comodo internet security can find and remove malware, virus, worms, trojans, etc. Comodo Free Internet Security requires less than 250 MB to install on your computer.
8. AdwCleaner
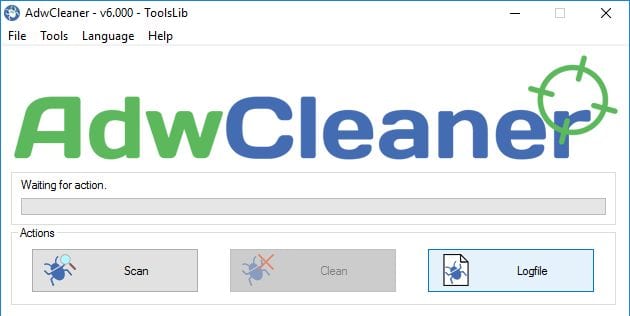
It is a portable adware removal tool that can be very handy if you want to remove malicious programs that affect web browsers. Usually, AdwCleaner is mainly used for removing Adware and PUPs, but it can also remove malware.
However, one thing you should note is that if you’re using Malwarebytes, you don’t need to use AdwCleaner. This is because the latest version of Malwarebytes ships with AdwCleaner built-in.
9. IObit Malware Fighter Free
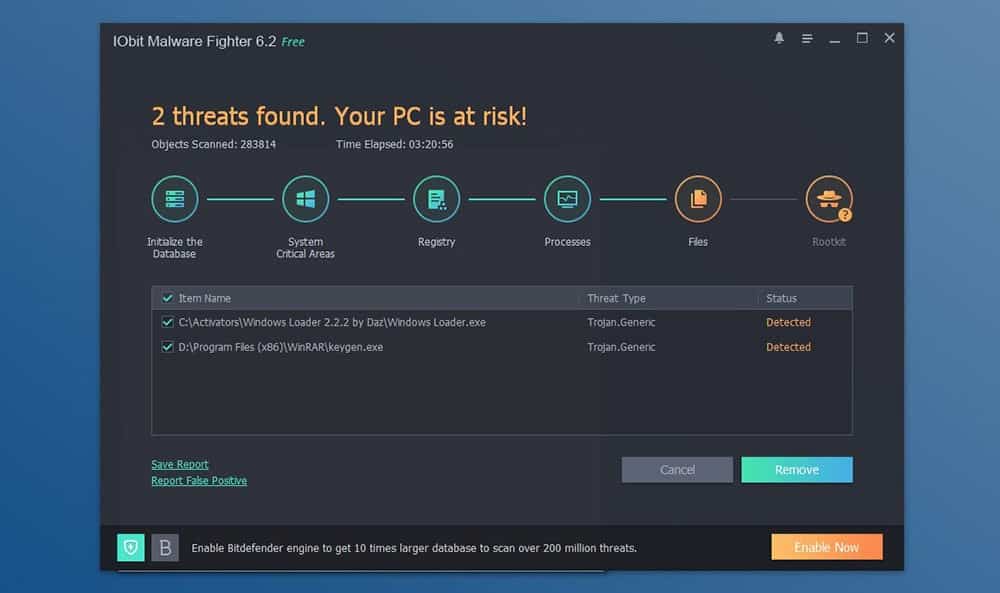
Guess what? IObit Malware Fighter Free is a multipurpose Windows security tool that can lead to better performance and enhanced security. The software brings features like Driver updater, smart defrag, password manager, virus & malware scanner, PC optimizer, etc.
IOBit Malware Fighter is a less popular option, but it’s an all-in solution for security, privacy, and performance. It’s one such tool that you’d never regret having.
10. Spybot Search & Destroy
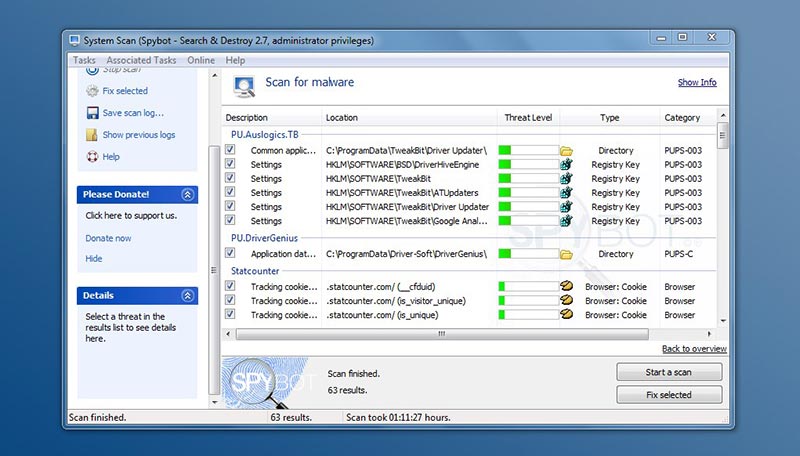
This security suite is meant to find and kill spyware, but the tool is capable enough to find hidden malware. Guess what? the tool not only removes malware but also safeguards your computer from any future virus or malware attacks. However, the free version of Spybot Search & Destroy is limited to only a few features.
All the tools we listed were compatible with the latest Windows 11. So, these are some of the best malware removal tools you can use on your Windows 10/11 computer. If you want to suggest other malware removal tools, let us know in the comments.
The post 10 Best Free Malware Removal Tools for Windows 10/11 appeared first on TechViral.
from TechViral https://ift.tt/l3IuJ8o
How to Install the New Windows 11 Photos App Right Now!
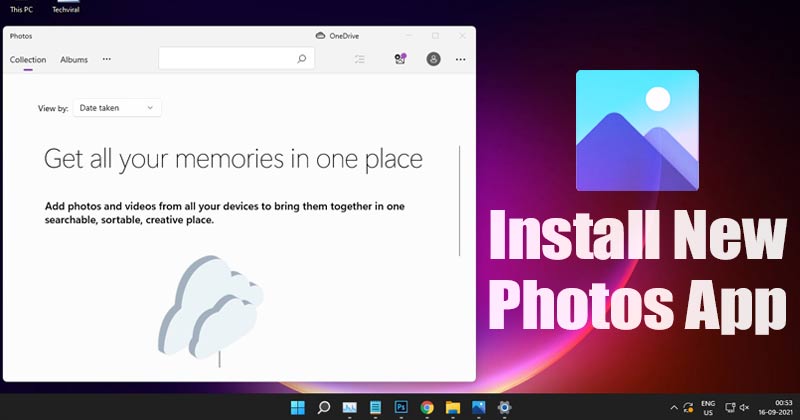
If you have been reading tech news regularly, you might know that Microsoft teased its new Windows 11 Photos app a few weeks ago. The new Windows 11 Photos app has a new UI and improved functionality.
Although Microsoft had already started to roll out the new Photos app to the Windows 11 Insiders, if you have just installed the latest Windows 11, you might not see the new UI of the Photos app.
Although the new Photos app will be rolled out to every Windows 11 insider in the upcoming weeks, if you can’t wait that long, you can download and install the new Photos app right now.
Also read: How to Change Windows 11 Lock Screen Wallpaper
2 Methods to Install the New Windows 11 Photos App
This article will share the two best methods to get the new Windows 11 Photos app on your PC. The methods are going to be very easy. Just follow some of the simple steps given below.
1) Update the Photos App from the Microsoft Store
This method will update the Photos app directly from the Microsoft Store. However, please note that the update is not available for everyone. So, if you can’t edit the Photos app, you need to implement the second method.
1. First, open the Microsoft Store on your Windows 11 PC. You need to click on the three dots and select Downloads & Updates.

2. Next, click on the Get updates button, as shown in the screenshot below.
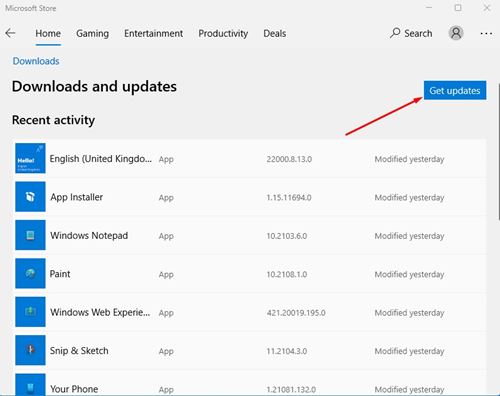
3. Now, select the Microsoft Photos app and install the update.
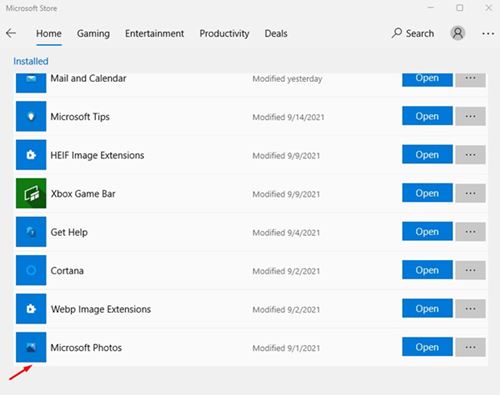
That’s it! You are done. After the update, you will see the new & cleaner UI of Microsoft Photos.
2) Download & Install Windows 11 Photos App
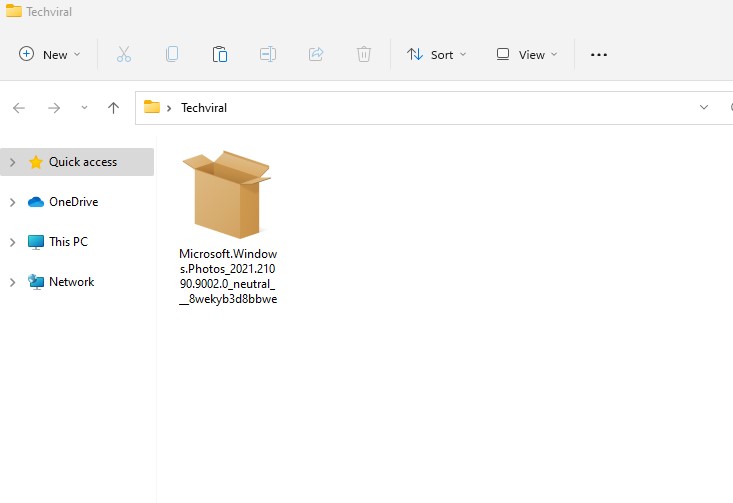
Well, developer Gustave Monce has extracted the link to the app package from the Microsoft Store.
However, the extracted link no longer works, but the good thing is that the developers at Deskmodder have mirrored the file. So, you can download the app from the Mirrored link.
1. First, download the Microsoft Photos app package from HiDrive.
2. Now, double-click on the installation file and the Install button. If you already have Microsoft Photos installed, click on the Update button.
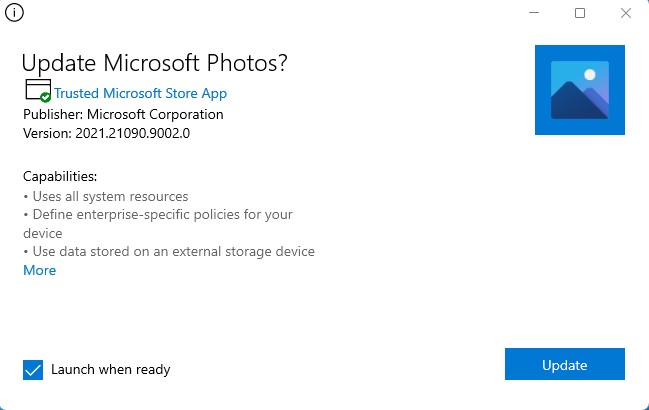
3. Once the installation is complete, click the Launch button to open the redesigned Photos app.
That’s it! You are done. This is how you can get the new Windows 11 Photos app on your PC.
Features of Windows 11 Photos App
Well, the first and the main feature you notice is the rounded corners. The new Photos app has rounded corners that look good.
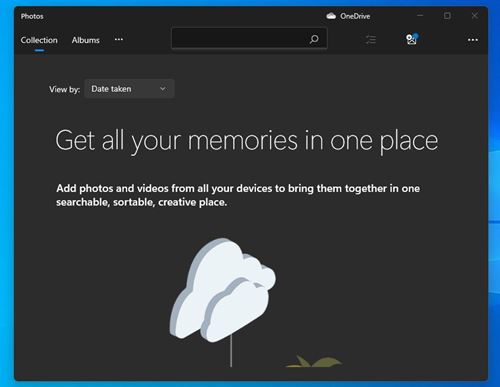
You would also notice dedicated menus for Categories, Collections, Albums, People, Folders, and Video Editor.
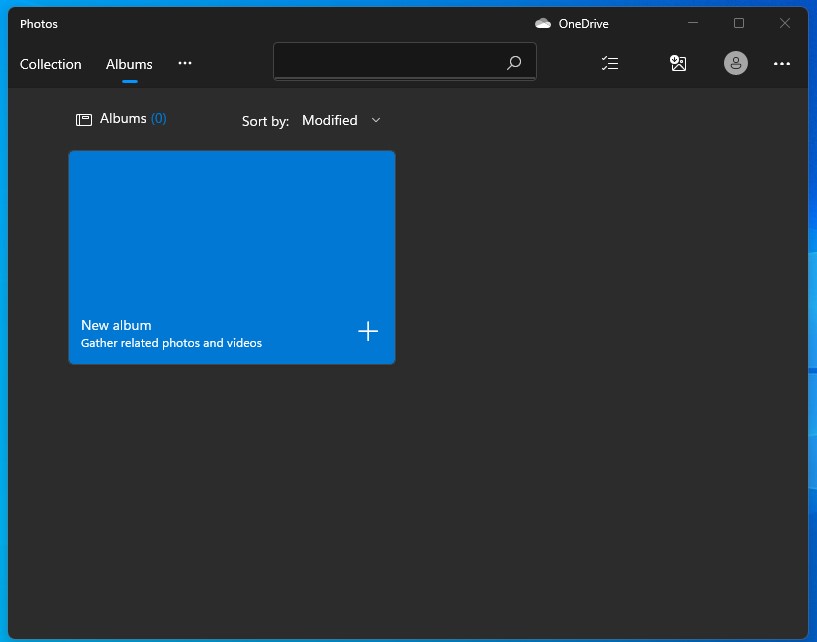
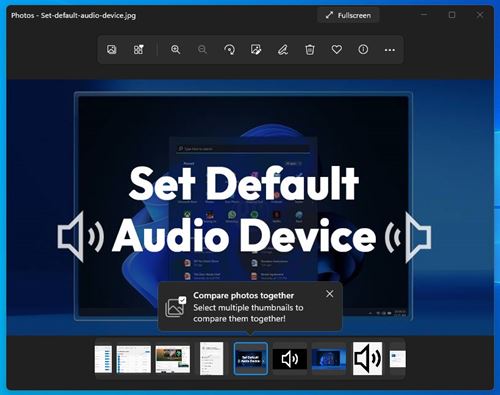
If you open any image with Microsoft Photos, you will see a new floating toolbar. The floating toolbar will provide you with quick controls.
So, this guide is all about how to get the new Windows 11 Photos app on your PC. I hope this article helped you! Please share it with your friends also. If you have any doubts about this, let us know in the comment box below.
The post How to Install the New Windows 11 Photos App Right Now! appeared first on TechViral.
from TechViral https://ift.tt/SmqZ4Oo
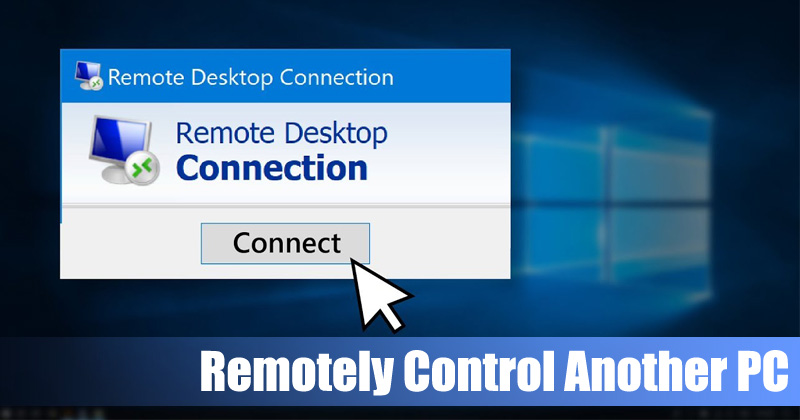
How To Remotely Control Another PC Without Any Tool In Windows 10
Remote computer access is a method in the computer world to control another computer remotely over the internet. Technicians and business owners mostly use remote Computer Access to guide their clients and employees.
With Remote access, one can easily control everything on another computer, like managing files, troubleshooting things, etc. There are plenty of remote access tools like Ammy, Teamviewer, etc. However, what if I tell you that you can remotely control another computer without any device?
Yes, it’s possible. You don’t need third-party software to control another computer remotely. Below, we have listed the two best methods to control another computer without any tool in Windows 10 remotely.
Also Read: Best Free Windows 11 Themes, Skins & Icon Packs for Windows 10
Remotely Control Another Computer Without Any Tool In Windows 10
The method is quite simple, and you will be just using the inbuilt feature of Windows 10 that will help you remotely access other Windows devices. So follow up some simple steps below to proceed.
Remotely Access Another Windows Computer
1. First, in your Windows 10, go to your system settings by clicking the Windows button on your keyboard and then entering System.
2. In a system setting, you must select the Remote Settings on the left of the screen.
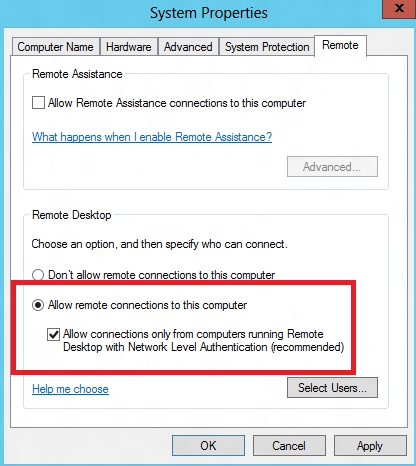
3. Now, enable the Allow remote connections to this computer option.
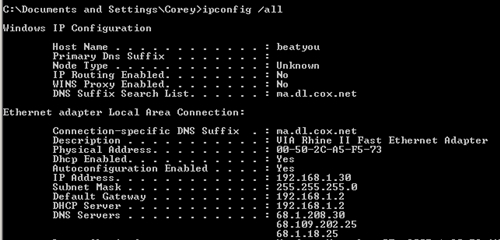
4. You need to get your IP address and username to access the computer. For the IP address, you need to enter the command ipconfig command prompt and the username you can see in system settings.
5. Now, from the other machine with Windows 10, where you want to access the computer, press the Windows button, type RDP, and then click on the Remote Desktop Connection option.
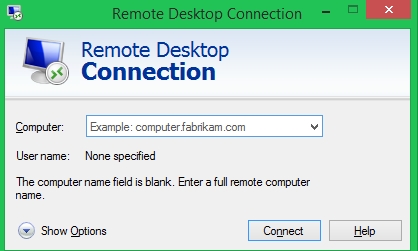
6. The dialog box appears to type the computer box’s target computer IP address and the Computer Username in the second box.
7. A popup will appear where you need to enter the Password of that computer and then click on ok.
That’s it; you are done! Now you will be accessing that machine from your computer.
2) Using Quick Assist
Quick Assist is a part of the Windows 10 operating system now, and it can be used remotely to troubleshoot a friend’s Windows PC without installing any extra software. Let’s check out how to use Quick Assist to remove access to another computer.
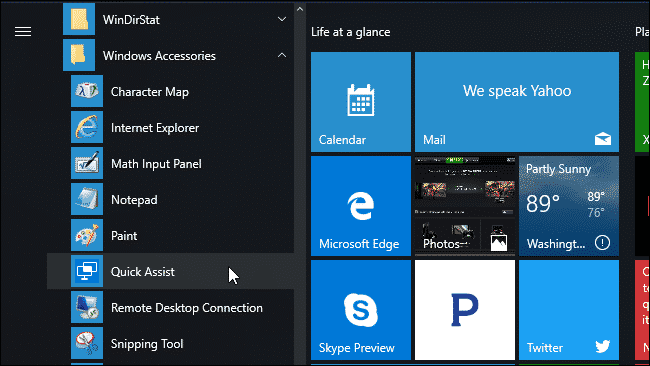
1. First of all, head to the Start Menu > Windows Accessories > Quick Assist.
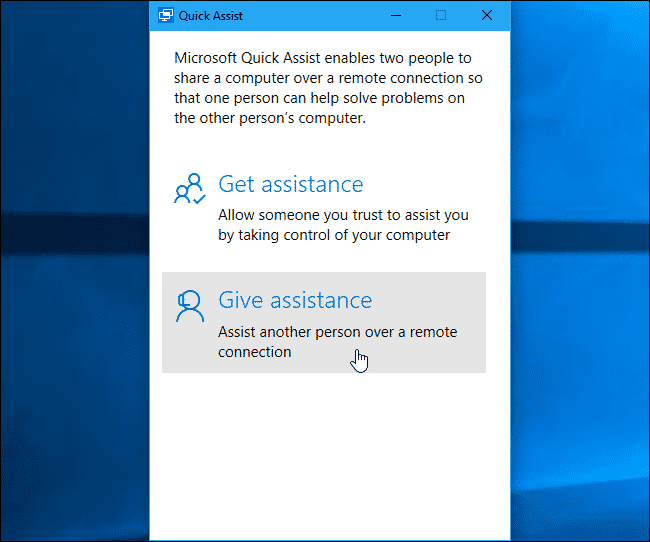
2. To remote into another computer, click the Give Assistance option.
3. You will be asked to sign in with the Microsoft account and receive a security code.
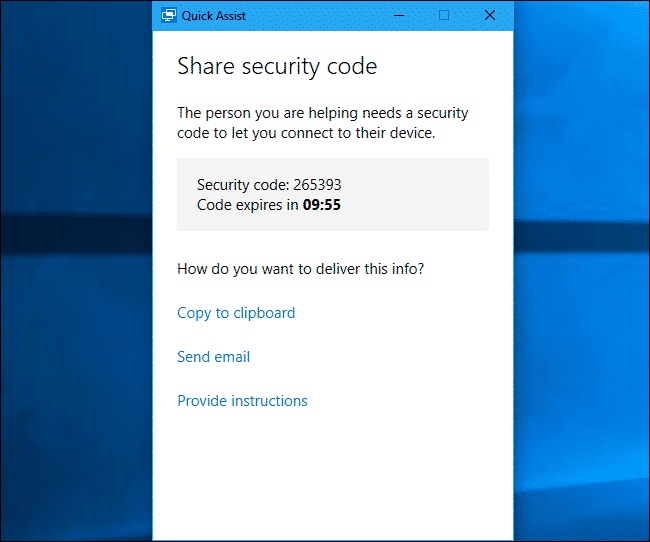
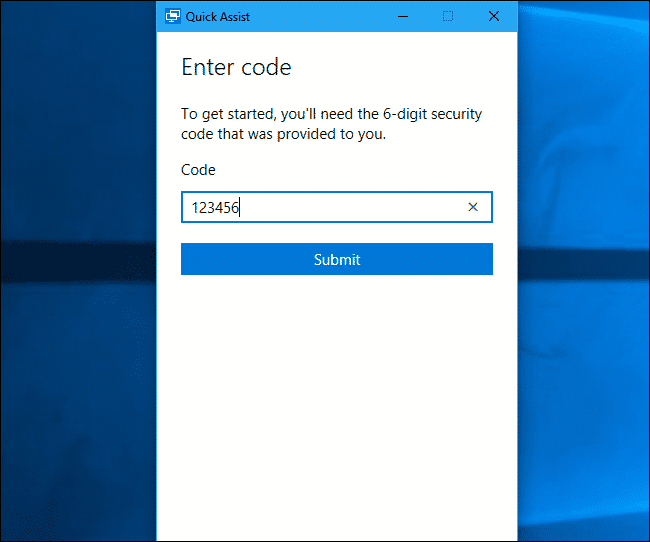
4. The other person needs to open the Quick Assist tool and click on the Get Assistance button.
5. You must enter the security code on the other computer you received in Step 3.
That’s it; you are done! This is how you can remotely control another PC without any tool in Windows 10.
Also Read: How To Record Screen In Windows 10
So above is all about Remotely Control Another Computer Without Any Tool In Windows 10. I hope this article helped you share it with others as well! By connecting remotely, you can easily control another computer.
The post How To Remotely Control Another PC Without Any Tool In Windows 10 appeared first on TechViral.
from TechViral https://ift.tt/qv9N2yf
GTA 6: New Leaks About Characters & Expected Release Date

GTA 6’s latest leaks and rumors are breaking the internet, and these leaks are significant & detailed. Besides, these leaks are tipped by some well-known tipsters, so it is worth discussing.
We all are waiting for the announcement or the official reveal of the next installment of the Grand Theft Auto game series, which admirable RockStar Games are developing.
GTA 6 Storyline & New Female Character Rumors

GTA 6 has been in development for around eight years because, after the successful launch of GTA 5 in 2013, the company hinted about the extensive installment, but it confirmed its existence at the beginning of this year.
Also, its codename is suggested to be “Project Americas” by earlier reports.
New Female Characters
The latest heat-up leak from Bloomberg’s Jason Schreier claims that GTA 6 will have a unique female protagonist, Latina, as a part of the story’s leading character.
As we all know, Rockstar now wants to fill the gap in gender because GTA 5 or GTA San Andreas doesn’t have a leading female character. There is no clue what she will look like, but we can expect a modern gangsta look.
Storyline
Jason also suggested a great detail about the storyline. According to his sources, the game’s story will be influenced by the 19th century’s famous bank robbers Bonnie and Clyde.
Besides, Stephen Totilo from Axios has also reported that earlier, the game was planned to have three cities and four playable characters, but ahead, the plan faced a cut-down.
And it was changed to one city and two playable main characters, which Jason also suggested in his report. Also, rumors claim GTA 6’s story will be in Miami city, raising the question, “does GTA 6 will be set in Vice City?”
Release Date
And about the game launch, there is no confirmation, but many reports suggested March 2024 as the deadline for the launch, so we have to wait for around 20 months. We’ll let you know if any new information arrives, so stay tuned.
The post GTA 6: New Leaks About Characters & Expected Release Date appeared first on TechViral.
from TechViral https://ift.tt/QVjbcEy
How to Change Account Lockout Duration in Windows 11
Windows 11 users may know that the operating system automatically locks the account if someone tries to log in with the wrong password. This is done to prevent unauthorized access to the device and reduce potential brute force attacks.
When Account Lockout policies were set on Windows 11, the operating system prevents others from entering the password after several wrong login attempts and blocks the user account for 10 minutes.
After 10 minutes of lockout, the counter was automatically reset, giving users another 10 chances to enter the password or PIN. You can modify that 10 minutes of duration in easy steps.
Also Read: How to Password Protect Folders in Windows 11
Best Methods to Change Account Lockout Duration in Windows 11
While it’s not recommended to change the Account Lockout duration in Windows 11, you may still want to increase or decrease the duration for specific reasons. Hence, below, we have shared a step-by-step guide on changing account lockout duration in Windows 11. Let’s check out.
1) Change Account Lockout Duration via Local Group Policy
This method will show you how to change account lockout duration via Local Group Policy Editor. Follow some of the simple steps we have shared below.
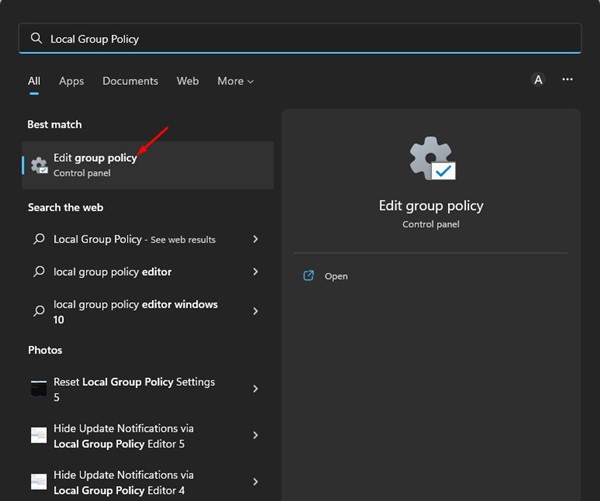
1. First, click on the Windows 11 search and type in Local Group Policy. Next, open the Group Policy Editor from the list of matching results.
2. On the Local Group Policy Editor, navigate to the following path:
Computer Configuration > Windows Settings > Security Settings > Account Policies > Account Lockout Policy
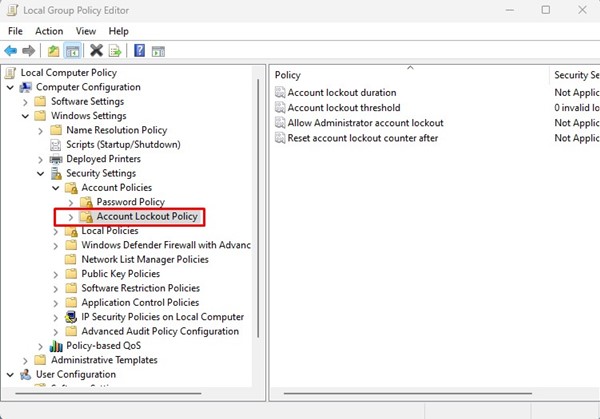
3. You will find a few policies in the Account Lockout Policy folder. You need to double-click the Account lockout duration policy on the right.
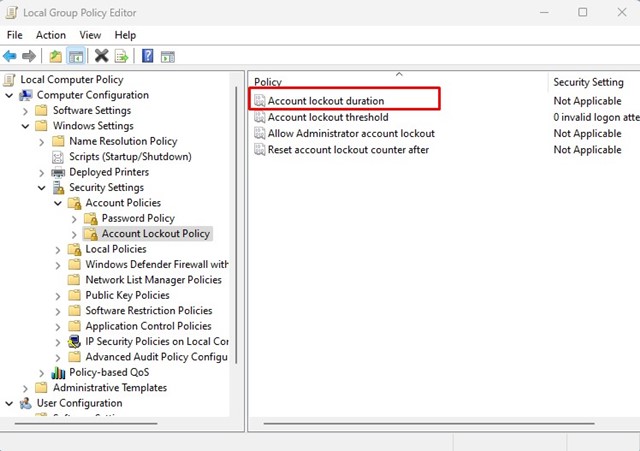
4. On the Account lockout duration properties, switch to the Local Security Setting tab.

5. Now, set the time (in minutes) for the account lockout. Once done, click on the Apply button and then on Ok.
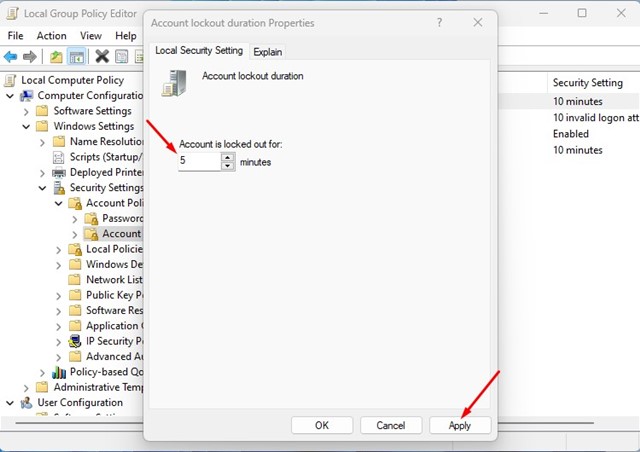
That’s it! This is how you can change the account lockout duration in your Windows 11 computer.
2) Change the Account Lockout Duration via Command Prompt
You can even use the Command Prompt utility to change the account lockout duration. For that, follow some of the simple steps we have shared below.
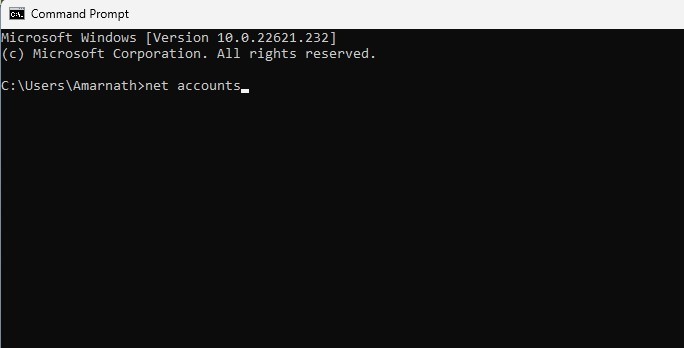
1. Click on the Windows 11 search and type in Command Prompt. Next, open the Command Prompt utility from the list of matching results.
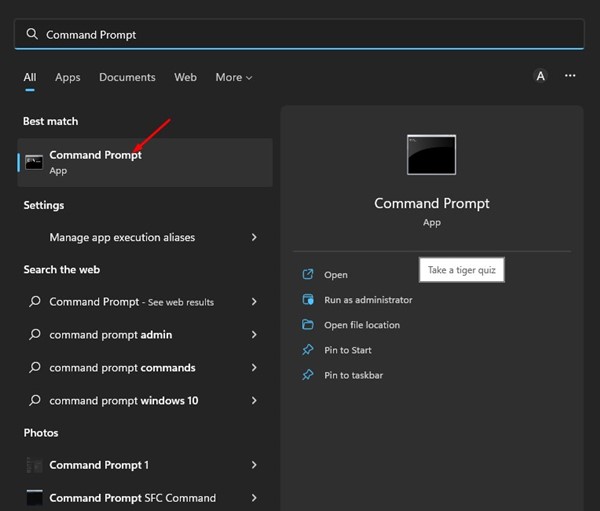
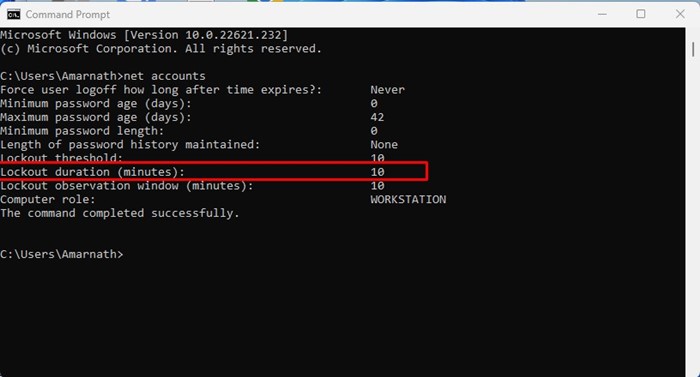
2. On the Command Prompt, type in net accounts and hit the Enter button.
3. This will reveal the Account Lockout policy. You need to check the Lockout duration (minutes): to check the current account lockout time.
4. Now, if you want to increase or decrease the Account Lockout duration, enter the following command:
net accounts /lockoutduration:<number>
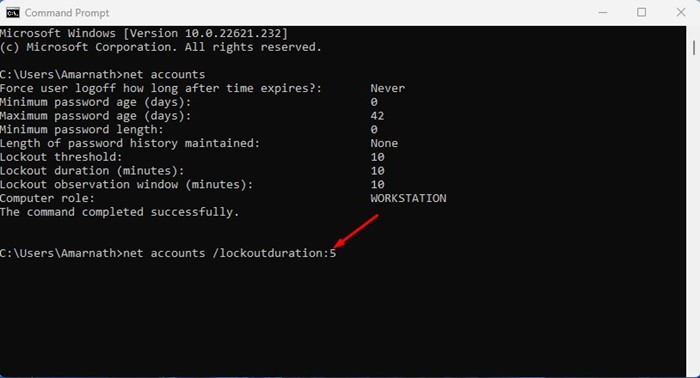
Important: Make sure to replace<number> with the time you want to set. You can set the time between 0 and 99999 minutes. Setting it to 0 will disable the account lockout.
That’s it! You can change the account lockout duration in Windows 11 via the Command Prompt.
Also Read: How to Format a Hard Drive or SSD in Windows 11
So, that’s all about changing the account lockout duration in Windows 11. You can follow these two methods to modify the time limit for account lock. If you need more help with the Account lockout duration policy, let us know in the comments below.
The post How to Change Account Lockout Duration in Windows 11 appeared first on TechViral.
from TechViral https://ift.tt/l4jPzAp
Subscribe to:
Posts (Atom)