All of a sudden, WoW players are in revolt, and its competitors are having a boom.
from BBC News - Technology https://ift.tt/2WvFhuP
Saturday, July 31, 2021
How to Directly Save Photos From Gmail to Google Photos
Well, it’s no doubt that Gmail is right now the most used email service. Compared to other email services, Gmail offers you more features and email controls. For example, on Gmail, you can exchange files, send photos, etc.
Let’s admit; we often receive important images on our Gmail. The image could be anything like a receipt, movie ticket, bank account statement, etc., and sometimes we want to save those image files.
Although you can save essential images from Gmail to your desktop, what if we tell you that you can directly save Photos from Gmail to Google Photos? It’s possible, but for that, you would need to use the Gmail web version.
Also read: How to Create Multiple Inboxes in Gmail
Steps to Save Photos From Gmail to Google Photos
The Save to Photos feature is only available in the Gmail for web, and it’s pretty easy to use. With this feature, you can save any image file saved on your Gmail account to Google Photos.
So, in this article, we will share a step-by-step guide on how to save Photos from Gmail to Google Photos. The process is going to be very easy; just follow some of the simple steps given below.
Step 1. First of all, open your favorite web browser and open Gmail.com.
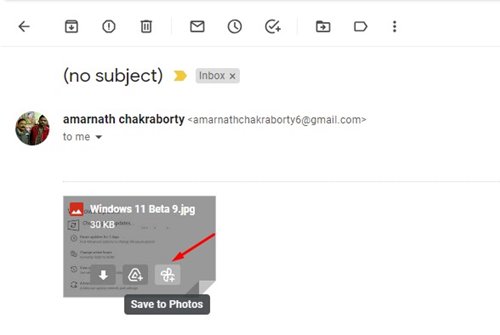
Step 2. On your Gmail account, open the image that you want to save to Google Photos.
Step 3. On the bottom right corner, you would see the ‘Save to Photos’ icon. Click on that icon to save the image to Google Photos.
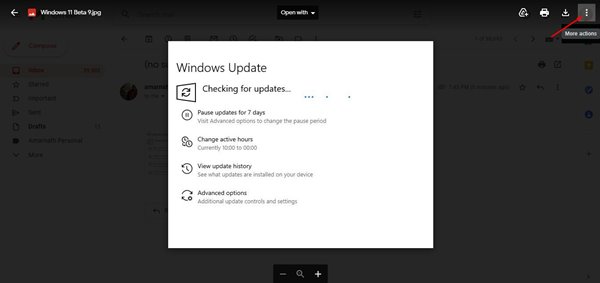
Step 4. Alternatively, you can click on the image to see a preview of it. Next, click on the three dots as shown in the screenshot below.
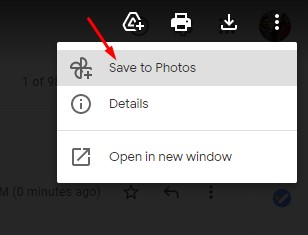
Step 5. From the list of actions, click on the ‘Save to Photos’ option.
Step 6. You will now see a confirmation message pop-up. Just click on the ‘Save‘ button to save the image to Google Photos.

That’s it! You are done. This is how you can save images from Gmail to Google Photos directly.
So, this guide is all about saving photos from Gmail to Google Photos in easy steps. I hope this article helped you! Please share it with your friends also. If you have any doubts related to this, let us know in the comment box below.
The post How to Directly Save Photos From Gmail to Google Photos appeared first on TechViral.
from TechViral https://ift.tt/3C1nfB3
10 Best Money Making Apps For Android in 2021

Let’s admit; there are times when we think about earning a few extra bucks. The few extra bucks that you earn now could be helpful in critical situations. Let’s take an example of the recent COVID- Pandemic; the threat has forced users to stay and work from home. However, not everyone knows how to utilize technology to earn a few extra bucks per month.
It’s all because of the lack of resources. Look, there’s no sure-shot way to earn money, but you can always have a try with the apps listed in the article. In this article, we will share a few best Android apps that would help you make some decent money. You can use these apps on your Android smartphone to generate decent secondary income.
List of 10 Best Money Making Apps For Android
It’s worth noting that the apps listed in the article require hard work, and they won’t bring money overnight. Therefore, you need to understand how these apps work to earn a decent income. For proper understanding, we recommend you watch YouTube videos or visiting the company’s webpage.
1. Zareklamy
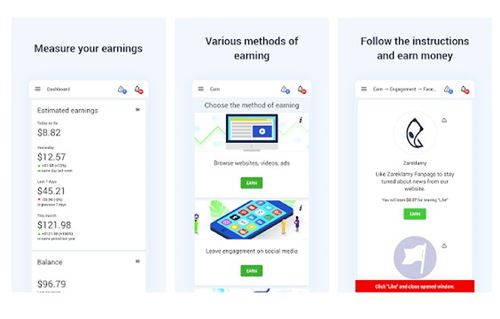
Well, Zareklamy is a highly underrated money-making app on the list. The app provides full-time or part-time jobs for all people from every country.
There are various ways to earn money via the app. You can play games, complete surveys, type texts, answer questions, watch ads, browse websites, create accounts, complete offers, and more.
2. Etsy

If you are an artist looking for a platform to sell your arts and crafts, you need to give Etsy a try. Etsy is pretty much similar to eBay, but it focuses more on arts and crafts.
On Etsy, you need to create your shop to sell whatever you want. The mobile app for Android lets you manage your shop, your orders, and your listings.
3. Ibotta
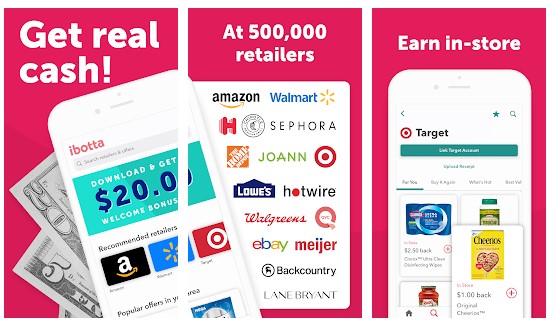
Well, if you love to shop online, then you need to give Ibotta a try. It’s a free app that gives you real cash back on every purchase, online or in-store.
The good thing is that it gives you cash back every time you shop for essential items, groceries, and more. It’s a cash-saving app, so don’t expect decent money with it.
4. Google Opinion Rewards
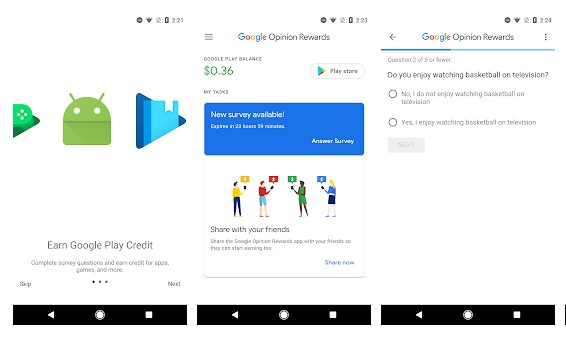
This is an app created by the Google Surveys team. At first use, you need to answer basic questions about yourself. Once done, the app will periodically send you surveys.
The good thing is that in answering each survey, you earn credit. So, this is a decent money-making app where you don’t need to do any hard work.
5. Surveys On The Go
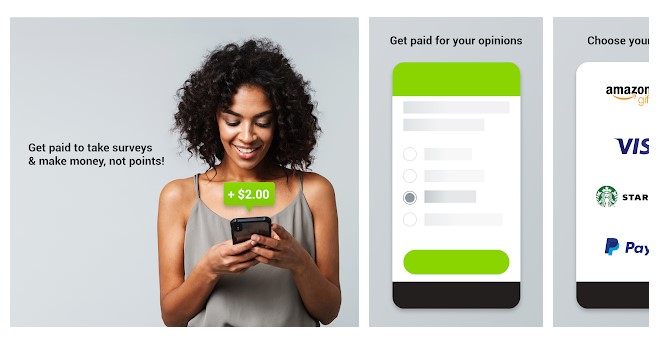
This app is pretty much similar to the Google Opinion rewards that had been listed above. In addition, surveys On The Go lets you complete surveys for money. However, unlike Google Opinion rewards, this one pays out in cash.
On the downside, there are limited surveys available per month. So, don’t expect massive money from this app.
6. Kormo Jobs
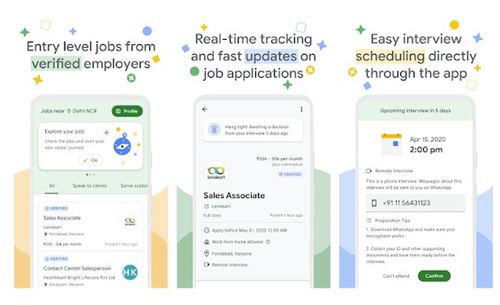
Kormo Jobs alone won’t make you money, but it’s an app that would help you find entry-level jobs. So, if you are sitting idle at home and looking for a job opportunity, then you need to give Kormo Jobs a try.
Google itself backs Kormo Jobs, and it could help you find new jobs from verified employers. Overall, Kormo Jobs is an excellent app for finding a new job.
7. Amazon Seller
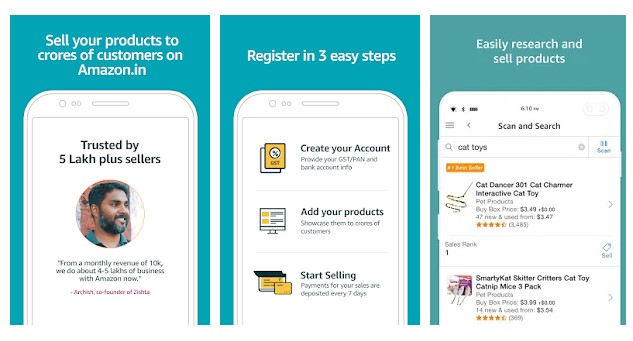
It’s right now the leading e-comm retail website in the world. You can sell your own product on Amazon Seller by creating a seller account. What’s more important is that Amazon Seller is a free platform.
You can sell pretty much everything on Amazon, like grocery items, books, refurbished smartphones, etc.
8. YouTube
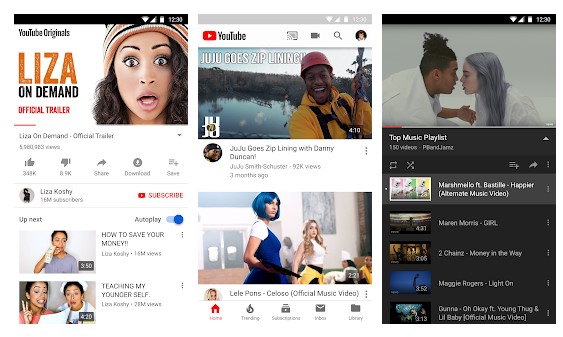
Well, YouTube is right now the most popular video platform out there. If you are good at something, then you can showcase your skills on YouTube. However, don’t expect millions of subscribers overnight, but the right content, consistency, and hard work can score you enough.
If we talk about the money earning options, you can make money on YouTube via Advertising, Channel Membership, Merchandise shelf, Super Chat, etc.
9. LinkedIn
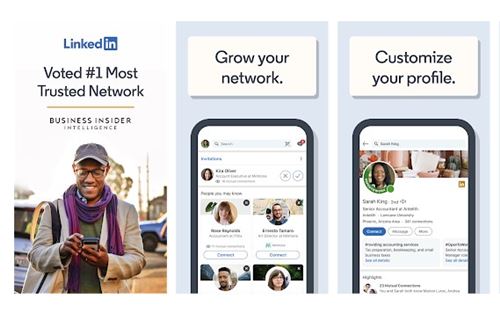
Well, LinkedIn is probably the most trusted network for businesses. With this app, you can build connections with industry leaders in your community.
You need to sign up with LinkedIn and complete your profile. Then, you need to list your experience, education skills, hobbies, etc., to grab a new job.
10. Foap
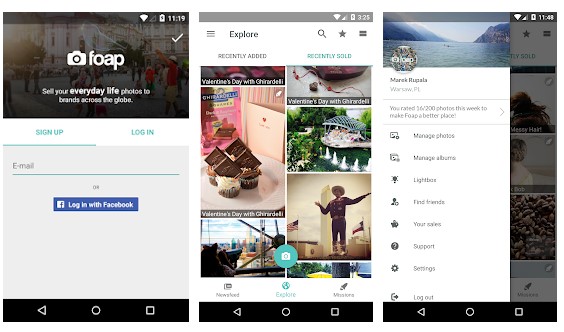
Well, if you are an excellent mobile photographer and searching for ways to earn money by selling your photos, then Foap might be the best pick for you. On this app, you need to upload your photos and sell them to well-known brands all over the world.
What’s more valuable is that Foap distributes your content through partners like Getty images to help you grab more buyers.
So, these are the ten best money-making apps for Android. I hope this article helped you! Please share it with your friends also. If you know of any other such apps, let us know in the comment box below.
The post 10 Best Money Making Apps For Android in 2021 appeared first on TechViral.
from TechViral https://ift.tt/3zVNzdX
10 Most Popular Search Engines In The World

Search engines help to find the right content that is available on the internet. Just put in some keywords on the search box, and the search results would show you the exact information you want.
Several search engines available on the internet can display proper results of what you are looking for. Yet, there are only a few search engines that rank on the top list. So, to let people know about the top search engines on the internet, we have created this post.
List of 10 Most Popular Search Engines In The World
Here in this article, we have listed the ten best search engines globally that everyone can use. So, let’s check out the most popular search engines in the world.
1. Google
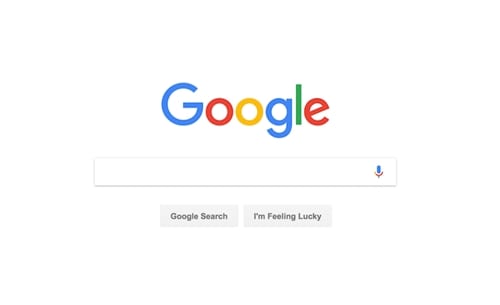
Out of the billions of searches daily, almost 70% of the searches are through the Google search engine. This is by far the most incredible search engine in the world, and no one would deny accepting it as the number one search engine. Furthermore, the results from this search engine will be amazingly accurate and to the point.
2. Bing

This is the search engine by Microsoft, so you can guess its quality, and this is why the second option for people to search for things online is Bing.
The main reason why Bing is used more than Google in some cases is due to its better image search capabilities as well as better results for news as well.
3. Yahoo
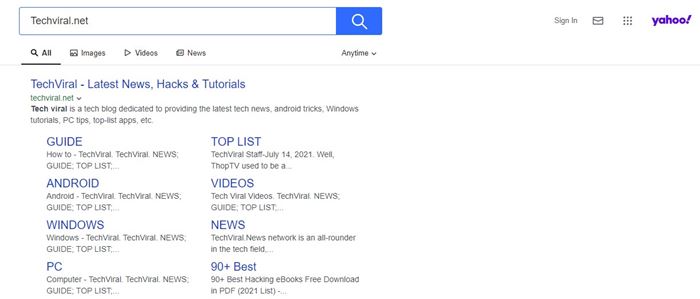
It is the oldest ever search engine, and before Google’s popularity, it was the only search engine in people’s minds. This search engine has some edge values and is used by several million people every day.
4. Ask.com
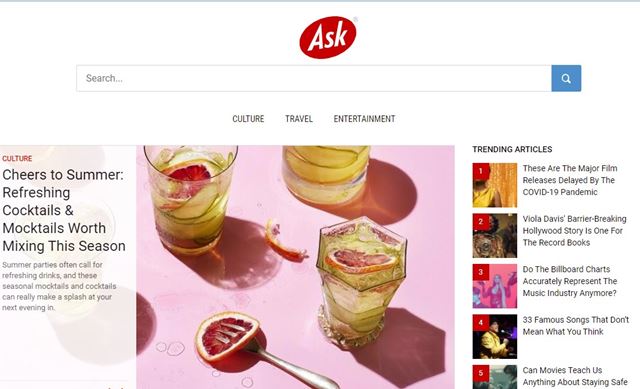
Ask.com is best for asking questions and seeking out answers and information related to some facts and topics. This is one of the most popular search engines you can use today.
The great thing about Ask.com is that even if their resources don’t have the answer to your question, they utilize third-party search engines to show you relevant information.
5. AOL.com
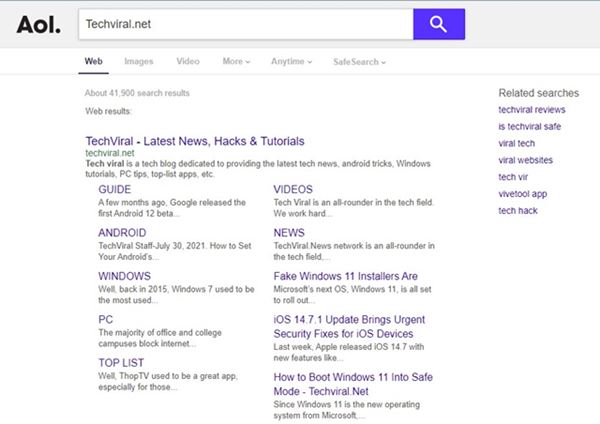
This network includes many different websites like TechCrunch, Engadget, and many others. This advantage of having the quality websites on the list makes it get the consistent 0.04 share for the searches online.
6. Baidu
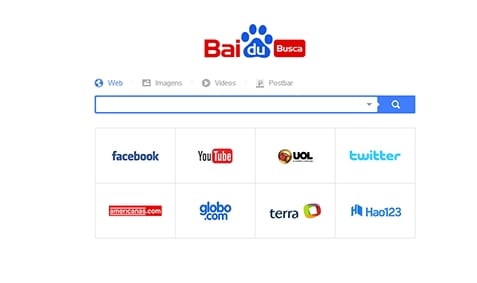
This is the Chinese search engine that is widely used in their country and many other parts of the world. There can be several reasons people use Baidu, and language is one of the top reasons.
According to the latest reports from Wikipedia, Baidu is right now serving billions of search queries every month. However, on the downside, the Baidu search engine is only available in the Chinese language.
7. WolframAlpha

With the advantages like the users are not at all traced for their searches, there are no clumps ads, etc., this search engine is the best choice for safer searches and more accurate searches.
WolframAlpha is a bit different than all other search engine sites listed here. The search engine serves results based on facts and data. It can do all sorts of calculations pretty easily.
8. DuckDuckgo
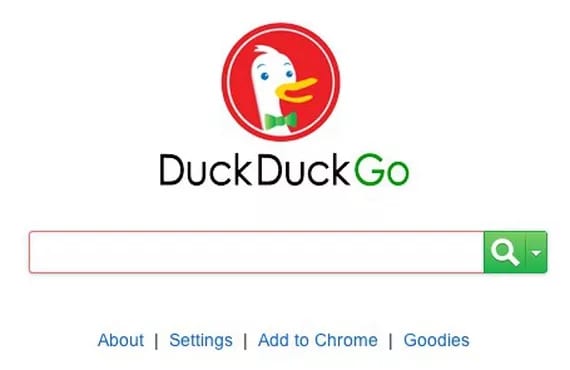
If you are someone who prioritizes Privacy, then you would love DuckDuckGo. DuckDuckGo is a search engine that is serving on average 47 million searches per day.
The thing that you should note is that DuckDuckGo doesn’t have a search index of its own. Instead, they generate search results from a variety of sources.
9. Internet Archive
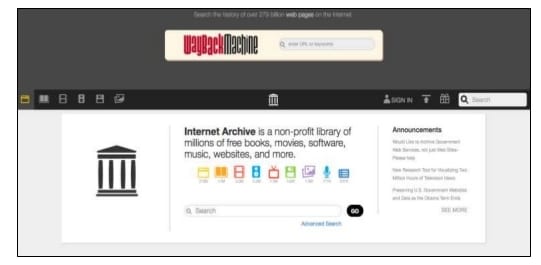
Well, the Internet Archive is a lot different than regular search engine sites. It doesn’t show you search results like Google, Bing, etc. Instead, it’s an Internet archive search engine that lets you find how a website looked way back in time.
On this site, you can trace the history of any website. It’s used mainly by web developers and bloggers who want to examine how a website has changed over time.
10. Yandex.ru

Well, Yandex is Russia’s most popular search engine. According to the Alexa rankings, Yandex is among the 50 most popular websites on the internet.
If we talk about the data, Yandex is probably the biggest search engine in Russia, and it has about 65% market share in that country.
So, these are the most popular search engines in the world. I hope this article helped you! Please share it with your friends also. If you know of any other such search engines, let us know in the comment box below.
The post 10 Most Popular Search Engines In The World appeared first on TechViral.
from TechViral https://ift.tt/3ifiufq
How to Stop Chrome Browser from Blocking Downloads

Google Chrome is possibly the best web browser for desktop and mobile operating systems out there. Compared to all other web browsers for desktop, Chrome offers more features and options. Also, it provides you lots of security features.
If you have been using Google Chrome for a while, you might know that the web browser automatically blocs the downloads that it thinks are suspicious. Also, it blocks multiple downloads as well. All these things were done for better security.
Although Google Chrome is designed to detect and block downloads that it deemed unsafe automatically, it sometimes blocks contents from trusted websites for no reason.
So, if you are also frustrated with Chrome’s automatic download block feature, you might like to disable it. In this article, we will share a step-by-step guide on how to stop Google Chrome from blocking downloads.
Why Chrome Blocks Downloads?
Well, before stopping Chrome from blocking the downloads, you should know why Chrome blocks the downloads. Here’s why Chrome Blocks downloads
- Google Chrome blocks download from sites that it feels is unsafe for users. So, Chrome blocks the download for all good reason.
- Many websites trick users into downloading malware with flashy downloads buttons. If Chrome detects such events, it automatically blocks the downloads.
These two are the most probable reason behind Chrome blocking downloads. So, if you don’t have any idea of security and if not using any security program, it’s best to allow Chrome to block the suspicious downloads.
Also Read: How To Change The Mouse Cursor In Google Chrome Browser
Steps to Stop Chrome Browser from Blocking Downloads
Important: Please make sure to update the Google Chrome browser before following the steps. To update the Chrome browser, click on three dots > Help > About Google Chrome.
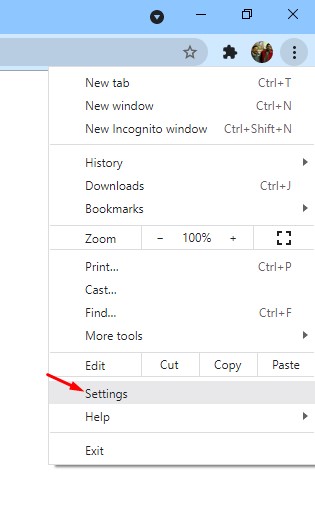
Step 1. First of all, launch the Google Chrome browser on your desktop computer. Next, click on the three dots as shown in the screenshot below.
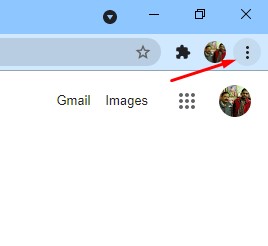
Step 2. From the list of options, click on the ‘Settings.’
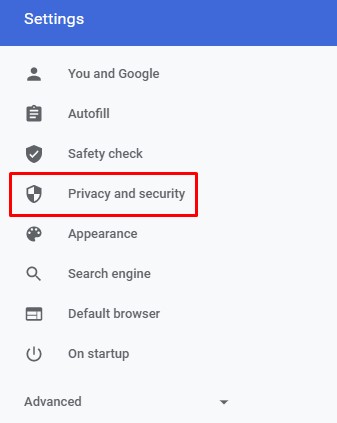
Step 3. On the left pane, click on the ‘Privacy and security’ option.
Step 4. On the right pane, click on the ‘Security‘ option.

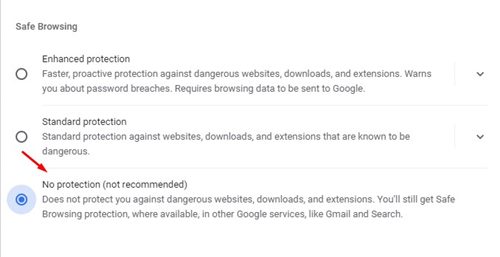
Step 5. On the next page, select the ‘No protection (not recommended).’
That’s it! You are done. From now on, Chrome won’t block any downloads from any website.
So, this guide is all about how to stop Google Chrome from blocking downloads. I hope this article helped you! Please share it with your friends also. If you have any doubts related to this, let us know in the comment box below.
The post How to Stop Chrome Browser from Blocking Downloads appeared first on TechViral.
from TechViral https://ift.tt/3iduWvW
Friday, July 30, 2021
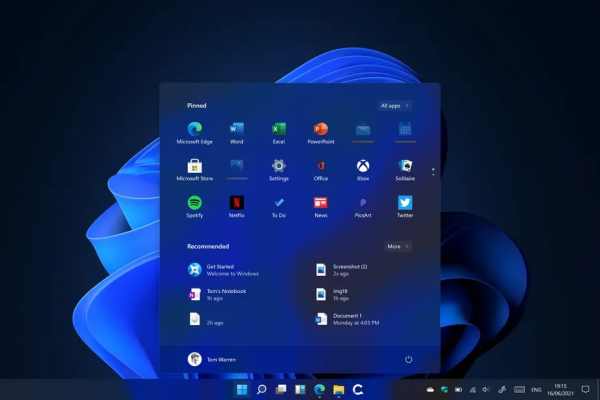
Microsoft Windows 11 First Public Beta Available for Download

Microsoft has finally released the first public beta of Windows 11. The official release of the upcoming OS will take place later this year. Earlier, it was available for download on the Windows Insider Program Dev channel for Windows Insiders.
As no major problems were found on the Dev channel, Windows 11 is now available on the Beta channel for the users to get experience. With the release of Windows 11 beta, the popularity has now reached another level.
Download Windows 11 First Public Beta
The beta release of Windows 11 will run a lot better than what was available for developers. You can install the beta version if you are interested, but for that, you will need a compatible computer.
In a blog post, Microsoft said,
“If you are in the Dev Channel, now would be the right time to consider switching to the Beta Channel if you want to stay on more stabilized builds of Windows 11.”
How to download the Windows 11 beta?
All those who are running Windows 10, but want to join the beta, then register for the Microsoft beta program first. Microsoft says that Beta Channel releases are more stable than Dev channel, but still, there are bugs, crashes, and many issues. The company has posted a list of all the issues in the blog post.
However, it is good news for those who already installed the Dev preview. You can easily switch to the beta channel from Settings >> Windows Update >> Windows Insider Program and then select Choose your Insider Settings.
If you are a developer and want to switch to a beta channel, then you need to change your Insider account preference. For this, you need to download and reinstall the Windows 11 OS on your PC.
On Twitter, Microsoft said, it is allowing for a short period of time to switch to the beta channel.But according to Windows Insider, it is possible to do it from the same place for a short period of time.
We are allowing it for a short period of time. If you want to switch, now is the time. This is mentioned in the blog.
— Windows Insider (@windowsinsider) July 29, 2021
The users will not be able to Chat from Microsoft Teams. Earlier, Microsoft said they are looking to enable it for the Beta channel in the future.
The post Microsoft Windows 11 First Public Beta Available for Download appeared first on TechViral.
from TechViral https://ift.tt/3j8vG4J
Home car charger owners urged to install updates
Security vulnerabilities in two domestic electric car chargers were discovered by researchers.
from BBC News - Technology https://ift.tt/37anQSF
from BBC News - Technology https://ift.tt/37anQSF
Owners of home car chargers urged to install updates
Security vulnerabilities in two domestic electric car chargers have been discovered by researchers.
from BBC News - Technology https://ift.tt/3C2rIDp
from BBC News - Technology https://ift.tt/3C2rIDp
Elon Musk: 'I don't want to be CEO of anything'
Elon Musk reiterated on Friday that he doesn't want to be Space X or Tesla boss. What's going on?
from BBC News - Technology https://ift.tt/3BZzLkw
from BBC News - Technology https://ift.tt/3BZzLkw
How to Turn off Transparency & Animation in Windows 11

Recently, Microsoft introduced its new desktop operating system – Windows 11. Like every other version of Windows, Windows 11 also introduced some new features and lots of visual changes.
Windows 11 also includes visual effects that make the taskbar, menu, and other activity areas transparent and translucent. Although the visual features have been introduced to improve the Windows experience, many users find it unnecessary.
For many users, the transparency and animation on Windows 11 are just a waste of resources. If you have more RAM on your PC, the visual effects won’t create any performance issues. However, if you have anything less than 4GB of RAM, you might experience a slight delay in some actions.
Also Read: How to Show Hidden Files & Folders in Windows 11
Steps to Turn off Transparency & Animation in Windows 11 PC
So, if you want to free some resources, it’s best to disable the visual effects on Windows 11.
It’s pretty easy to disable Transparency and Animations on Windows 11; you can do it in simple steps.
So, in this article, we will share a step-by-step guide on how to disable the transparency and animation on Windows 11 PC. Let’s check out.
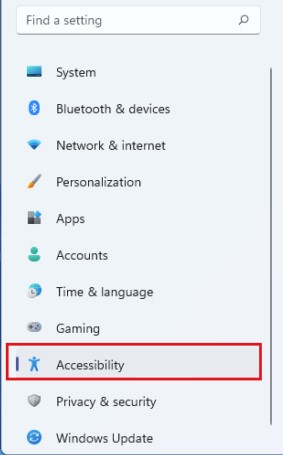
Step 1. First of all, press Windows Key + I to open the Settings. Or else, you can click on the Start button and then select the ‘Settings.’

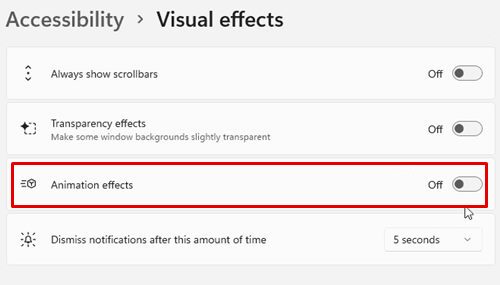
Step 2. On the Settings app, click on the ‘Accessibility‘ option. The option is located on the left side of the screen.
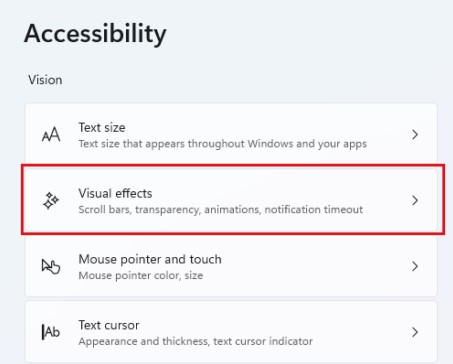
Step 3. On the right pane, click on the ‘Visual Effects’ option.
Step 4. Under the Visual effects, disable the ‘Transparency effects’ first.
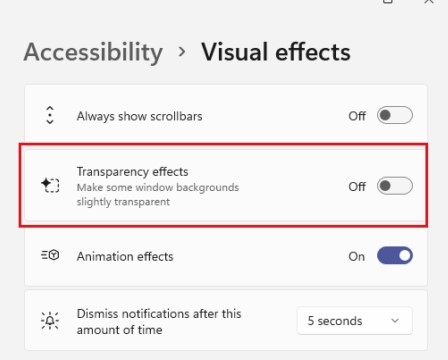
Step 5. Next, disable the ‘Animation effects’ option.
That’s it! You are done. You will not see any visual effects from now. The entire interface will now look non-transparent and opaque.
If you wish to enable the transparency and animation in Windows 11, you just need to enable the toggle button for ‘Transparency Effects’ and ‘Animation Effects’ in the step no. 4 and 5.
So, this guide is all about how to disable transparency and Animation in Windows 11 computers. I hope this article helped you! Please share it with your friends also. If you have any doubts related to this, let us know in the comment box below.
The post How to Turn off Transparency & Animation in Windows 11 appeared first on TechViral.
from TechViral https://ift.tt/2WtRL6c
How to Set Your Android’s Volume Level to Change on a Schedule
Let’s just admit, we all have dealt with situations where we have just wanted to put our Android smartphone into a silent mode. For example, if you are carrying your smartphone to school, or business interview, or coaching classes, you always want your smartphone to be as silent as possible.
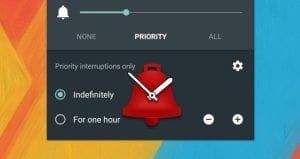
Well, few Android devices do have a Do Not Disturb Mode that allows users to control the ringtone and notification sounds, however, not all Android devices have the DND Mode. Actually, you don’t really need a Do Not Disturb mode to control Android’s volume level.
Set Your Android’s Volume Level to Change on a Schedule
There are lots of Android apps available on the Google Play Store that allows users to set their Android’s volume level to change on a schedule. So, in this article, we are going to share the two best methods that can be used to adjust your Android’s volume level as per your wish.
1. Using Volume Scheduler
Volume Scheduler is one of the best free volume scheduler app available on the Google Play Store. The great thing about Volume Scheduler is that it can automatically change the ringtone volume of your phone from low to high and high to low based on the schedule you provide.
Step 1. To get this one going, start by installing Dama’s free app, which is called Volume Scheduler. Install the Volume Scheduler app from the Google Play Store.
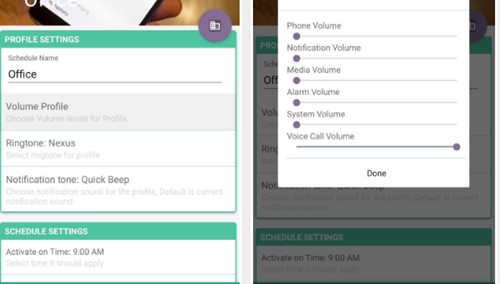
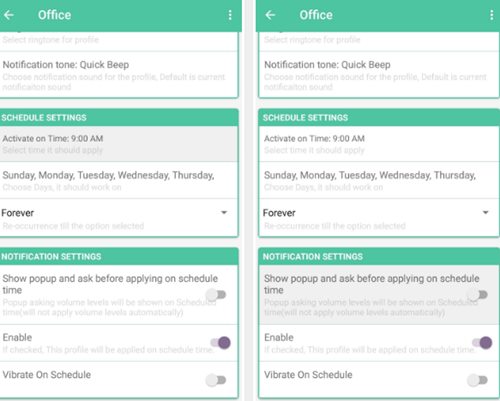
Step 2. Now enable the toggle button for Volume Scheduler on the top. You’ll see two preset volume profiles named Office and Home. You could tap on the (+) button at the bottom of the screen to create a new profile. You can also alter the existing profiles just tap one of the presets, then select “Edit” from the menu to make it your own.
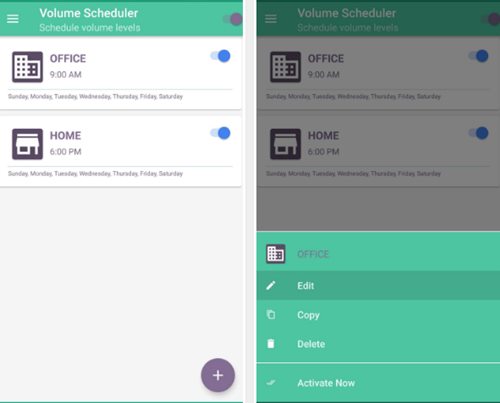
Step 3. Next, you need to adjust the schedule settings. You need to adjust the time, date, repeat dates, etc.
Step 5. When everything is done, move to the main menu. You will now see the profiles with the changes that you have made.
That’s it, you are done! This is how you can use the Volume Scheduler app to set your Android’s volume level to change on a schedule.
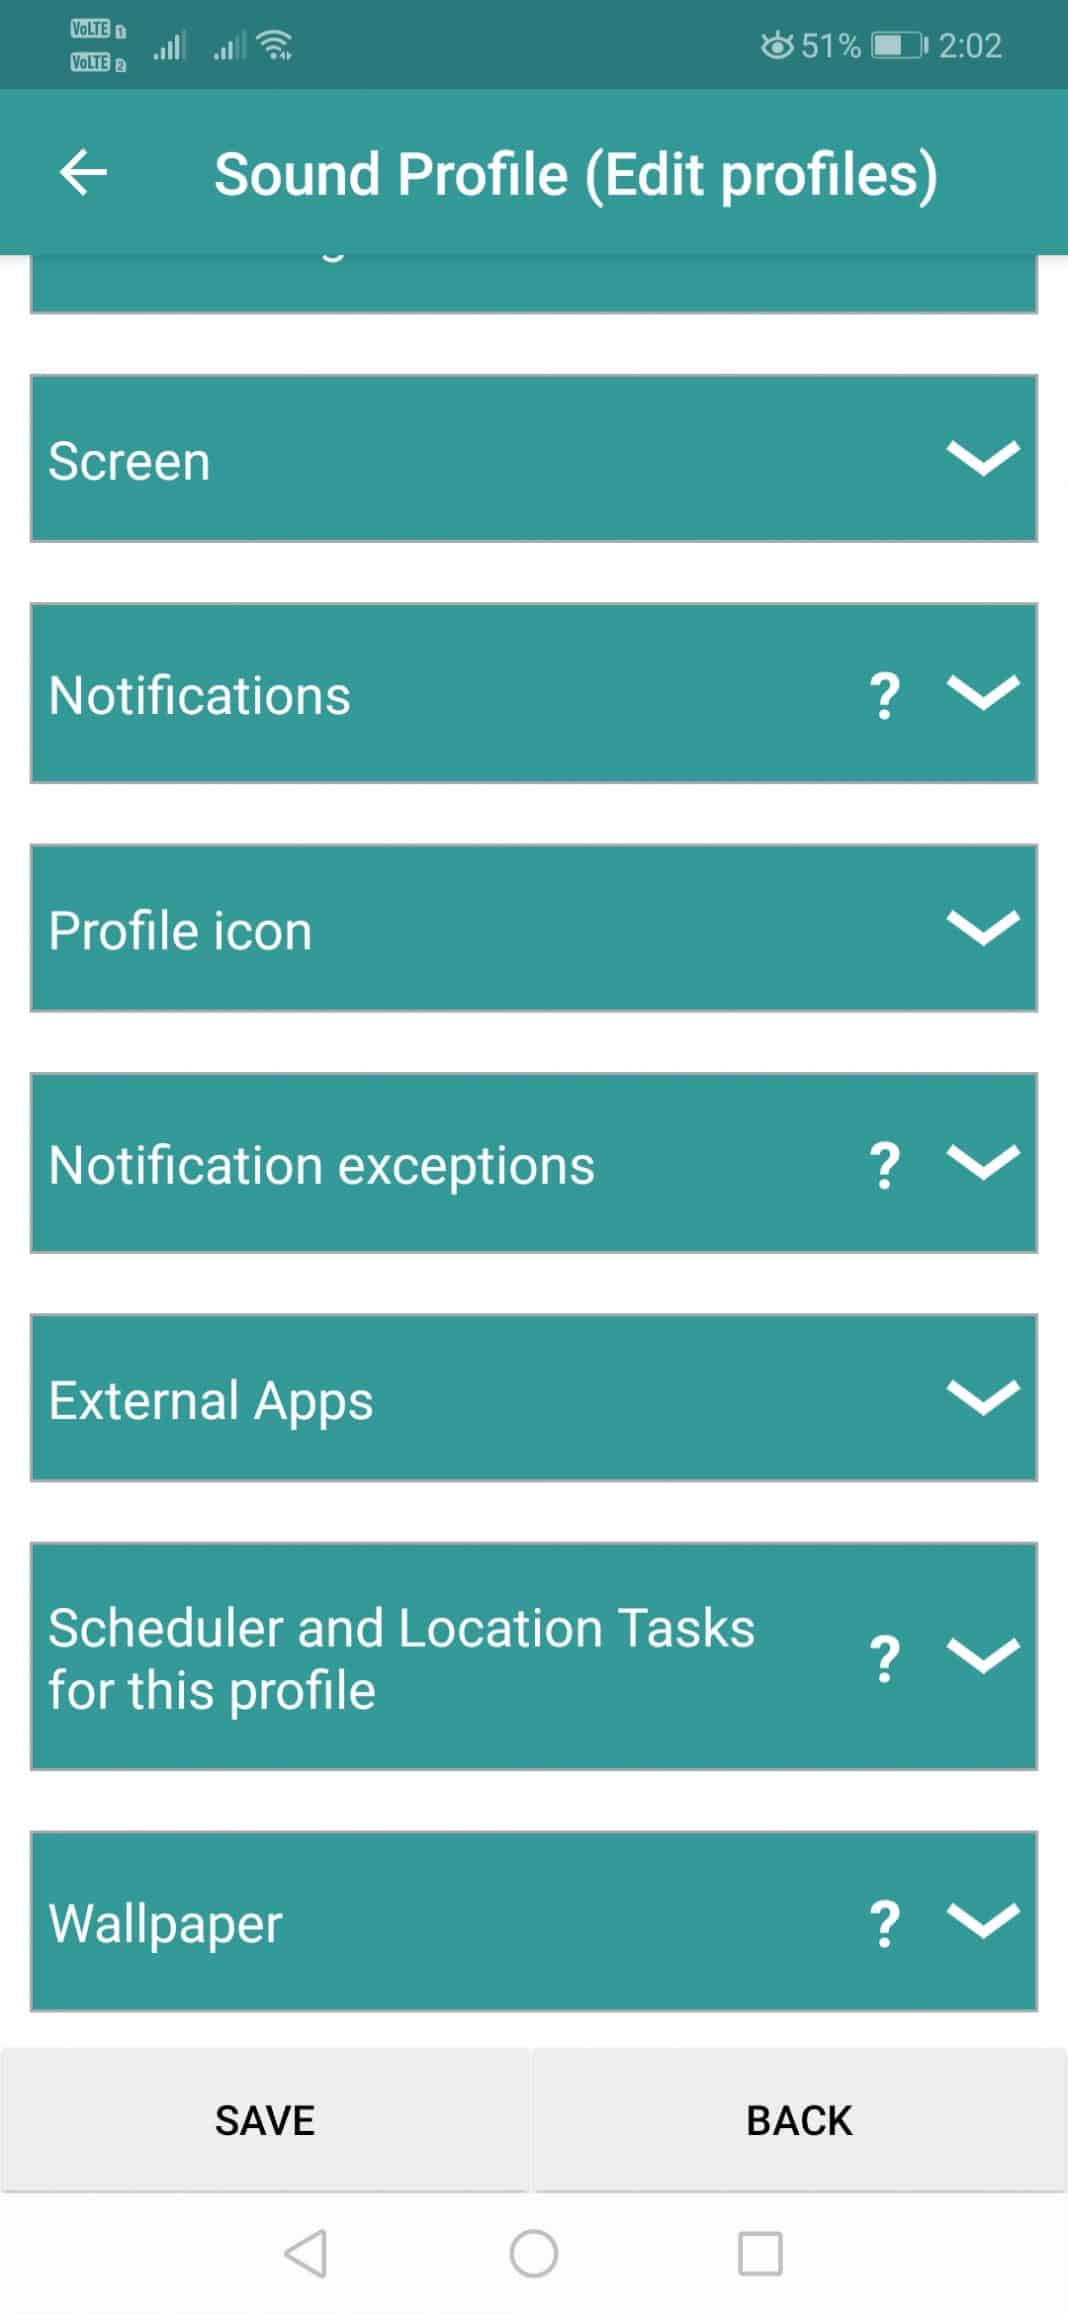
2. Using Sound Profile
Sound Profile is one of the best Android app available on the Google Play Store that allows users to set the Android’s Volume level to change as per the schedule. Here’s how to use the app.
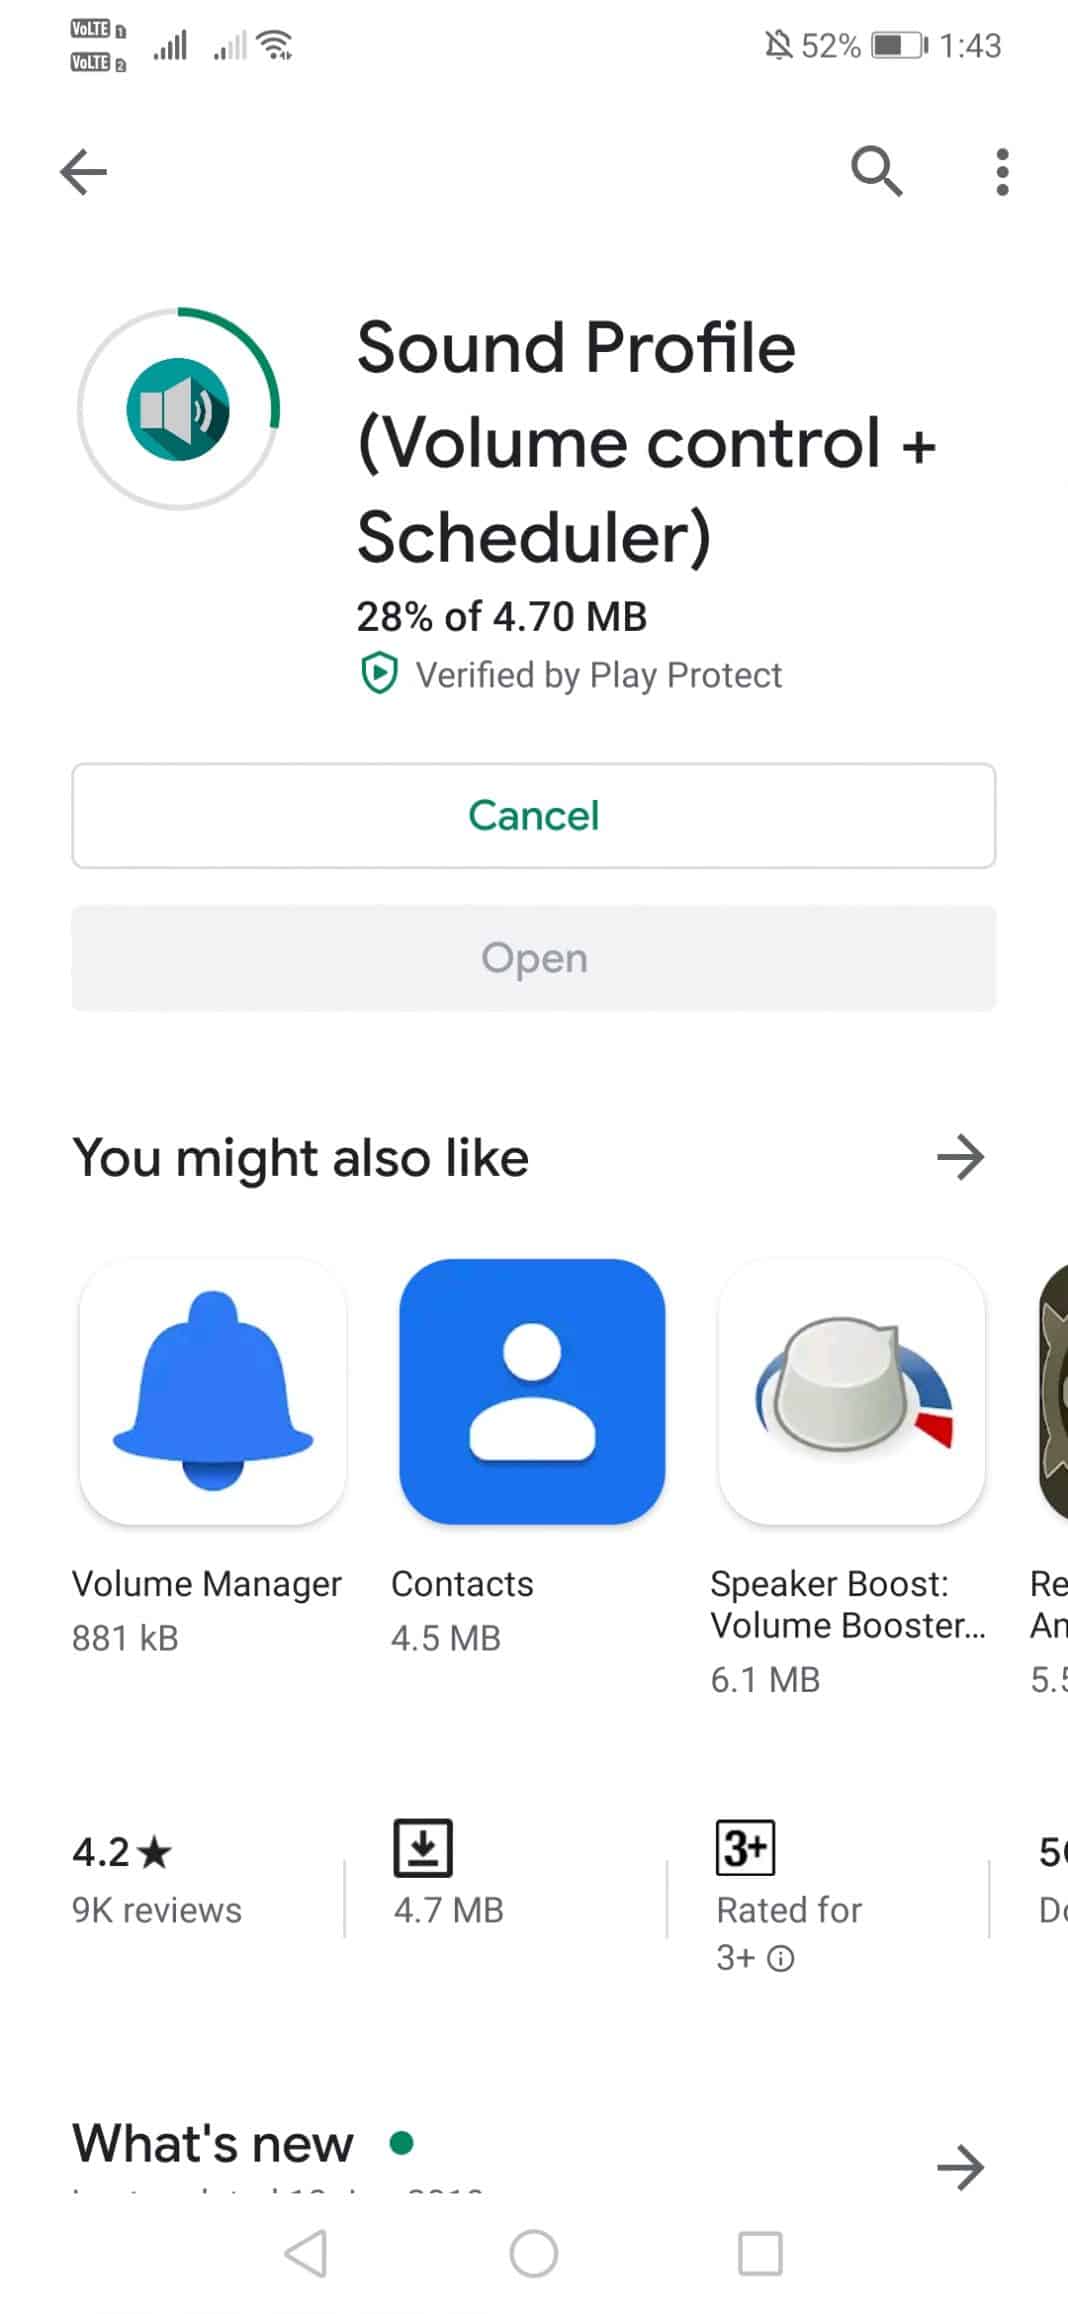
Step 1. First of all, download & install Sound Profile on your Android smartphone.
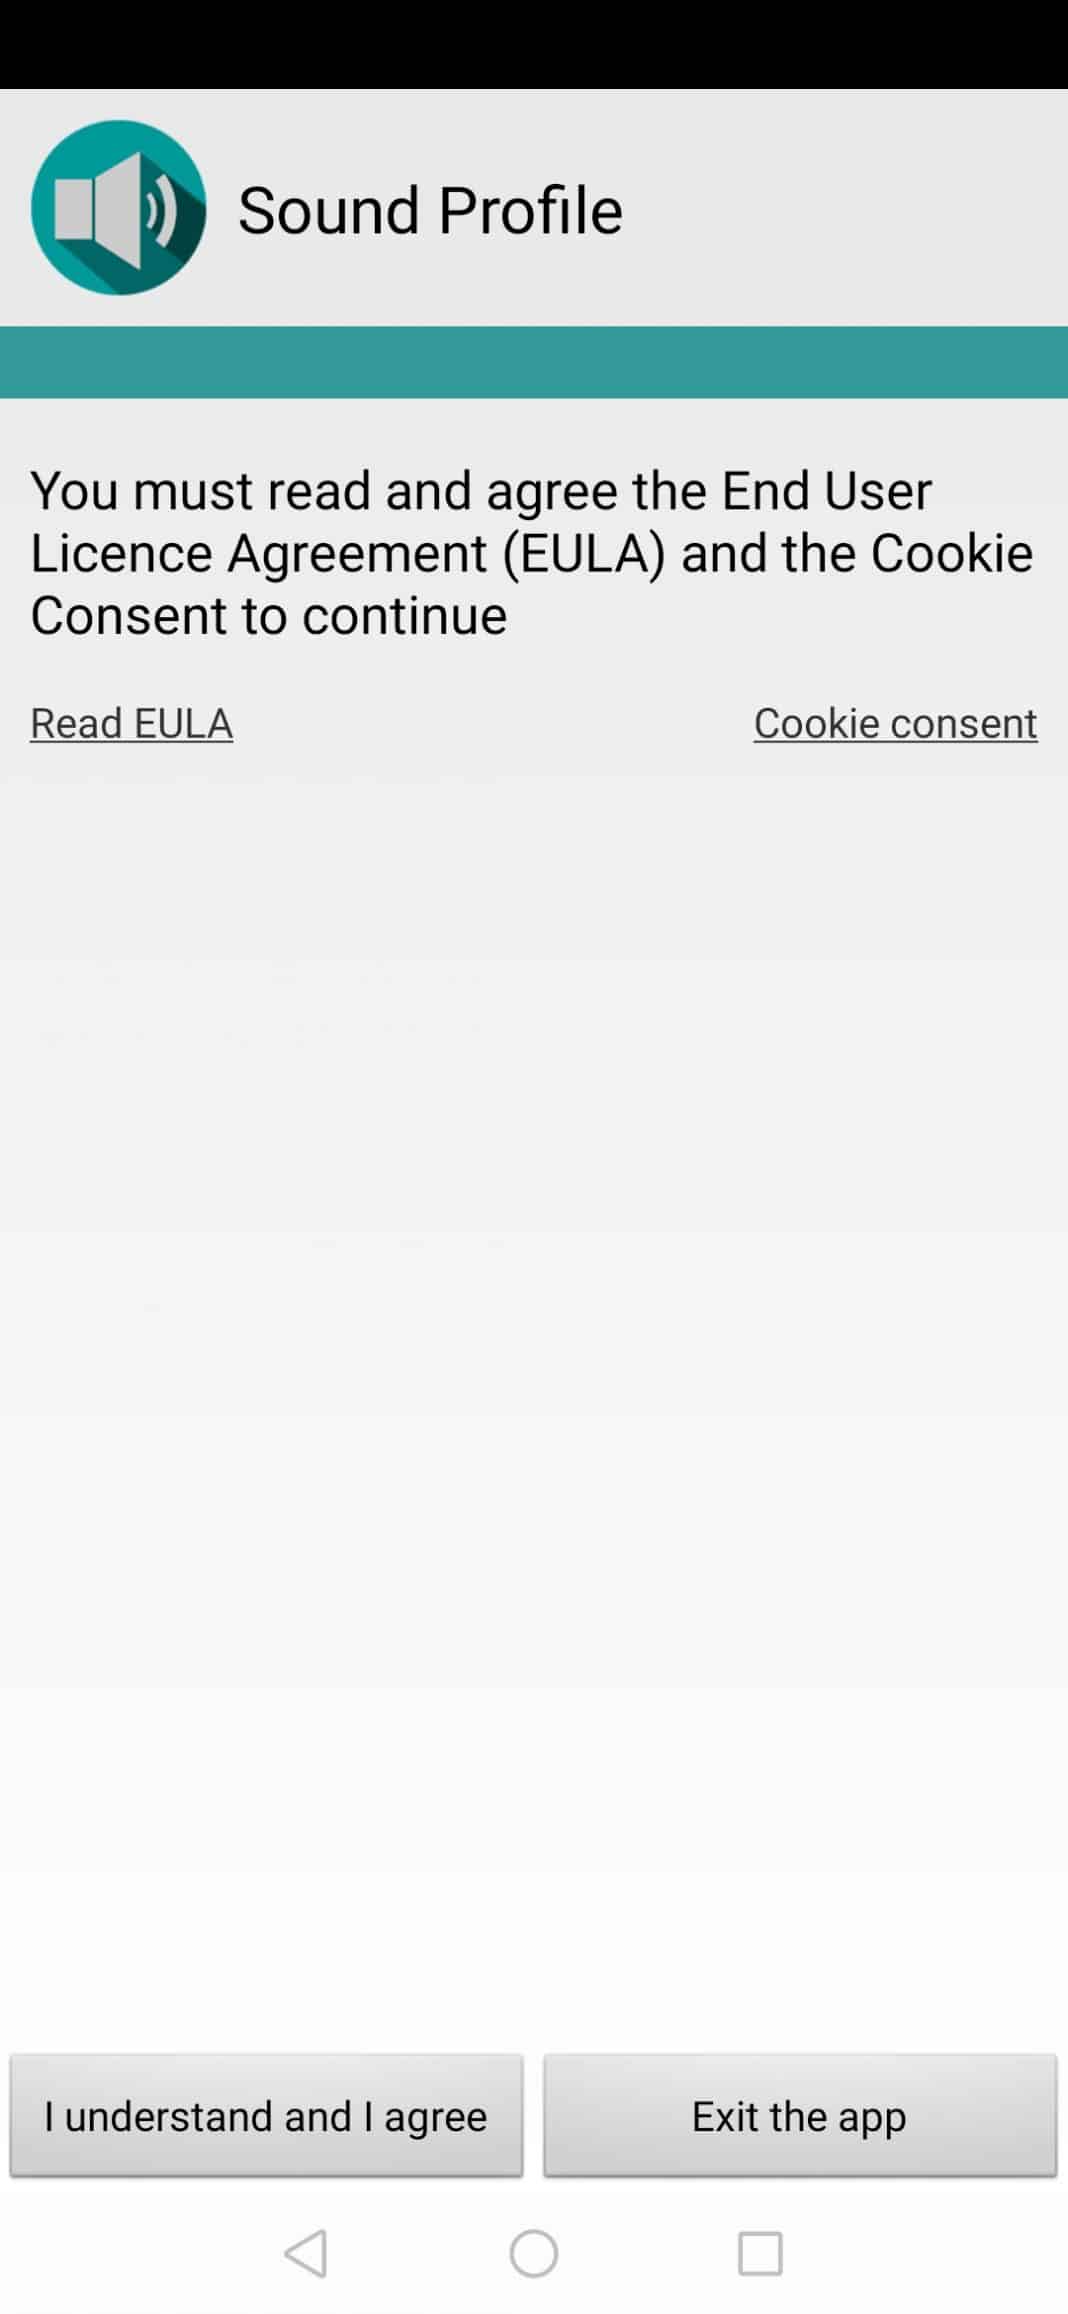
Step 2. Once done, open the app. You will see a screen like below, where you need to tap on the ‘I understand and I agree’ button.
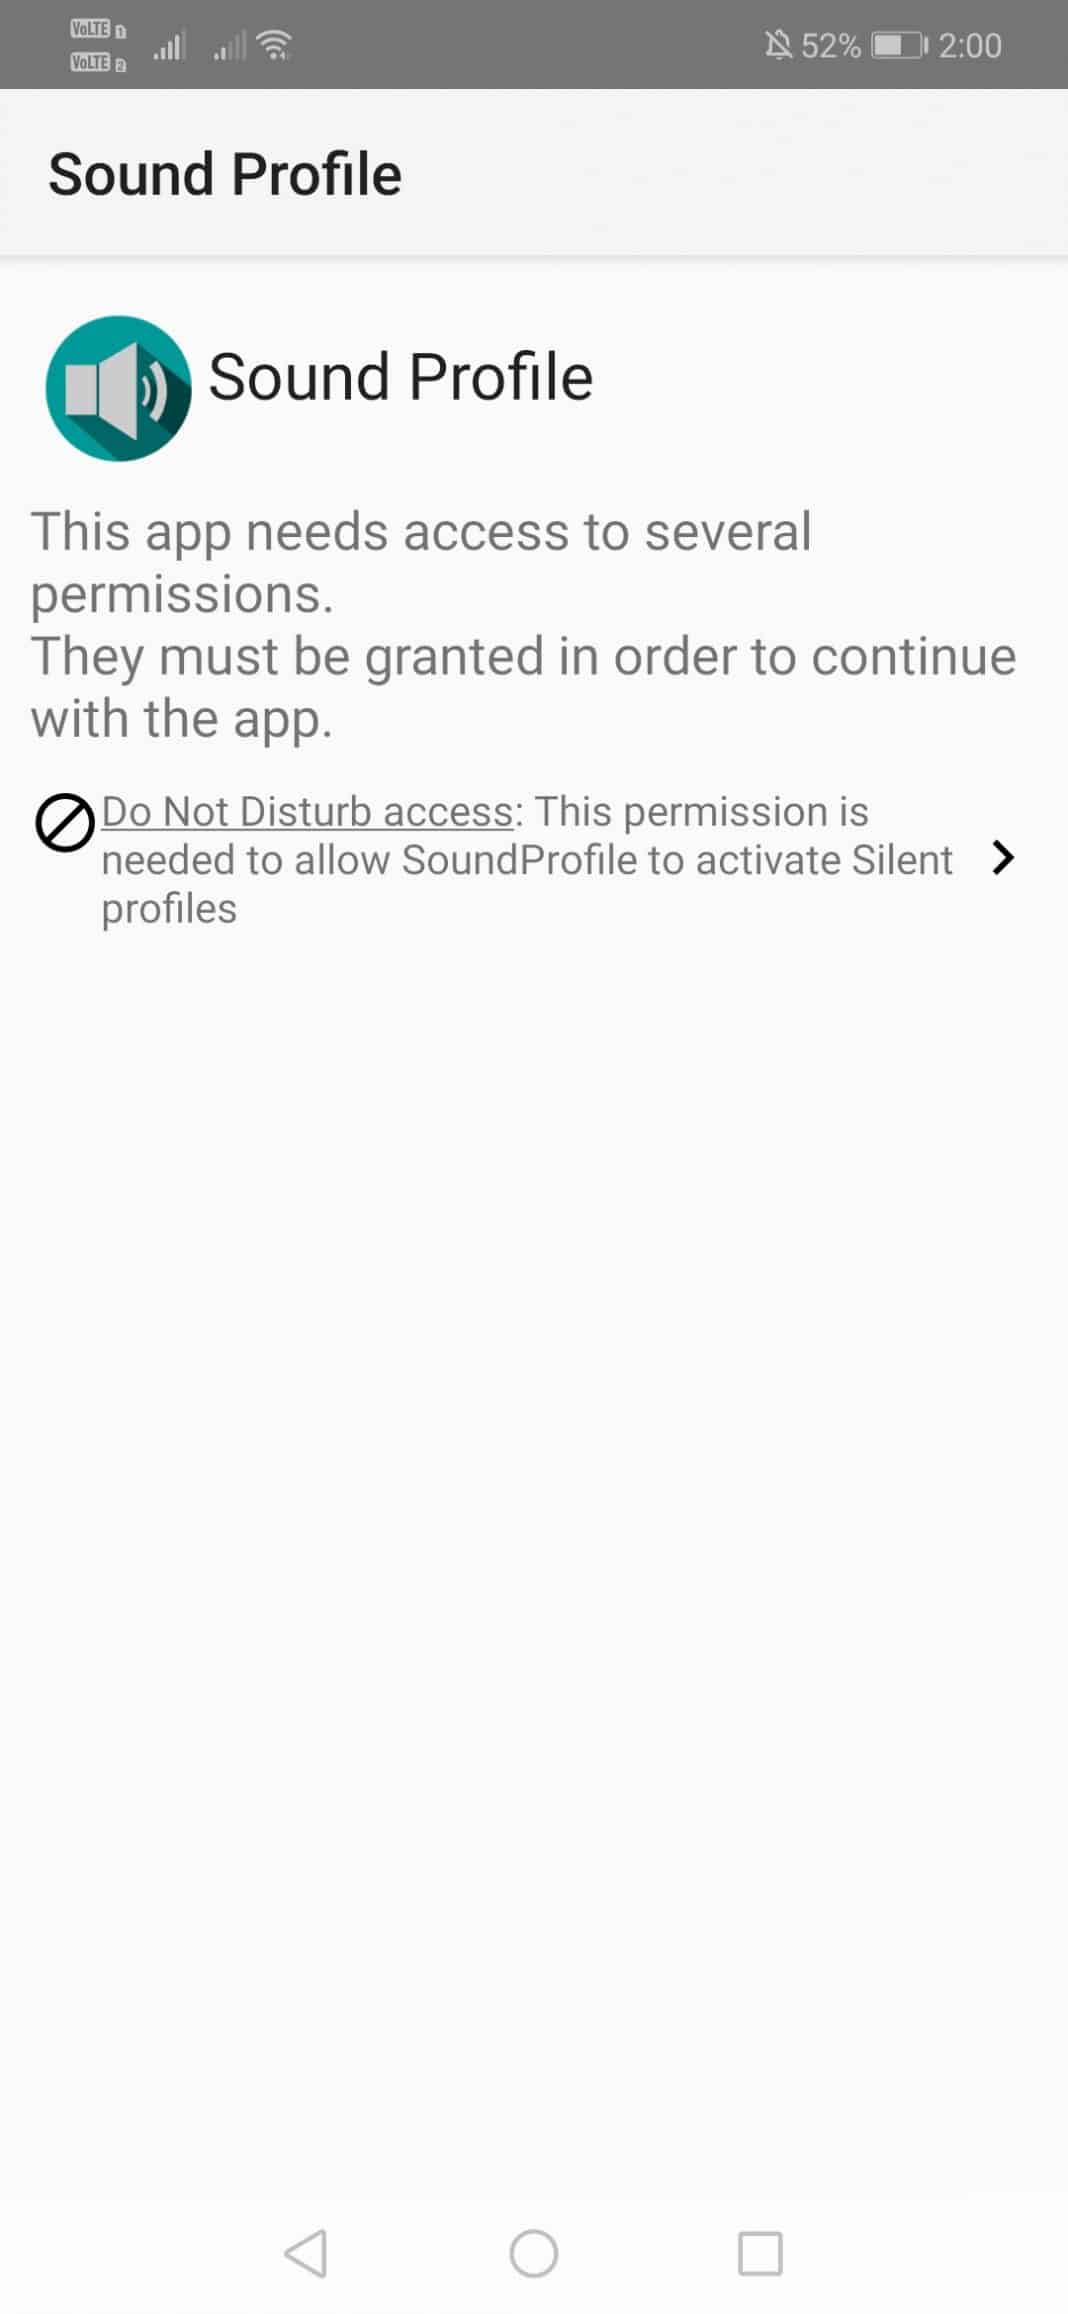
Step 3. In the next step, you will be asked to grant two permissions. Grant the permissions.
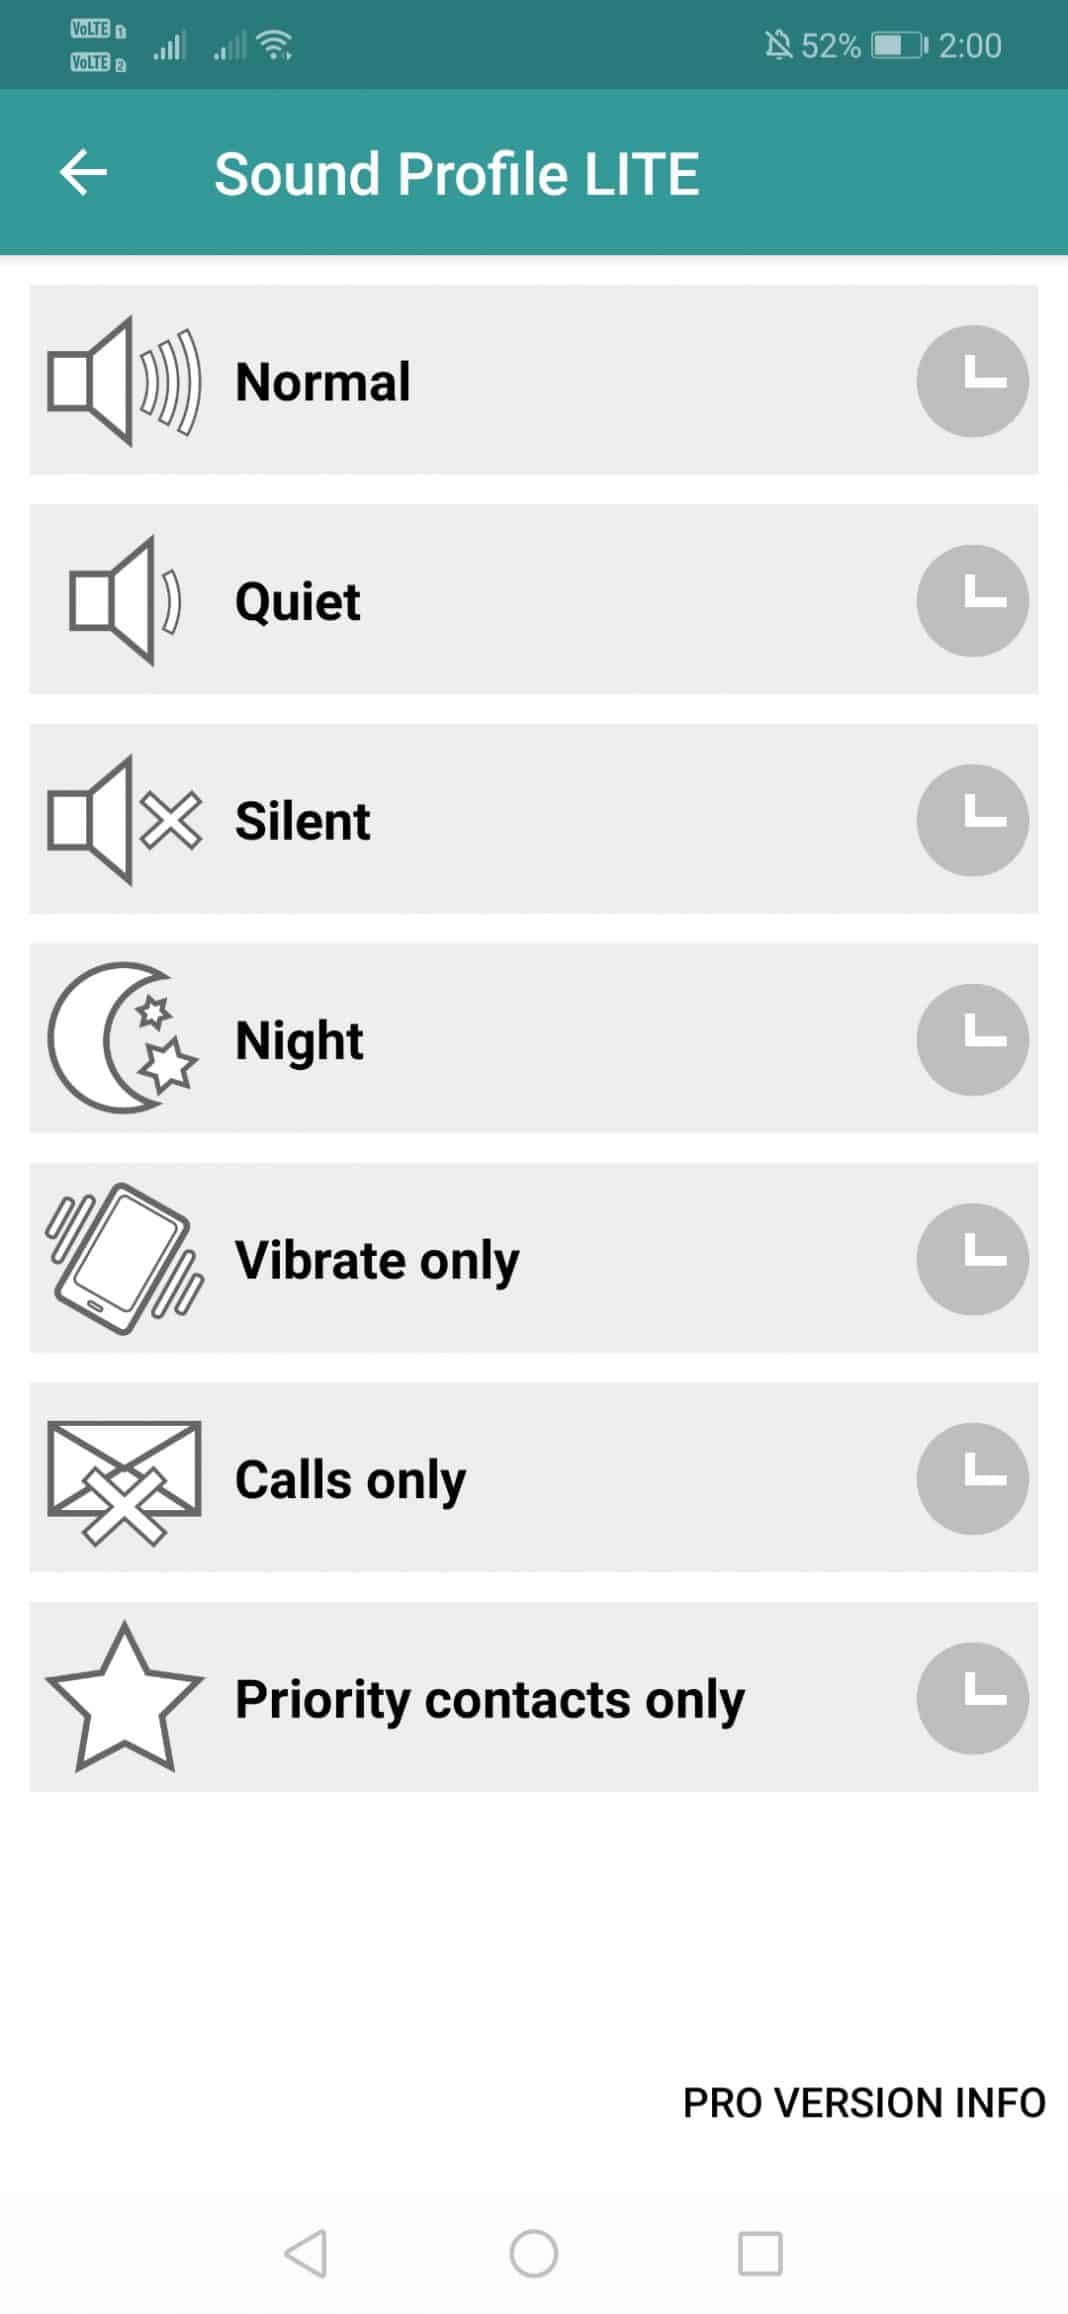
Step 4. Now you will see the main interface of the app.
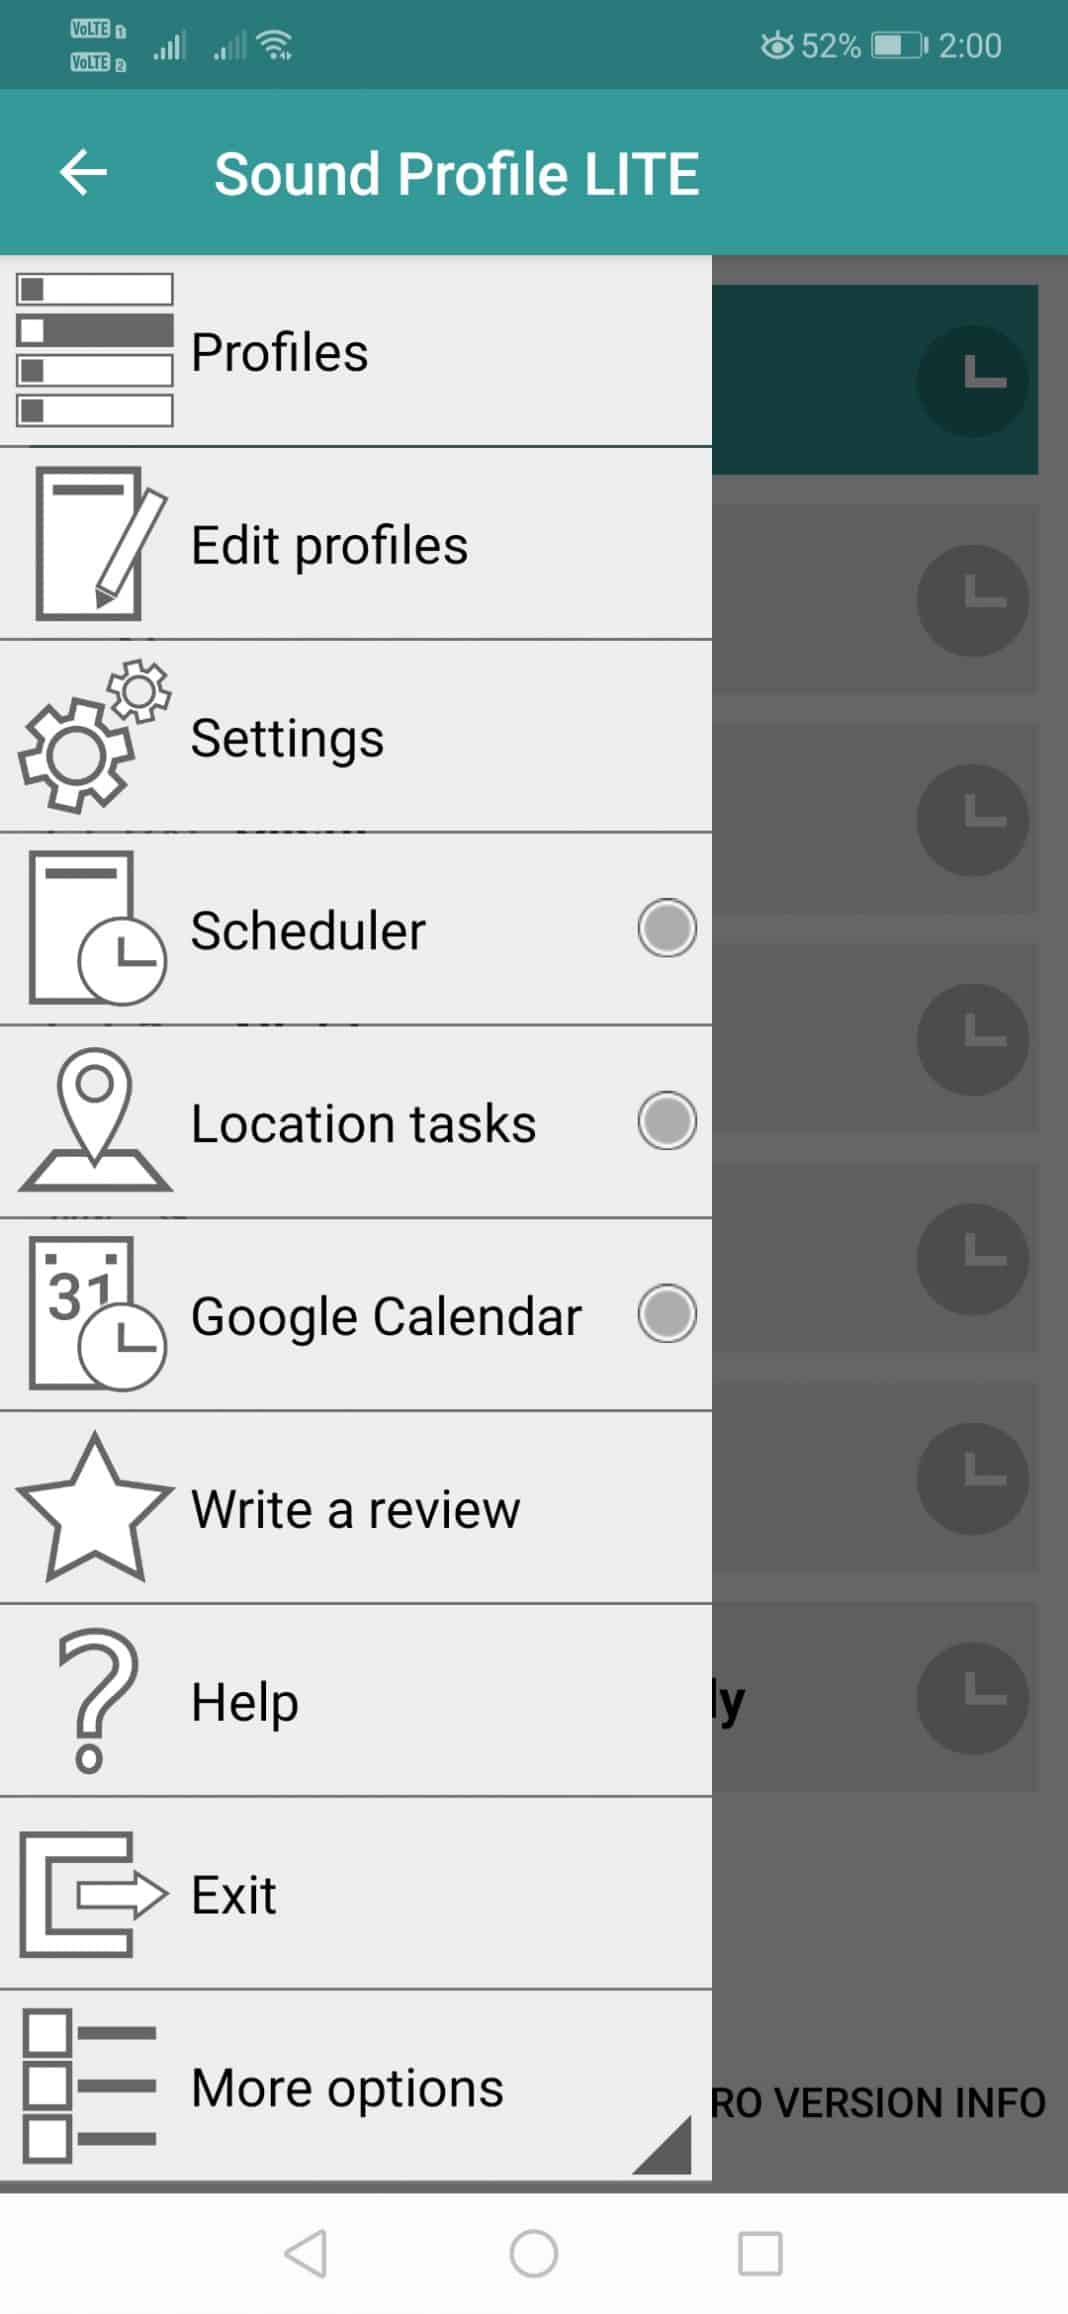
Step 5. Now swipe your screen from left to right to open the Sound Profile options. There you need to tap on ‘Edit Profiles’
Step 6. There you need to set everything as per your requirements. For instance, you can set up a name, volumes, etc.
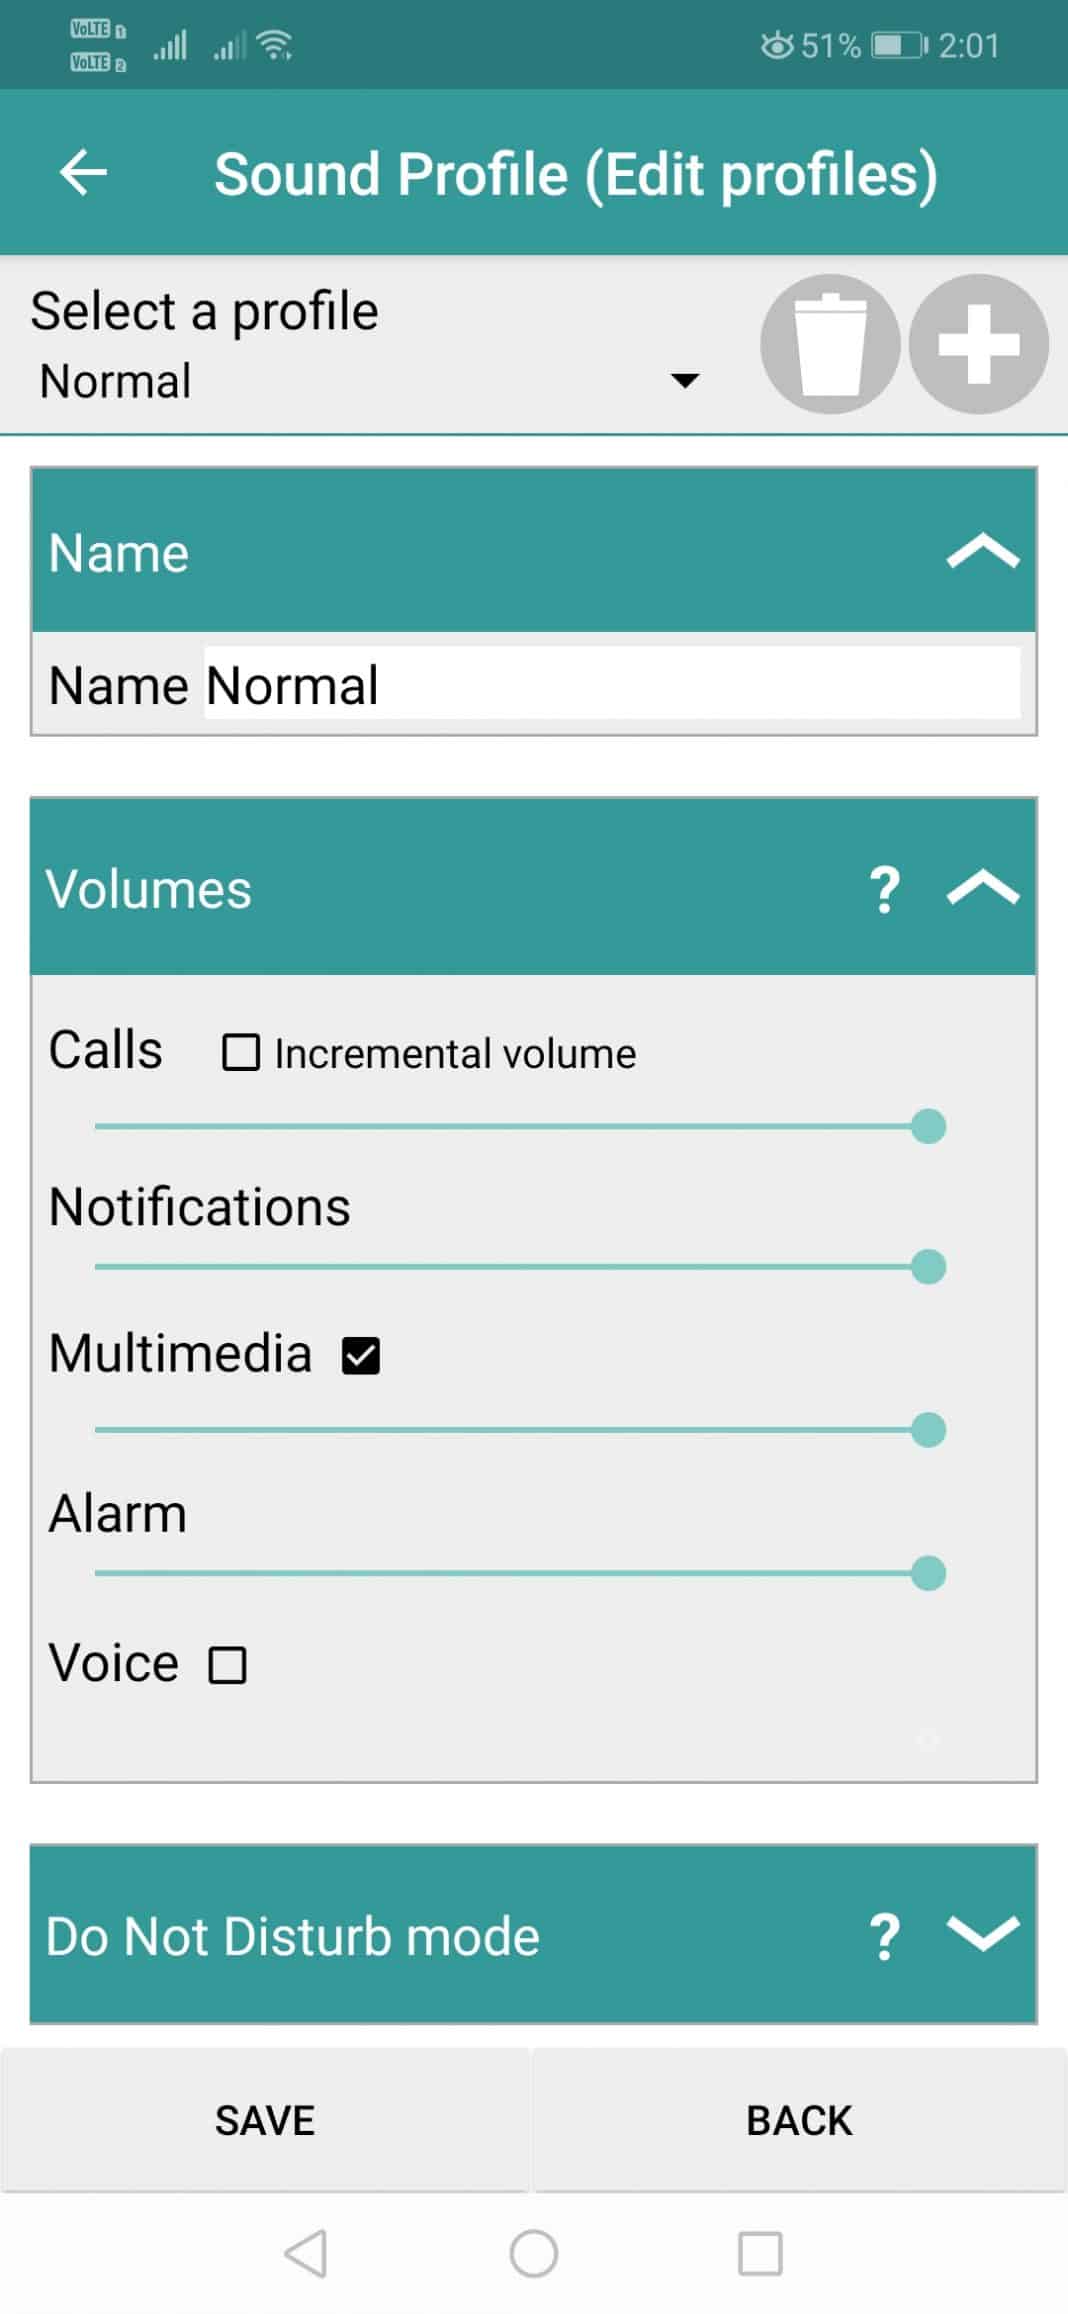
Step 7. You can also set up the Do not disturb mode for the sound profile.

Step 8. If you want to whitelist any particular contact, add it to the ‘Starred contacts’ list.
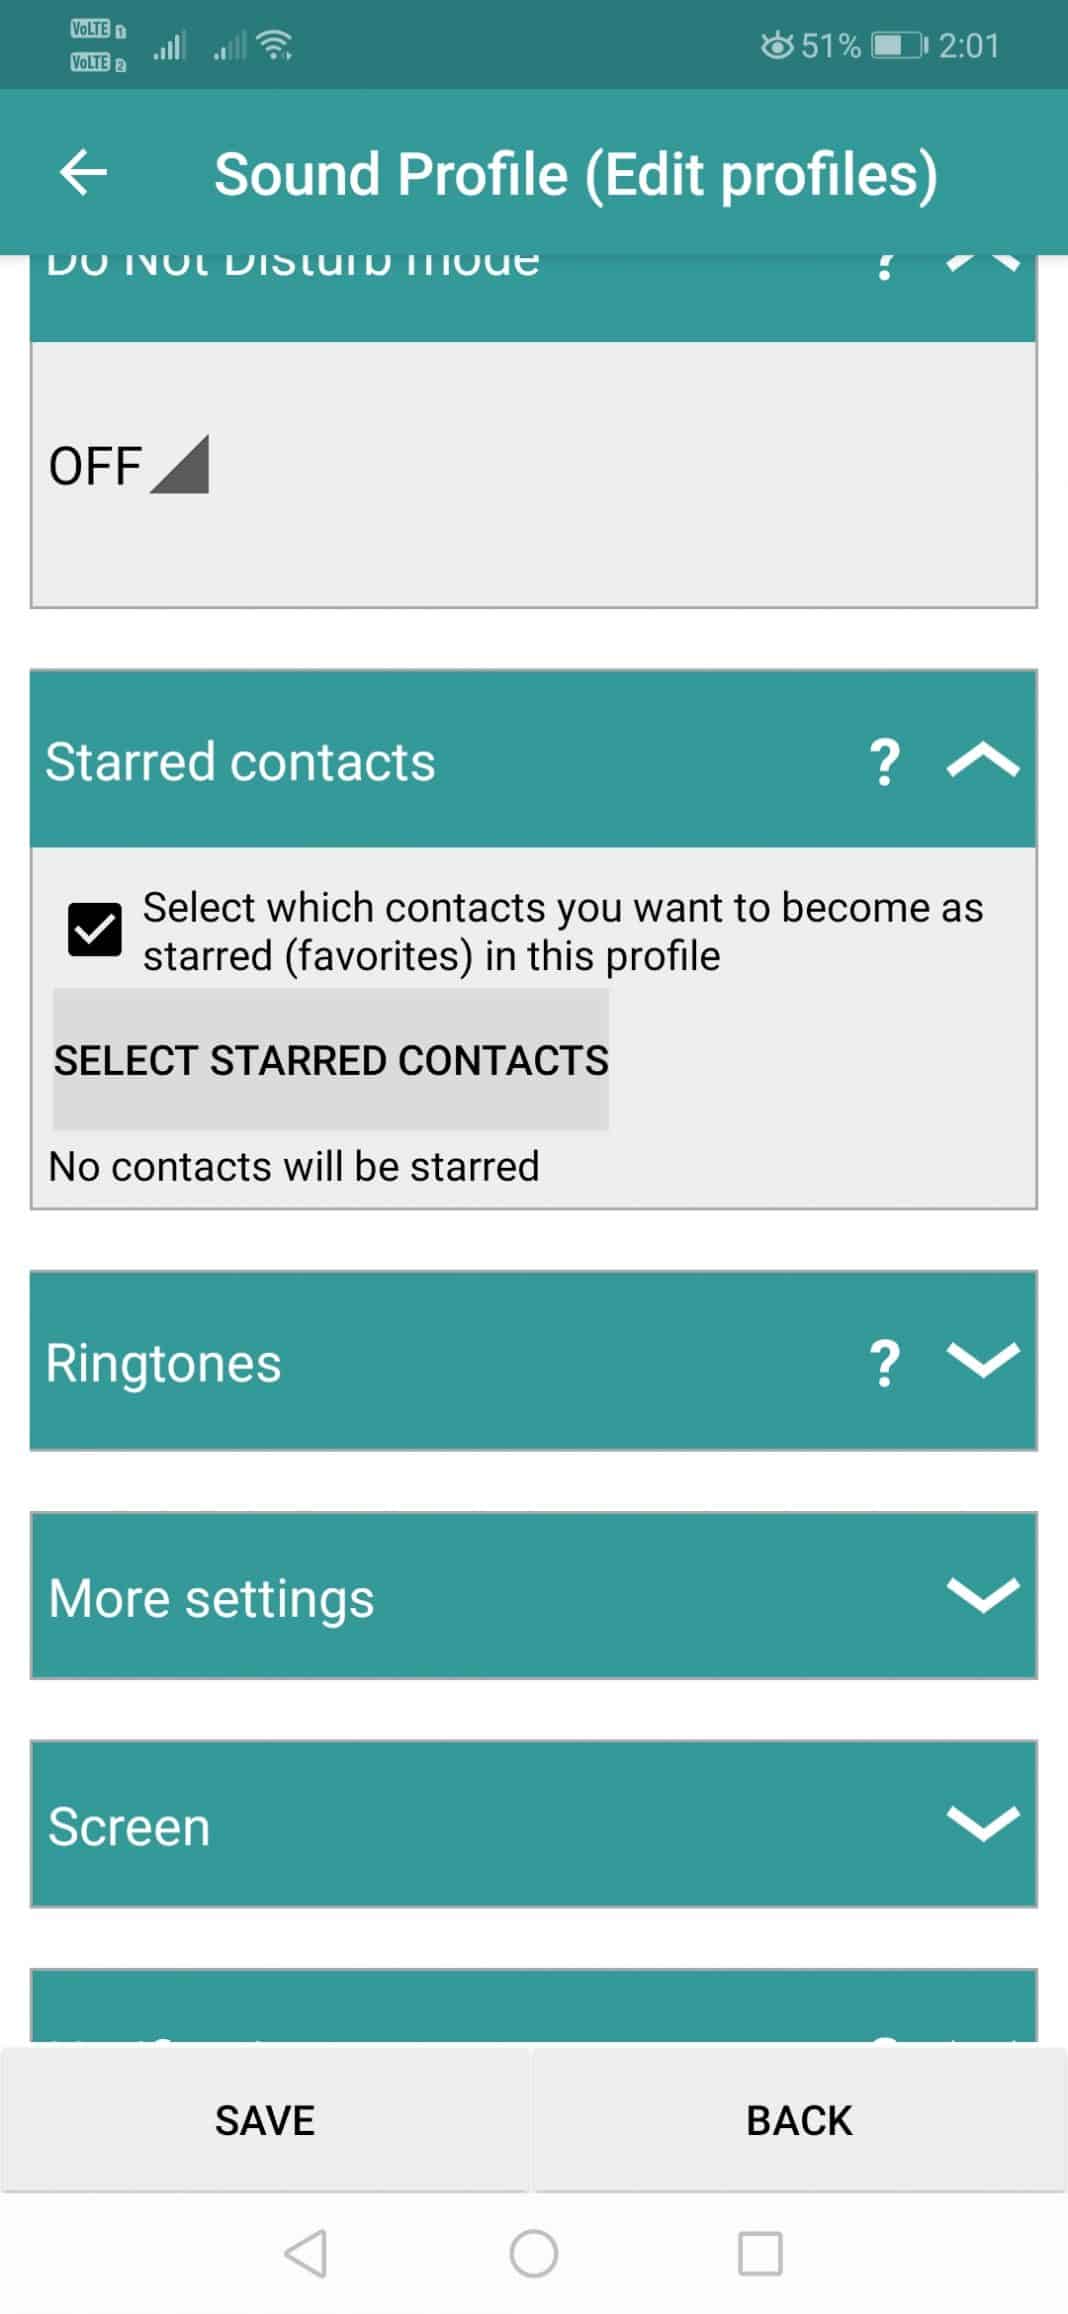
Step 9. You can also explore the ‘More Settings’ option to control other factors like Vibration, Bluetooth, WiFi, etc.
So, this is how you can use Sound Profile to Set your Android’s Volume Level to change on a schedule.
So, this is how you can set Android’s volume level to change on a schedule. I hope this article helped you! Please share it with your friends also. If you have any doubts related to this, let us know in the comment box below.
The post How to Set Your Android’s Volume Level to Change on a Schedule appeared first on TechViral.
from TechViral https://ift.tt/344ckpb
Subscribe to:
Posts (Atom)