Tuesday, November 30, 2021

Google Camera 8.4 Update Brings New Features to Old Pixel Devices

The Google Camera app has got updated to the latest version, 8.4. This new update brings new features that were debuted on the new Pixel 6 flagship phones.

A few of the features, including Timer light, disabling exposure controls, and more, will be added to the older Pixel devices.

At the launch, the Google Camera 8.4 only supported to the Pixel 6 and 6 Pro devices; however, the latest update of the app, 8.4.300, brings support for older smartphones and also brings the Pixel 6 settings to old phones.

Download Google Camera 8.4.300 Update to Get Pixel 6 Features on Older Devices

Download Google Camera 8.4.300 Update to Get Pixel 6 Features on Older Devices

The Google Camera 8.4.300 is now available on Google Pixel 5 (XL), Pixel 5A, Pixel 4 (XL), Pixel 4a, and other phones running on Android 12 or above.

Google specifically notes that it has added three features, including Night Sight in-camera, Video stabilization modes, and New Zoom buttons.

The Night sight is added to the portrait and camera modes, so you don’t need to switch the modes to get low light.

The Video stabilization mode is used to lock the long videos. You must use it in Active heavy moments. For smooth and panning shots, use Cinematic Pan.

The zoom buttons help to zoom in or out quickly. Tap and hold a zoom button or pinch-zoom to use the full zoom slider.

According to the reports, the Google Camera 8.4 update doesn’t bring all the available features on the new flagships.

For Google Pixel 5 and Pixel 4a, the update brings the Timer Light feature, which can modify exposure. Once you turn on this feature, the flash is used as a countdown to when you take a timer photo. One can disable the exposure option to keep the viewfinder clear.

When you open the camera app for the first time, Google has added a gear next to the chevron symbol. With this, it shows when you swipe down from the top of the screen, it shows options.

The new Manual Controls area in settings lets you enable or disable the “Exposure.” And the “Timer Light” under “Advanced” uses black flash as a countdown. Also, there are features like Magic Eraser, it allows you to remove strangers and unwanted objects from your photos.

You can download the Google Camera 8.4.300 update via the Play Store.

The post Google Camera 8.4 Update Brings New Features to Old Pixel Devices appeared first on TechViral.


from TechViral https://ift.tt/2ZEOjYo

Qualcomm Snapdragon 8 Gen 1 Launched, List of Compatible Phones

Qualcomm Snapdragon 8 Gen 1 Launched, List of Compatible Phones

Qualcomm has just launched a new flagship chipset at the Tech Summit that took place on November 30. The new chipset is Qualcomm Snapdragon 8 Gen 1 will have better performance, battery life, and camera capabilities for improved graphics.

This chipset gets a new name, as there were rumors of calling it the Snapdragon 898. The change will come to other Snapdragons platforms also.

Qualcomm Snapdragon 8 Gen 1 chipset is the successor to the Snapdragon 888 chipset. At the event, many smartphone manufacturers announced their upcoming phones will have this Snapdragon 8 Gen 1 chipset.

New Chipset by Qualcomm Launched, ‘Snapdragon 8 Gen 1’

Qualcomm Snapdragon 8 Gen 1 Launched, List of Compatible Phones

The new Qualcomm chipset brings major improvements over its predecessor, like it offers AI technology, better security, and 5G technology. Snapdragon 8 Gen 1 chip is the first from Qualcomm to have the latest Armv9 architecture from Arm.

The chipset is built on a 4nm process that is smaller than Snapdragon 888’s 5nm process. According to the company, the new chip offers a 20 percent improvement in performance and up to 30 percent more power.

Snapdragon 8 Gen 1 also offers a new GPU control panel, and it also introduces the Qualcomm Snapdragon X65 modem that brings a whole suite of 5G features. This is the fourth generation 5G modem by Qualcomm.

The company promises to bring more high-end camera features, like it brings support for shooting videos in 8K with an HDR 10 plus and shooting in 18-bit RAW. Other improvements are improved dark mode photos that use data up to 30 images in a single shot.

Also, there are better AI processing features like improved autofocus, auto-exposure, and auto-face detection. There is a dedicated “bokeh engine” that adds portrait effects to 4K video and the ultrawide engine that de-wrap and removes chromatic aberrations from photos.

The first smartphone to be powered by Snapdragon 8 Gen 1 is said to come at the end of this year. The Android smartphone manufacturers like Xiaomi, OnePlus, Redmi, Moto Edge series, Oppo, and other devices have confirmed to bring this chipset in their upcoming smartphones.

The post Qualcomm Snapdragon 8 Gen 1 Launched, List of Compatible Phones appeared first on TechViral.


from TechViral https://ift.tt/3rnwlVI

How to Download JW Player Videos (3 Methods)

How to Download JW Player Videos (3 Methods)

You might be visiting hundreds of websites every day. Some websites serve us text-based content, whereas others focus more on images & videos. In this article, we will talk about the videos that you watch on your favorite websites.

Most of the videos you watch on websites rely on specific video player software to serve the videos. With proper video integration tools, video creators can gain insight into how their videos are performing.

One such player is known as JW Player, which is a feature-packed HTML5 online video player. This is an open-source framework designed for embedding videos into websites.

The good thing is that JW Player integrates support for Flash and HTML5 videos, eventually allowing you to stream videos on different platforms. There are times when you might have landed on a website using JW Player to show you the videos. Unfortunately, you can’t download those videos easily as JW Player by default blocks the download option.

It’s pretty difficult to download JW Player videos that are embedded into web pages. You need to be a bit technical to download the videos embedded into web pages. So, if you are looking for ways to download JW Player videos, you have landed on the right page.

3 Best Methods to Download JW Player Videos

In this article, we will share a few best methods to download JW Player Videos on PC.

The methods shared below were easy to follow, but they only work with JW Player, not any other player. Let’s check out.

1. Download JW Player Videos on Chrome

If you use Google Chrome to watch videos, you need to implement some of the simple steps given below. Here’s how to download JW Player Videos on Chrome.

1. First of all, open your Google Chrome web browser ad open the website where the JW Player video is hosted.

2. Right-click anywhere on a blank space and select ‘Inspect’

select 'Inspect Element'

3. Now click on the Network tab, as shown in the screenshot below.

click on the Network tab

4. Now select the Media tab, as shown in the screenshot below.

select the Media tab

5. Now reload the main webpage to allow the inspect element to identify the media. Once done, the network tab will list the media files. Click on the file and select Open in New Tab.

Open in New Tab

6. The video will play on a new tab. You need to right-click on it and select the option ‘Save video as’

'Save video as'

This method will work on every website that relies on JW Player to show you videos. However, you need to use the Google Chrome browser to download the videos.

2. Download JW Player Videos on Firefox Browser

If you use the Firefox browser to visit different websites, you might want to download JW Player videos on Firefox instead of Chrome. Here’s what you need to do.

1. First of all, open the Firefox web browser on your PC. Now visit the webpage containing the video you want to download.

2. Once the page is loaded, click on the padlock icon at the address bar. Now click on the Connection secure.

click on the Connection secure

3. Next, click on the More Information option.

click on the More Information option

3. On the Page info Window, click on the Media tab, as shown below.

click on the Media tab

4. The Media page will show you all video files present on the webpage. Just click on the video you want to download and select the ‘Save As’ option to save the video on your computer.

select the 'Save As' option

This is how you can use JW Player Videos on the Firefox web browser.

3. Download JW Player Videos using Download Managers

As of now, there are hundreds of download manager applications available for PC platforms. You can use any of them to download videos hosted on different websites.

Download JW Player Videos using Download Managers

The first best option is to use Internet Download Manager (IDM). Compared to other download managers, IDM provides better download speed and fetch results. It can easily fetch videos from web pages and can download them at a faster speed.

However, to grab online videos, you need to install the IDM browser integration extension.

The second best option is the FDM (Free Download Manager). It’s a free download manager application available for desktop operating systems. It can also fetch the video download links from various websites.

These are the best methods to download JW Player videos on PC. We are sure that you can easily download the videos served by JW Player with these methods. Still, if the method didn’t work out for you, then using a screen recorder is the last option. If you know of any other methods to download JW Player videos, let us know in the comments below.

The post How to Download JW Player Videos (3 Methods) appeared first on TechViral.


from TechViral https://ift.tt/3o8ZG4c

Elon Musk jokes about whistleblowers with new Tesla product

In recent months, Tesla has faced lawsuits over alleged sexual harassment and racist abuse.

from BBC News - Technology https://ift.tt/3rEi0Vl

Facebook reverses Kyle Rittenhouse search policy

Facebook had blocked searches for the US teen on its platform after he was acquitted of killing two people.

from BBC News - Technology https://ift.tt/3xHhSW3

Twitter will remove images tweeted without consent

Images or videos of private individuals posted without consent could be removed for violating rules.

from BBC News - Technology https://ift.tt/3lq0XlJ

How To Create Custom Stickers in WhatsApp Web

How To Create Custom Stickers in WhatsApp Web

WhatsApp is an instant messaging app that everyone loves to use. The instant messaging app is available for Android, iOS, and desktop operating systems. If you are a regular WhatsApp user, you might know that the app lets you send stickers to express yourself in chats.

Over the years, WhatsApp Stickers have been the most used way to express ourselves on the platform. The instant messaging apps offer you a few built-in stickers, but if you are not satisfied with them, you can create your own WhatsApp stickers by using several third-party apps.

Recently, WhatsApp introduced a new tool for users to create custom stickers on its desktop and web version. So, if you use the WhatsApp web version or the desktop app, you can now create your own custom stickers and use them on the platform.

Steps to Create Custom Stickers in WhatsApp Web

So, if you are interested in creating your own custom stickers on WhatsApp, you are reading the right guide. Below, we have shared a step-by-step guide on creating custom WhatsApp stickers on the web version or Desktop app. Let’s check out.

1. First of all, open your favorite web browser and open the WhatsApp Web.

2. Now, open a chat window where you want to send a custom sticker.


3. Click on the Attachment button as shown in the screenshot below.

Click on the Attachment

4. From the list of options, click on the Sticker.

click on the Sticker


5. Now, WhatsApp web will ask you to select a photo. Just browse the photo and click on the Open button in the file explorer pop-up.

Select the Photo

6. Now, you will see the sticker maker UI of WhatsApp web or desktop. You can use the sticker maker to cut/crop images, rotate images, add texts, use the draw tools to draw over images, etc.

use the sticker maker

7. After making all the changes, click on the Send button to share your custom sticker.

click on the Send button

Important: The feature is right now available only on the WhatsApp Web version. It will take a few weeks to arrive on the desktop version of WhatsApp.

Thanks to the new feature of WhatsApp, users no longer need to rely on third-party sticker maker apps to create stickers. It’s yet to see whether the same feature will be seen on WhatsApp for Android or iOS. So, what’s your take on this? Please share your views with us in the comment box below.

The post How To Create Custom Stickers in WhatsApp Web appeared first on TechViral.


from TechViral https://ift.tt/31jIAIe

10 Best GIF Keyboards for Android To Share GIFs With Ease

10 Best GIF Keyboards for Android To Share GIFs With Ease

GIFs have gained immense popularity on social media networks and instant messaging platforms, as this is something that looks cool.

After the trend of emojis, people have now started sharing GIFs on social networking and instant messaging platforms. The good thing is that now almost all platforms have got native GIF support. On Android, you can use GIF keyboard apps to exchange GIFs.

List of 10 Best GIF Keyboards for Android

There are hundreds of Android GIF keyboard apps available on the Google Play Store. However, not all of them were useful. So, in this article, we will share a list of the best GIF keyboard apps for Android. With these apps, you can share GIFs directly to instant messaging and social networking platforms. Let’s check out the apps.

1. Microsoft SwiftKey

Microsoft SwiftKey

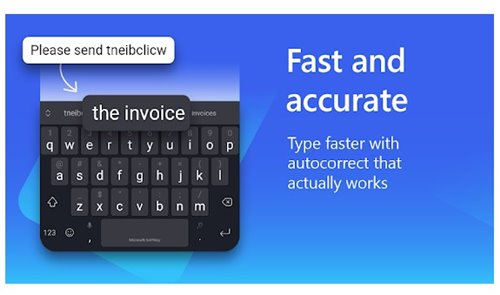
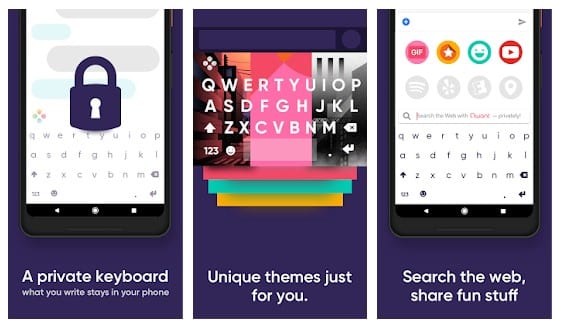
If you are searching for an intelligent keyboard app for your Android device, look no other than Microsoft SwiftKey. From emojis to GIFs, Microsoft SwiftKey has all features that you look for in a keyboard app.

It has a predictive emoji feature that predicts emojis based on what you have typed. Also, you get a dedicated search engine that lets you discover and use GIFs during a chat.

2. Xploree AI Keyboard

Xploree AI Keyboard

Xploree AI Keyboard is a keyboard app for Android that brings many intelligent features to your smartphone. With this app, you can type faster with predictive text and emojis.

It has a dedicated tab for GIFs that lets you search and find awesome GIFs within seconds. You can use those GIFs during a chat on popular instant messaging and social networking apps.

3. Chrooma Keyboard

Chrooma Keyboard

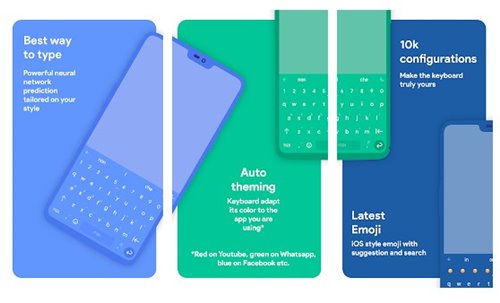
Well, Chrooma Keyboard is a lightweight yet fully customizable keyboard app for Android. The great thing about Chrooma Keyboard is that it adapts the color theme of the app you are using.

Chrooma Keyboard also offers you a dedicated GIF tab to search and send all the GIFs you want. Overall, Chrooma Keyboard is a great GIF keyboard app for Android.

4. Fleksy

Fleksy

Fleksy is a top-rated Android keyboard app available on the Google Play Store. It brings millions of free themes, emojis, and stickers.

If we talk about the features of Fleksy, it offers you an auto-correction, gesture typing, glide typing, and many other useful features. The emoji keyboard of Fleksy automatically suggests you the best emojis as you type.

5. Kika Keyboard

Kika Keyboard

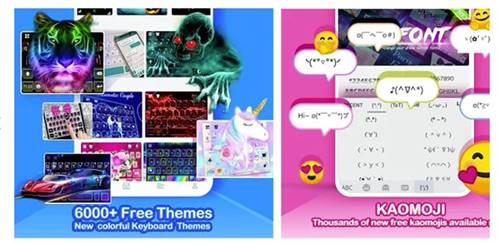
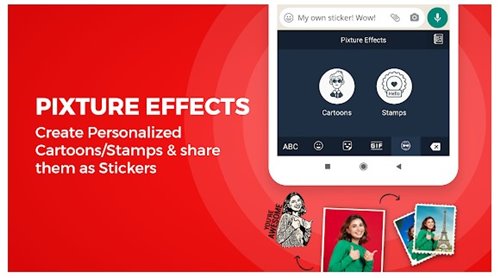
Kika Keyboard is a fully customizable and personalized keyboard app for Android. You can customize almost everything on Kika Keyboard, like the keyboard color, keypress sound, keyboard background image, and more.

If we talk about the emoji & GIF features, the app offers you hundreds of emojis & GIFs that you can use on instant messaging apps, social networking platforms, and more.

6. Ginger

Ginger

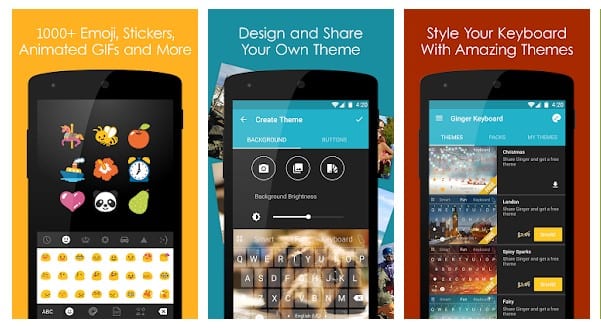
This keyboard app has some great features regarding text messaging, i.e., grammar and spell-check. As you type, the Ginger keyboard automatically corrects your spelling mistakes.

Also, the keyboard app allows you to express yourself with over 1000+ beautiful emojis. It also has an emoji prediction feature that suggests relevant emojis based on typing.

7. Go Keyboard Pro

Go Keyboard Pro

GO Keyboard is by far the best and most unique keyboard app for Android. Guess what? GO Keyboard brings hundreds of cute emojis, themes, and GIFs that you can use while typing.

The emoji prediction feature of GO Keyboard offers a precise prediction of your emoji search. Apart from that, GO Keyboard also offers you gesture typing, auto-correction features.

8. Giphy

GIPHY

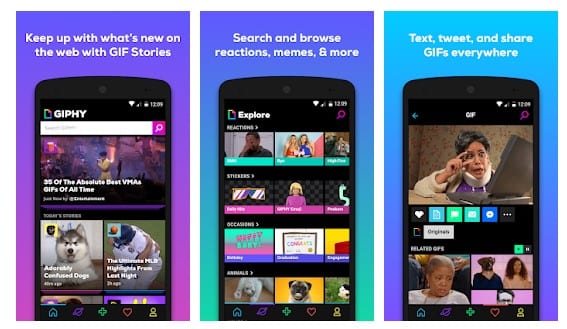
It is another great app that you will surely love to try on your android mobile. The world’s largest library of animated GIFs, now on your mobile phone! GIPHY for Android is the fastest, simplest way to search and share GIFs across all of your favorite social channels.
Faster than ever, but still wicked easy.

9. Gboard

Gboard

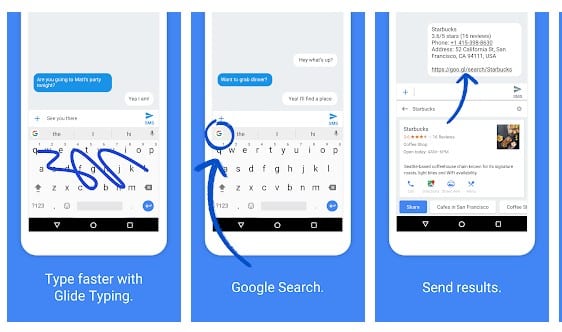
Gboard, also known as Google Keyboard, is one of the best keyboard app available on the Google Play store. The keyboard app for Android houses almost every keyboard feature that you need.

The keyboard app comes pre-loaded with tons of smileys and GIFs. There’s also a GIF search option which you can use to search for new Gifs.

10. Facemoji Emoji Keyboard

Facemoji Emoji Keyboard

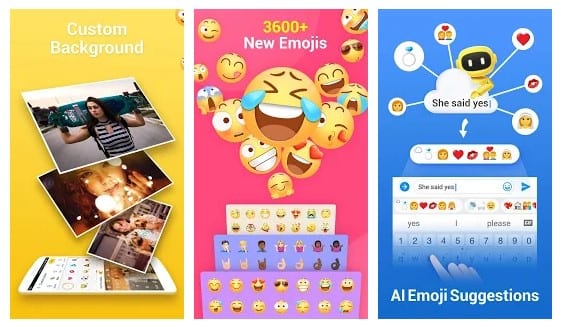
Facemoji Emoji Keyboard is another best one on the list, with lots of unique features. You won’t believe that Facemoji Emoji Keyboard for Android packs over 3500 emoticons, GIFs, stickers, and symbols, which you can use.

The app is compatible with FB messenger and WhatsApp, which means you can use all those emoticons and GIFs on social media platforms.

We are pretty sure that these keyboard apps will sort out all your GIF-related needs. You can also use these GIF Keyboard apps on your Android to discover trending GIFs. If you know any other such keyboard apps for Android, let us know in the comment box below.

The post 10 Best GIF Keyboards for Android To Share GIFs With Ease appeared first on TechViral.


from TechViral https://ift.tt/2qHWFJ4

UK competition watchdog orders Meta to sell Giphy

The CMA rules Facebook's purchase of the vast Gif database unfair to competing social-media platforms.

from BBC News - Technology https://ift.tt/3o4dAEW

E-scooters in London: Met Police warn retailers not to exploit customers at Christmas

Thousands of e-scooters ridden illegally have been seized by police in London so far this year.

from BBC News - Technology https://ift.tt/3E7zQ69

Parag Agrawal: India celebrates new Twitter CEO

Parag Agrawal's appointment has made headlines in India where Twitter has over 30 million users.

from BBC News - Technology https://ift.tt/3EcOysL

Xbox Cloud Gaming gets Clarity Boost Feature on Edge Browser

Xbox Cloud Gaming gets Clarity Boost Feature on Edge Browser

Microsoft has announced a new Clarity Boost feature exclusive to Xbox Cloud gaming. This new feature for xCloud improves the video quality of your game stream.

However, the Clarity Boost is available only on the Microsoft Edge browser. Microsoft’s Xbox Cloud Gaming has done a partnership with the Microsoft Edge team to improve the user’s experience with optimizations and provide the optimal look while playing the games.

In the Edge browser, you can only stream Netflix in 1080p, and now a similar feature is available for Edge and Xbox Cloud Gaming.

Microsoft Clarity Boost Feature for Xbox Cloud Gaming Available on Edge

Xbox Cloud Gaming gets Clarity Boost Feature on Edge Browser

In a blog post, Microsoft has announced the Clarity Boost feature. It says Clarity Boost “uses a set of client-side scaling improvements to improve the visual quality of the video stream.”

The Clarity Boost makes improvements to images and all over other details. Currently, the feature is available for free via the Microsoft Edge Canary browser. It is a version that is used for testing new features, additions, and changes.

However, the Clarity Boost will be available to all Edge users by next year (2022). This means you don’t need to wait for a long time.

If you want to try it now, then you can use the feature by installing Microsoft Edge Canary. Follow the steps to try the Clarity Boost on the Edge browser.

1. First, Download the Microsoft Edge Canary on your system.

2. Confirm that you are in the edge canary; for that, navigate to edge://settings/help to make sure you are on version 96.0.1033.0 or later.

3. Now, enable Clarity Boost by visiting www.xbox.com/play, login, and start a game.

4. Open the More options menu.

5. Select the Enable Boost Clarity Option.

Xbox Cloud Gaming support was rolled out to a few compatible Xbox consoles in selected regions. However, to get access to Xbox Cloud Gaming, you will need an Xbox Game Pass Ultimate subscription.

The post Xbox Cloud Gaming gets Clarity Boost Feature on Edge Browser appeared first on TechViral.


from TechViral https://ift.tt/3xCKjUL

How to Add Music to Instagram Posts (2 Methods)

How to Add Music to Instagram Posts

Being introduced as a photo-sharing platform, Instagram is now gearing up for the videos. Instagram is no longer considered a photo-sharing app as it allows you to share shorter forms of videos as well.

Instagram also has a TikTok type feature known as Reels. You can watch endless hours of short videos on Instagram reels. We are talking about Instagram because the company is now testing the possibility of adding music to the feed posts.

Yes, you read that right! You can now add music to Instagram Posts on your account. So, if you are interested in adding music to your Instagram feed post, you need to follow the simple guide shared below.

Please note that Instagram is testing the new feature in India, Brazil, and Turkey. However, the feature is rolling out slowly to selected users only. That means, even if you are in one of the mentioned regions, you may not find the feature immediately.

2 Methods to Add Music to Instagram Posts

If you are unable to find the new feature on your Instagram, you can use a third-party app that we have mentioned in this article. So, let’s check out.

1) Add Music to Instagram Directly

1. First of all, open Instagram on your Android/iOS device. Now tap on the (+) icon to create a new Instagram Post.

tap on the (+) icon

2. Pick the image that you want to share. After selecting the filters and editing the image, you will see a new Add Music option.

Add Music

3. Tap on the Add Music option to find all trending songs. Just pick a song and select the portion of a song you want to include.

pick a song and select the portion of a song

4. If you are not interested in the curated songs, you can select the Browse tab to discover new music to use in your Instagram post.

select the Browse tab

5. Finally, share the image to your Instagram feed. The post will appear on your follower’s feed with the music. Yes, they can mute the music by tapping the speaker icon on the bottom of the screen.

Image with music

That’s it! You are done. This is how you can add music to your Instagram Post.

2) Using VN Editor

Well, VN Editor is a free HD video editor and video maker with all pro features. You can use this application to create videos with music.

Not only that, but you can even share your videos directly to Instagram, Snapchat, Musically, TikTok, etc.

You need to install the app, create a new project, select the images, and add the music of your choice. Once done, save the image to your Gallery or share it directly to Instagram.

VN Editor for Android & iOS

So, this guide is all about how to add music to Instagram posts. I hope this article helped you! Please share it with your friends also. If you have any doubts related to this, let us know in the comment box below.

The post How to Add Music to Instagram Posts (2 Methods) appeared first on TechViral.


from TechViral https://ift.tt/3diKv2t

MI6 must adapt to new technology to survive, says spy chief

Richard Moore says the secret service must partner with the private sector to find new technologies.

from BBC News - Technology https://ift.tt/3I8X9zg

Semi-automated offsides trialled at Fifa Arab Cup and could be used at 2022 World Cup

The use of technology to help officials make more accurate offside decisions will be tested at the Fifa Arab Cup, which starts on Tuesday.

from BBC News - Technology https://ift.tt/3E3Ulkv

Why broken African phones are shipped to Europe

A lack of recycling facilities in Africa has spurred one Dutch company to import broken phones.

from BBC News - Technology https://ift.tt/3E5Gmug

Monday, November 29, 2021

Amazon: Union election to be rerun after claims of foul play

Amazon workers in the US state will get a second chance to unionise in a major blow to the online giant.

from BBC News - Technology https://ift.tt/3lnjFKV

Jack Dorsey: What's next for Twitter's co-founder?

The last time the tech visionary left Twitter, he set up another company now worth $100bn.

from BBC News - Technology https://ift.tt/3o7LTet

Facial recognition firm faces possible £17m privacy fine

Clearview AI allegedly breached privacy rules and must now delete relevant photos from its records.

from BBC News - Technology https://ift.tt/31fozT3

Download Dr.Web Live Disk Latest Version for PC (ISO File)

Download Dr.Web Live Disk Latest Version for PC (ISO File)

In this digital world, security threats are always on the rise. Every now and then, we get introduced to new security threats by security researchers. To deal with security threats, Microsoft now includes a built-in antivirus program.

The built-in Windows security is good, but it can’t protect your computer when viruses/malware get hold of your system entirely. Some advanced threats can even bypass your security solution and reside on your PC forever.

So, if your PC is infected and unable to access your files, you need to use Antivirus Rescue Disks. In this article, we will talk about the best Antivirus Rescue disk known as Dr. Web Live Disk.

What is Dr.Web Live Disk?

What is Dr.Web Live Disk?

Dr.Web Live Disk is a program designed to run from a USB drive or CD/DVD. This program serves as an emergency kit that can run from portable devices.

Dr.Web Live Disk is designed to recover access to your computer & files after a malware attack. Since some malware modifies the startup entries and blocks the boot option, you can use Dr.Web Live Disk to access your system.

How Dr.Web Live Disk is different from Antivirus

How Dr.Web Live Disk is different from Antivirus

Well, Dr.Web Live Disk is a bootable media with a Linux-based portable operating system. The portable operating system comes with pre-installed software to perform full antivirus scans of your computer.

After running a full scan, Dr.Web Live Disk neutralizes detected threats and allows you to regain access to your system and files. However, using Dr.Web Live Disk could be a complicated process because you need to create a bootable media with it.

On the other hand, regular Antivirus programs run on your system in the background. Antivirus programs provide you with real-time protection against malware and other types of security threats.

Another thing that users should note is that Dr.Web Live Disk is available for free. That means anyone can download & install the live disk for free.

Download Dr.Web Live Disk for PC (ISO Files)

Download Dr.Web Live Disk for PC

Now that you are aware of Dr.Web Live Disk, you might want to download the program on your PC. Please note that Dr.Web Live Disk is a part of an antivirus suite.

That means if you are using the premium version of Dr.Web Antivirus, you will already have the Dr.Web Live Disk ISO file.

You just need to create a bootable flash drive, update the virus databases on your bootable flash drive, and run a full virus scan.

However, if you just want to use Dr.Web Live Disk, you can use the standalone installer. Below, we have shared the latest version of Dr.Web Live Disk. These are the ISO image file, and hence they need to be burned in a flash drive or CD/DVD.

How to Install Dr.Web Live Disk?

Well, installing Dr.Web Live Disk is a complicated process. First of all, you need to download the Dr.Web Live Disk ISO files that we have shared above.

Once downloaded, you need to create a USB Bootable Dr.Web Live Disk. Next, you need to flash the ISO file on a USB device like Pendrive or External HDD/SSD.

Once flashed, you need to run Dr.Web Live Disk from the Boot menu. Next, boot with the Dr.Web Live Disk, and you will get the option to update the virus databases.

Once updated, you will get the option to run a full system scan. The scan might take a few minutes to complete. That’s it! You are done. This is how you can install Dr.Web Live Disk on a PC.

So, this guide is all about downloading Dr.Web Live Disk ISO files. I hope this article helped you! Please share it with your friends also. If you have any doubts related to this, let us know in the comment box below.

The post Download Dr.Web Live Disk Latest Version for PC (ISO File) appeared first on TechViral.


from TechViral https://ift.tt/3o16aCi

How to Setup & Use Call Recording Feature on TrueCaller

How to Setup & Use Call Recording Feature on TrueCaller

As of now, there are hundreds of caller ID apps available for Android smartphones. However, not all of them stand out from the crowd. Therefore, if we have to pick the best caller ID app for Android, we would pick TrueCaller without hesitation.

TrueCaller is right now the most popular caller and caller identification app available for Android smartphones. It has both free and premium plans – The premium plan offers some advanced features, whereas the free version is limited to call identifications and management.

We are talking about TrueCaller because the company has recently launched a new call recording feature for those who have a basic account. Before this, the call recording feature is only available for TrueCaller Premium users.

After the new update, those using the free version of TrueCaller can record calls on their smartphone. However, the only criteria are that the smartphone should be running on Android 5.1 and above.

You can use TrueCaller to record calls manually and set the app to record all calls automatically. So, if you are interested in setting up an auto record for calls on TrueCaller, you are reading the right guide.

Also read: How To Get Truecaller Premium for Free

Steps to Setup & Use Call Recording Feature on TrueCaller

This article will share a step-by-step guide on setting up an auto-record for calls on TrueCaller for Android. Let’s check out.

1. First of all, head to the Google Play Store and install the latest version of TrueCaller.

install the latest version of TrueCaller

2. Now, open your Android app drawer and tap on Accessibility.

tap on Accessibility

3. Under Accessibility, find the TrueCaller Call Recording feature under the Downloaded Apps section.

Downloaded Apps

4. Tap on the TrueCaller Call Recording and enable it on the next screen.

TrueCaller Call Recording

5. Now, open the TrueCaller application and tap on the hamburger menu.

tap on the hamburger menu

6. Find the Call Recording option and enable the option. You will also find an auto-record option. You can turn on the option if you wish.

That’s it! You are done. This is how you can set up an auto-record for calls on TrueCaller.

So, this guide is all about setting up and using the call recording feature on TrueCaller. I hope this article helped you! Please share it with your friends also. If you have any doubts related to this, let us know in the comment box below.

The post How to Setup & Use Call Recording Feature on TrueCaller appeared first on TechViral.


from TechViral https://ift.tt/3rkSMuD

Twitter founder Jack Dorsey steps down as chief executive

The founder and chief executive will step down from leading the company.

from BBC News - Technology https://ift.tt/3D5mKVZ

China surveillance of journalists to use 'traffic-light' system

Documents detail how one province is making a facial-recognition system to spot "people of concern".

from BBC News - Technology https://ift.tt/3cZIhF2

Shazam Alternatives: 10 Best Music Identification Apps For Android

Shazam Alternatives: 10 Best Music Identification Apps For Android

We are pretty sure that once in your lifetime, you might have come across a song that might be playing on a radio or at a cloud, but you can’t remember the name or the lyrics. Let’s admit, this happens to everyone, and we have no other left apart from guessing the song’s words.

However, if you are using an Android smartphone, you can identify the playing song quite easily. Many Android song identifier apps available on the Google Play Store can instantly detect songs playing around you. One of those apps is Shazam, and it’s right now the most popular Android song identifier app available on the Google Play Store.

However, just like all other music identification apps, Shazam also got a few drawbacks, like it packs so many features that can confuse lots of people. You might not even find all those features useful to start with. That’s why lots of people search for Shazam alternatives. In this article, we have decided to share a list of the best Shazam alternatives for Android.

Also Read: 10 Best Offline Music Apps For Android

Shazam Alternatives: 10 Best Music Identification Apps For Android

Below, we will share some of the best song identifier apps that are easy-to-use and can detect almost all songs or music.

1. Musixmatch

Musixmatch

Musixmatch is one of the leading song identifier app available on the Google Play Store. Guess what? Musixmatch is on the list of best Shazam alternatives for a reason, and that’s because of its easy to use interface and feature.

The app is straightforward to use, and the song identifier covers almost all popular songs & music. The latest version of Musixmatch also adds a real-time notification to display the floating lyrics widget on the home screen.

2. SoundHound

SoundHound

SoundHound is right now the biggest rival of Shazam, and it offers users lots of unique features. Guess what? You can also use voice commands to get the song name with SoundHound.

Users need to say, ‘Ok Hound, what’s the song?’ and the app will recognize the song playing around you. What makes the app more interesting is that it also shows the lyrics of the identified songs.

3. BeatFind

BeatFind

Beatfind is an extremely easy to use Android app to identify the music playing around you. It identifies the songs and offers you other options to the recognized song like the artist name, other tracks from the song artist, etc.

After identifying a song, it lets you listen to the whole song on Spotify, Deezer, YouTube Streaming, etc.

4. MusicID

MusicID

MusicID is pretty much similar to the Beatfind that has been listed just above. With MusicID, you can quickly identify the music and songs playing around you.

Once identified, MusicID also shows you similar songs from the same artist. The user interface of the app is good, but the latest version has a few bugs.

5. Genius

Genius

According to the Play Store listing, Genius is the world’s biggest collection of song lyrics and crowdsources musical knowledge.

Genius is never known as a song identifier, but it can help you find lyrics for the song playing around you. So, if you get the lyrics right, you can quickly identify the song.

6. Music Finder

Music Finder

Music Finder is another best Android app that you can use to detect the song playing around you. Although the app is not popular enough, it’s straightforward to use and quite powerful. The app can detect almost all songs playing in the background.

Once detected, it shows additional information about the detected songs like Band name, Artist name, Song name, etc.

7. Music Identification

Music Identification

As you might have guessed with the name, Music Identification is an Android app that recognizes the title and artist name of the music playing around you. It uses Gracenote’s music recognition database to identify the songs. However, it can only recognize popular songs.

8. Song Key Finder

Song Key Finder

If you have just listened to a song, and want to know what key the song is in, then Song Key Finder might be the best pick for you. The app helps you identify the key of a song in several ways.

You can use it to analyze live music via the microphone or analyse a local audio file on your device.

9. QuickLyric

QuickLyric

QuickLyric is not exactly a music identification app, but it shows you the song’s lyrics playing around you. After viewing the lyrics, you can quickly identify the song playing around you.

It’s one of the fastest lyrics finder app available on the Play Store. Once installed on a device, it shows a floating window displaying the lyrics without interrupting what you are doing.

10. Song Recognition & Detector

Song Recognition & Detector

Although not famous, Song Recognition & Detector is still one of the best music finder apps you can use today. The free app will show you what song is playing around you.

It reveals the song name with just a tap of a button. Also, the app is extremely lightweight, and it doesn’t slow down your device.

So, these are the ten best Shazam Alternatives that you can use on your Android smartphone. If you know of any other such apps, let us know in the comment box below. I hope this article helped you! Please share it with your friends also.

The post Shazam Alternatives: 10 Best Music Identification Apps For Android appeared first on TechViral.


from TechViral https://ift.tt/2O5ukI0