You might be using Windows 10 for a while, but that doesn’t mean that you have discovered everything it has to offer. Windows 10 offers users lots of features, but most remain undiscovered. This article will talk about a hidden feature of Windows 10 that would allow you to record your screen.
To record the screen on Windows 10, users generally need to install third-party software. However, what if I tell you that you can record the Windows 10 screen without installing any additional software? Windows 10 has a hidden screen recording tool built into the Game Bar.
The screen recording tool is specially designed for gamers who want to record their gameplay videos. This article will share a working method that would help you record Windows 10 screens easily. So, let’s check out how to Record a screen in Windows 10 without using any software.
Also Read: 10 Best Encryption Software For Windows
Steps To Record Screen In Windows 10
The method is straightforward, and you need to use some shortcut keys on your keyboard. Windows 10 will display the game bar you will use to record the screen. So follow the complete steps below.
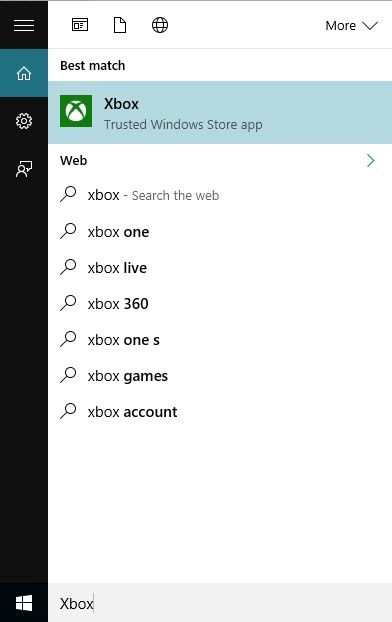
1. First of all, in your Windows 10, click on the Start button and type Xbox. Next, open the Xbox app.
2. Now, you have to press Windows Key + G button on the screen you want to record. As soon as you press this key combination, a popup will appear, asking you if it is a game? Simple click on Yes, it is a game.
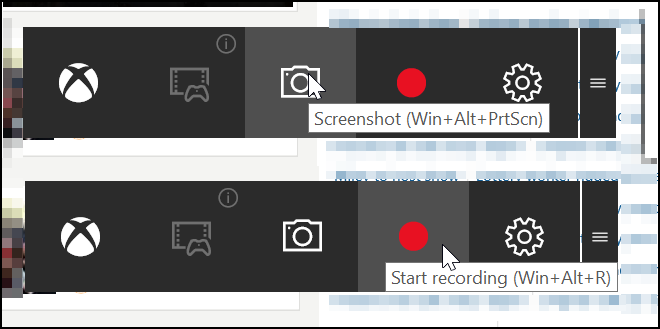
3. Now, you will see a few options: Screenshot, Start Recording, and Settings.
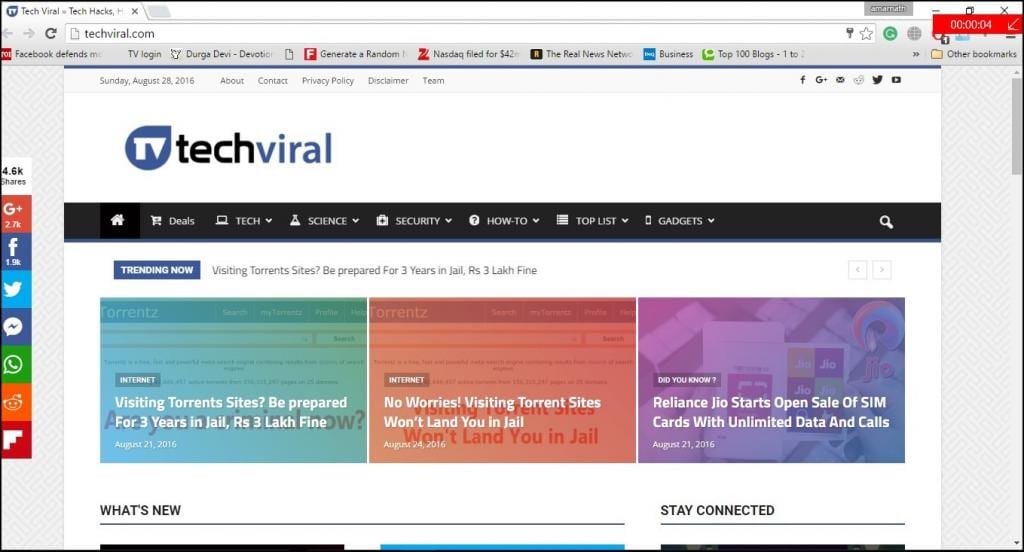
4. Now select the Start recording button, and the recording will get started, and you can stop recording when you are done.
By default, all your recordings get saved to the folder
“C/Users/Videos/Captures“.
That’s it! You can easily record the screen with the Xbox Game bar on Windows 10. You can also capture screenshots with the same tool.
Using VLC Media Player
With the VLC Media player, you can record the screen easily. You can use this method in Windows 7, 8, 10, and even Windows 11. Here’s how to record screen using VLC Media Player.
1. First, download and install VLC Media Player on your Windows computer if you don’t have one.
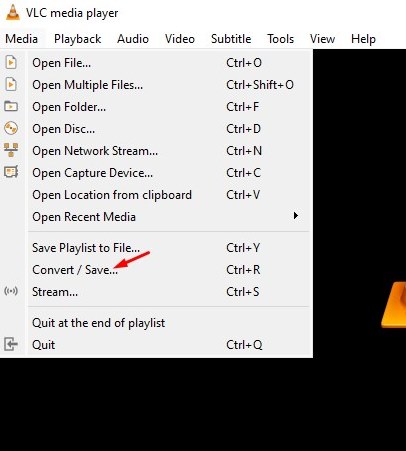
2. Next, click on the Media tab and select the Convert / Save option.
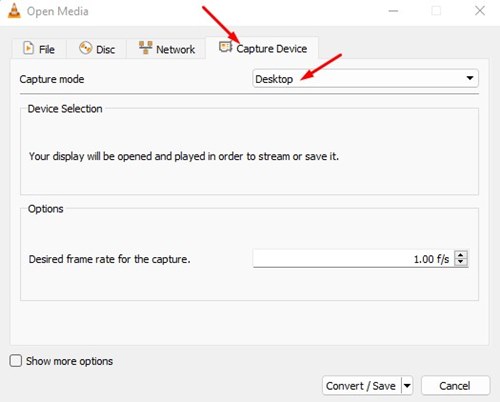
3. Now switch to the Capture Device, and on the Capture mode, select Desktop.
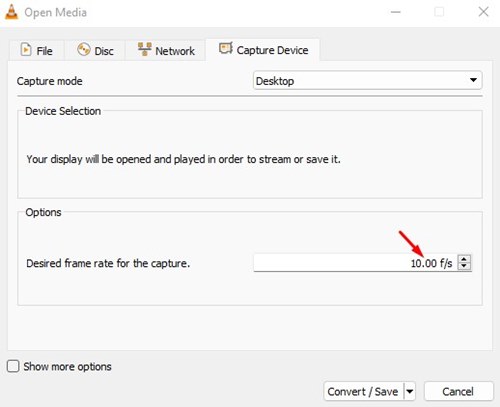
4. On the Desired frame rate for the capture, set your desired frame rate. 10f/s is recommended.
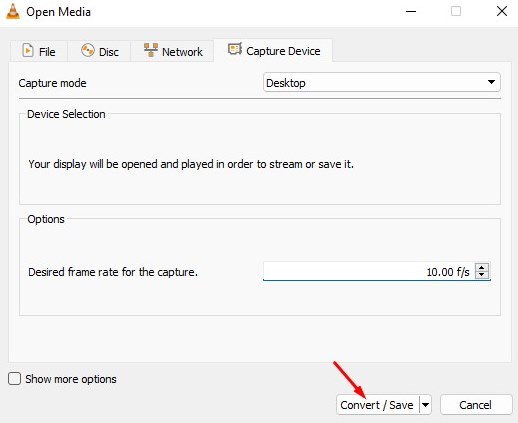
5. Once done, click on the Convert / Save button at the bottom of the Window.
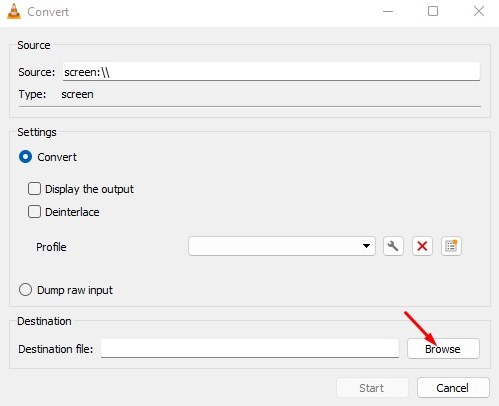
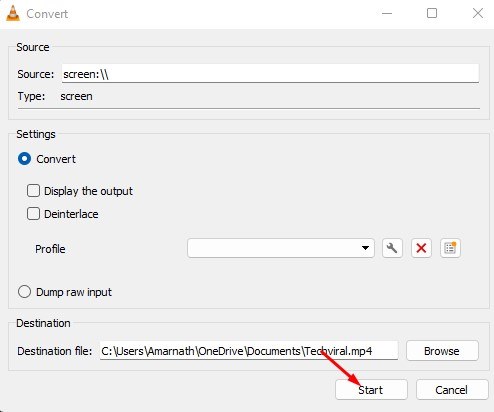
6. On the Convert Window, click on the browse button, select the filename and save location.
7. Once done, click on the Start button.
That’s it! You are done. Now the screen recording will start. You can now control the screen recording from the VLC’s interface.
That’s it! You are done. This VLC media player method works with every Windows version. You don’t need any additional software to record your desktop screen.
So, this is all about Windows 10 screen recording. We have shared the two best methods to record Windows 10 screen. If you don’t want to go through all hassle and want a straightforward way to record Windows 10 screen, you need to visit our article Best Screen Recording Software.
The post How To Record Screen In Windows 10 in 2022 (Without Any Software) appeared first on Tech Viral.
from Tech Viral https://ift.tt/mkVcqyY


No comments:
Post a Comment