While making certain changes to the system settings on Windows 11, you might have come across UAC prompt asking you to confirm the action. The UAC prompt appears when you try to do something that requires administrative privileges.
Yes, you can disable UAC prompts on Windows 11, but it’s not a good option as doing so will invite many security risks. The other option is to enable the Administrator account on Windows 11, which will bypass the UAC prompts.
However, before enabling the administrator account on Windows 11, you first need to check whether you already have administrator rights in Windows 11 or not. While the administrator account on Windows 11 needs to be enabled manually, still it’s best to check whether the admin account is already enabled.
3 Ways to Check If You Have Administrator Rights in Windows 11
Hence, if you are interested in checking if you have administrator rights on Windows 11, you have landed on the right page. Here we have shared four different methods to check if you have Admin rights on Windows 11. Let’s check out.
1) Check Account type via Settings
In this method, we will use the Windows 11’s Setting app to check if the user account is an administrator account. Here are some of the simple steps you need to follow.
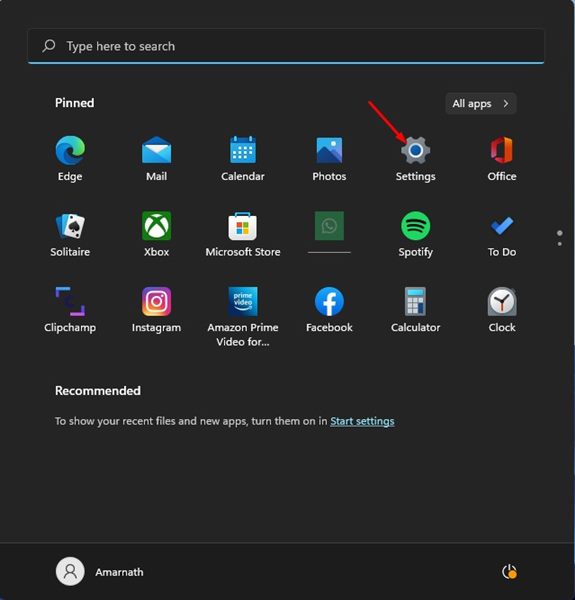
1. First of all, click on the Windows 11 Start menu and select Settings.
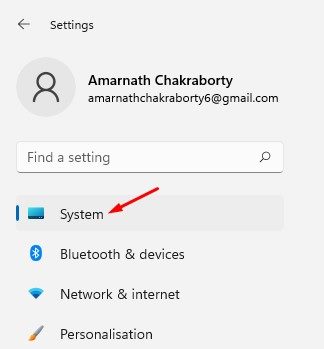
2. On the Settings app, switch to the System tab as shown below.
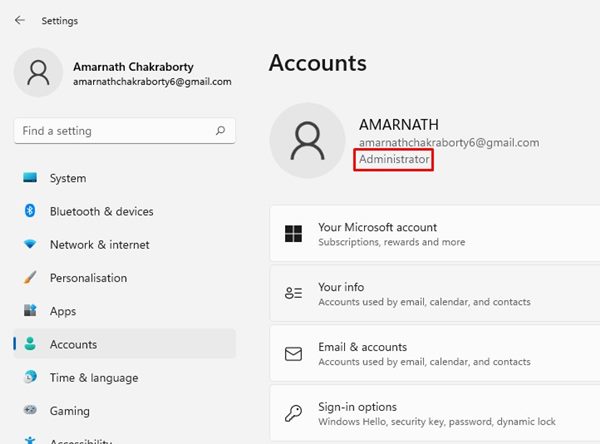
3. On the right pane, you will see the user account detail. If the ‘Administrator’ text appears, it indicates you are using an administrator account.
That’s it! You are done. This is how you can check if you have admin rights in Windows 11 via Settings.
2) Check if you have admin rights via Control Panel
In this method, we will use the Control Panel to check if the user account is an administrator account. Follow some of the simple steps that we have shared below.
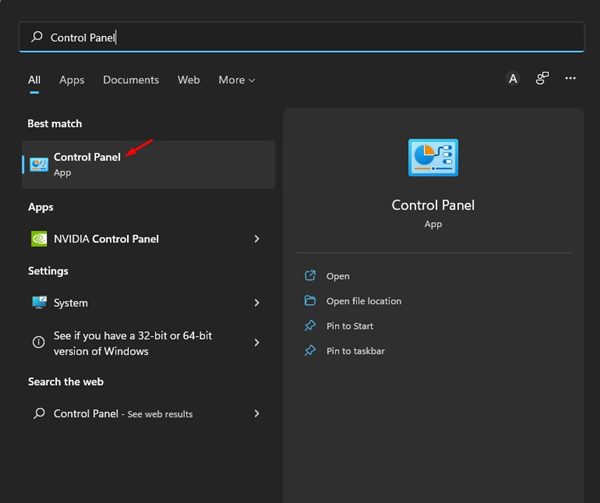
1. First of all, click on the Windows 11 search and type in Control Panel. Open Control Panel from the list of options.
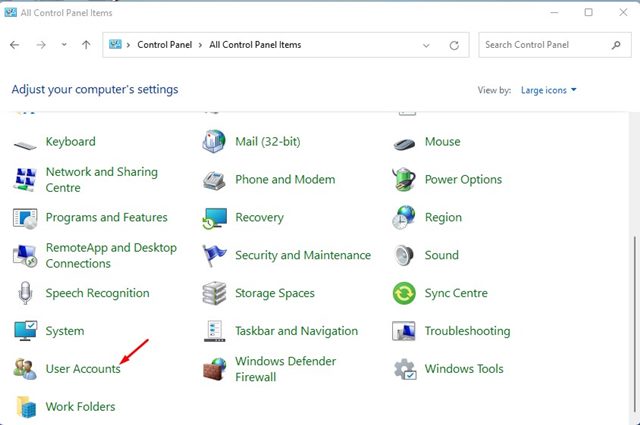
2. On the Control pane, click on the User Accounts.
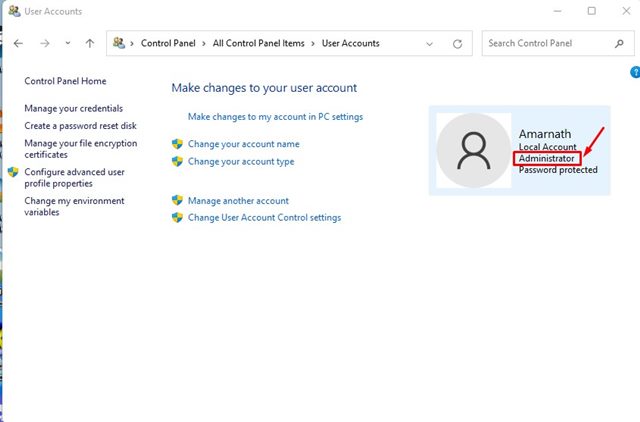
3. On the User Accounts page, look at the right side. If your account is an admin account, you will see the ‘Administrator’ text below the user account name.
That’s it! This is how you can check if you have administrator rights in Windows 11 via the Control Panel utility.
3) Check if your Windows 11 Account is an Administrator account via CMD
We will utilize the Command Prompt utility to check if Windows 11 account is an administrator account in this method. Here are some of the simple steps you need to follow.
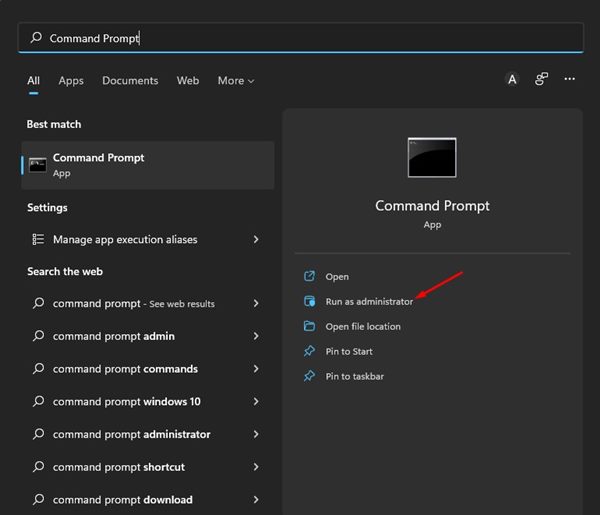
1. First of all, click on the Windows 11 search and type in Command Prompt.
2. Right-click on the Command Prompt, and select Run as administrator.
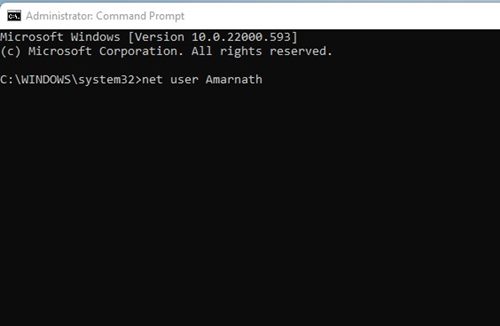
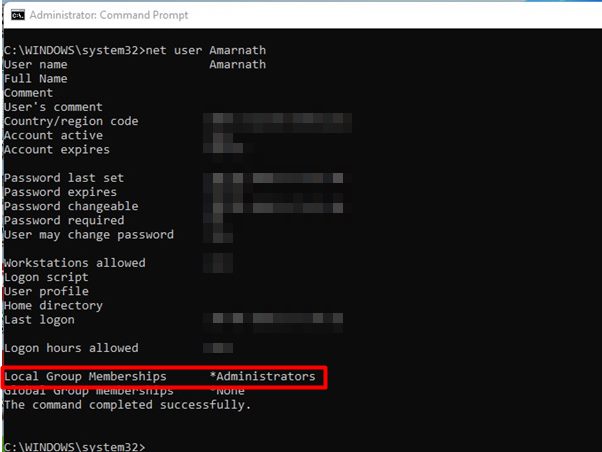
3. On the Command Prompt, type in net user accountname and hit Enter.
Note: Replace the accountname with your account name. For example, “net user techviral“.
4. The command prompt will display much information. You need to check the Local Group Memberships field to check the account type. If the Local Group Membership status shows *Administrators, your current account has admin rights.
That’s it! You are done. This is how you can check if you have administrator rights in Windows 11 via Command Prompt.
These are the few best methods to help you check if your user account is an administrator account. If you are using a standard account, and wish to enable the administrator account.
The post How to Check If You Have Administrator Rights in Windows 11 appeared first on Tech Viral.
from Tech Viral https://ift.tt/3Vl27SL
No comments:
Post a Comment