If you have high-speed internet and use Windows 11, the operating system will always play videos in higher resolution. You can stream videos in higher resolution as long as you have plenty of bandwidth left on your internet plan.
However, if you have limited internet bandwidth or use mobile data for internet connectivity on Windows, you may want to save the network bandwidth as much as possible.
Windows 11 has a feature that lets you save network bandwidth by playing video at a lower resolution. Windows 11 will force apps to play videos at a lower resolution if you enable this feature.
How to Change Video Playback Settings to Save Internet in Windows 11
So, if you are interested in changing the video playback settings on Windows 11 to save internet bandwidth, you have landed on the right page. In this article, we will share a step-by-step guide on how to change video playback settings to save network bandwidth in Windows 11. Let’s check out.
Important: Not every app and the game will follow the new video playback rule. Only the Universal Windows Platform (UWP) apps such as Edge browser, Photos, Movies & TV, and video apps downloaded from the Microsoft Store will follow the new video playback rule.
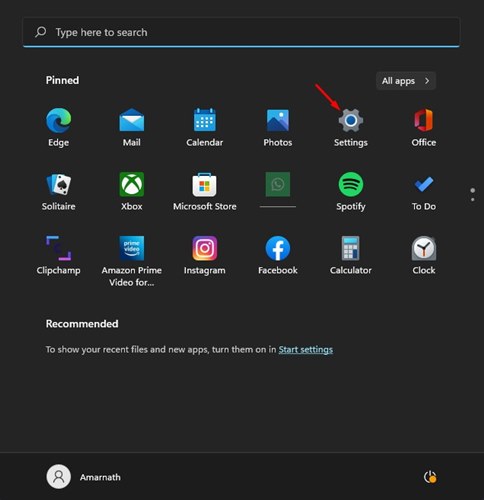
1. First of all, click on the Windows 11 Start button and select Settings.
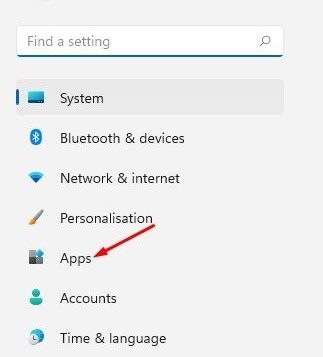
2. On the Settings app, click on the Apps option located on the left pane.
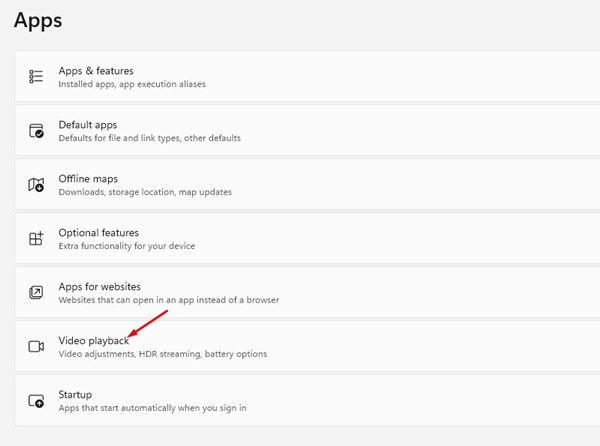
3. On the right pane, click on the Video Playback option below.
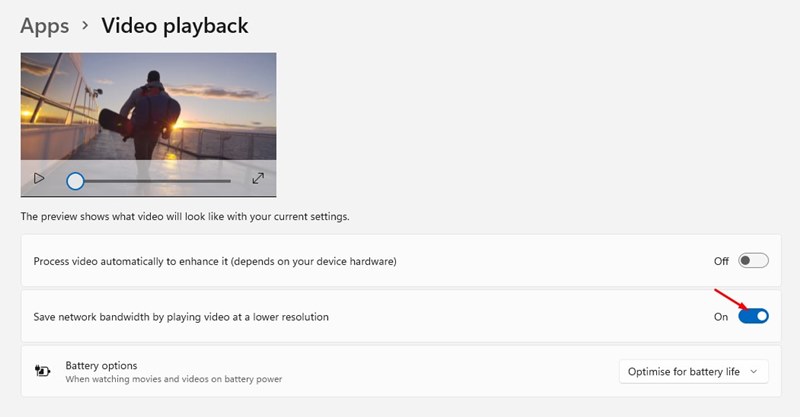
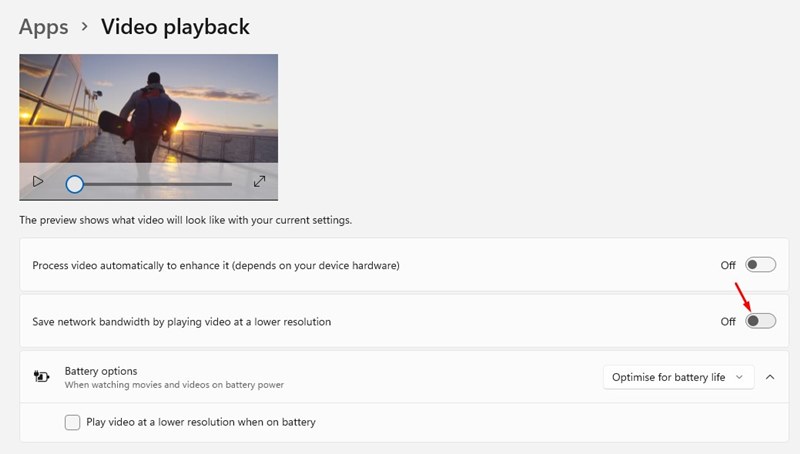
4. On the Video Playback page, scroll down and enable the toggle for Save network bandwidth by playing video at a lower resolution.
That’s it! You can change the video playback settings on Windows 11 to save network bandwidth. You are done.
How to Disable the Video Playback optimizations
If you don’t want apps and games to play videos in lower resolution, you need to turn off this feature. To disable the Video playback optimizations, you need to follow some simple steps shared below.
1. First of all, click on the Windows Key and select Settings.
2. On the Settings app, navigate to the Apps > Video Playback.
3. Scroll down and disable the toggle for Save network bandwidth by playing video at a lower resolution on the right pane.
That’s it! You are done. This will restore the default video playback settings on Windows 11.
Also Read: How to Change Playback Settings to Enhance Videos in Windows 11
So, this is how you can change the video playback settings to save internet bandwidth in Windows 11. I hope this article helped you! Please share it with your friends also. If you have any doubts about this, let us know in the comment box below.
The post How to Change Video Playback Settings to Save Internet in Windows 11 appeared first on Tech Viral.
from Tech Viral https://ift.tt/UK5joWV
No comments:
Post a Comment