While using Windows 11, many users have reported the Yellow tint issue on display. If you are experiencing the same issue, you have come to the right place. In this article, we will talk about why a yellow tint appears on the Windows 11 screen and how it can be fixed.
The yellow tint issue on Windows 11 is a pretty common problem, but it can be alarming for some since viewing anything outside the normal on display can be scary. Yes, there are probabilities of hardware problems, but most of the time, the Yellow tint issue occurs due to software-based problems.
So, if you often encounter a Yellow Tint issue on Windows 11 screen, you need to look at a few things to resolve the issue. The problem usually appears when a 3rd party program interferes with the display settings. It also appears due to bugs or glitches in the software or hardware.
How to Fix Yellow Tint Issue on Windows 11 Screen
Whatever might be the reason, the Yellow tint issue on Windows 11 screen can be fixed in easy steps. Hence, this article will share a few best methods to resolve the Yellow Tint issue on Windows 11 screen. Let’s check out.
1) Turn off the Night Light
Night Light on Windows 11 is basically an eye protection feature that filters out harmful blue light emitted from your PC screen. It applies a warmer color to your screen, and the tone is yellowish in color.
So, if you are experiencing a Yellow tint on your display all of a sudden, you need to turn off the Night Light feature. To disable Night light on Windows 11, follow some simple steps we have shared below.
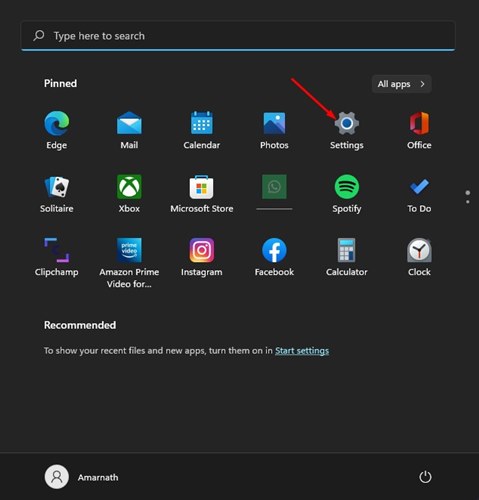
1. First of all, click on the Windows 11 Start button and select Settings.
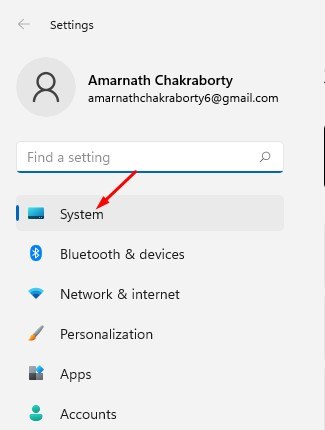
2. On the Settings app, click on the System option as shown below.
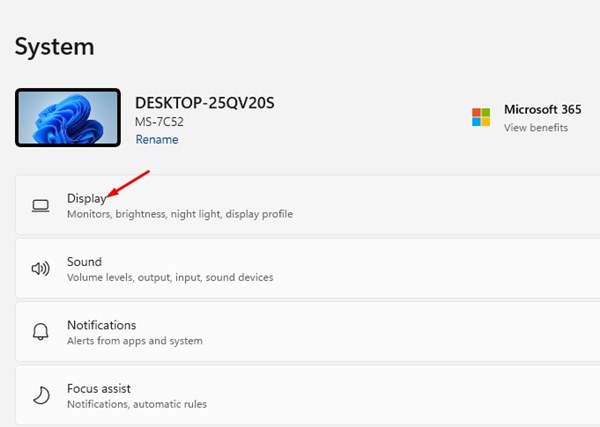
3. On the right pane, click on the Display.
4. On the Display, scroll down to the Brightness & color option and turn off the Night Light.
That’s it! You are done. If the Yellow tint is appearing due to Night light, it will be fixed immediately.
2) Change the Color Profile
In this method, we will use the Windows 11 Control panel to change the color profile. Follow some of the simple steps shared below.
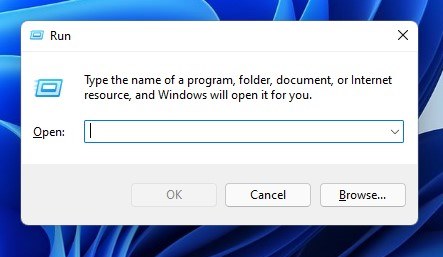
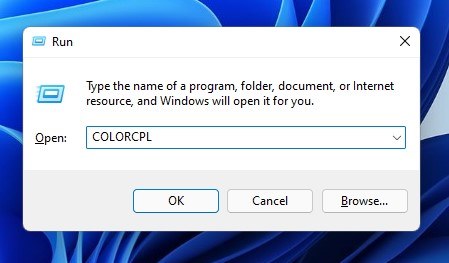
1. First of all, press the Windows Key + R button to open the Run Dialog box.
2. On the RUN dialog box, enter COLORCPL and hit the Enter button.
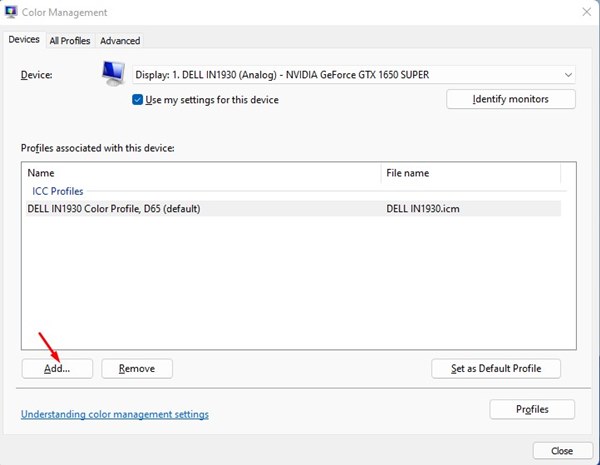
3. This will open the Color Management Window. Here you need to switch to the Devices tab.
4. Under the Device, select your monitor and click on the ‘Add..’ button at the bottom of the screen.
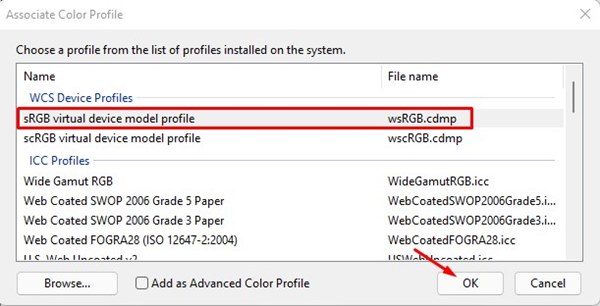
5. On the Associate Color Profile Window, select the sRGB virtual device model profile and click on the Ok button.
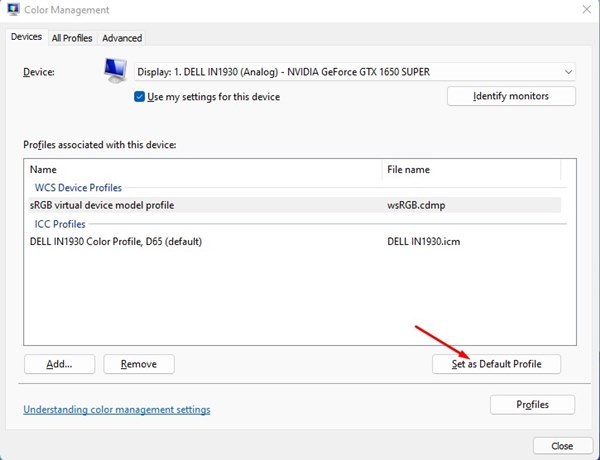
6. Now, on the Color Management Window, select the sRGB virtual device model profile and click on the Set as Default Profile option.
That’s it! You are done. This is how you can change the color profile on Windows 11 to fix the Yellow tint issue.
3) Calibrate your Windows 11 Display
Just like Windows 10, Windows 11 also includes a color calibration tool that can help you adjust the colors displayed on the screen. You can run the color calibration tool on your Windows 11 to fix the Yellow tint issue. Here’s what you need to do.
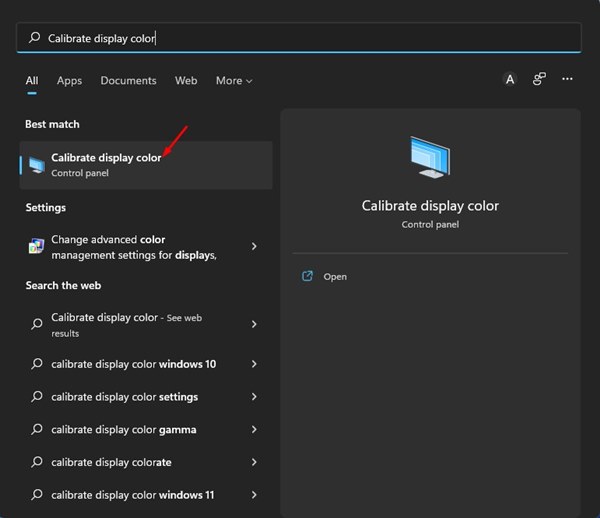
1. First of all, click on the Windows 11 search and type in Calibrate Display Color. Next, open the Calibrate Display Color option from the list.
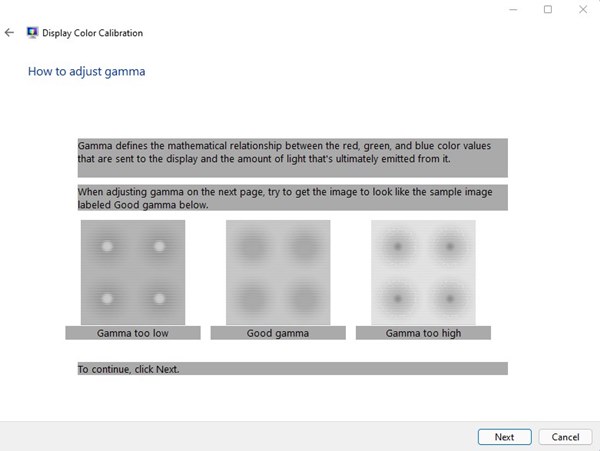
2. On the Display Color Calibration Window, click on the Next button.
3. Now, you need to follow the on-screen instructions to adjust the display colors.
That’s it! You are done. This is how you can run the Color Calibration tool on Windows 11 to fix the Yellow tint issue.
4) Update the Graphics Driver
Well, if the Yellow tint still appears on your Windows 11 computer, you need to update the Graphics driver. Outdated graphics drivers are often the lead cause of Yellow tint issues and many other display-related problems. Here’s how you can update the graphics driver on Windows 11.
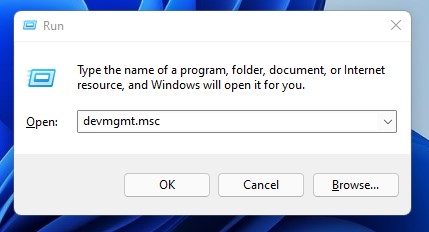
1. First of all, click on the Windows Key + R button to open the RUN dialog box.
2. On the RUN dialog box, type in devmgmt.msc and hit the Enter button.
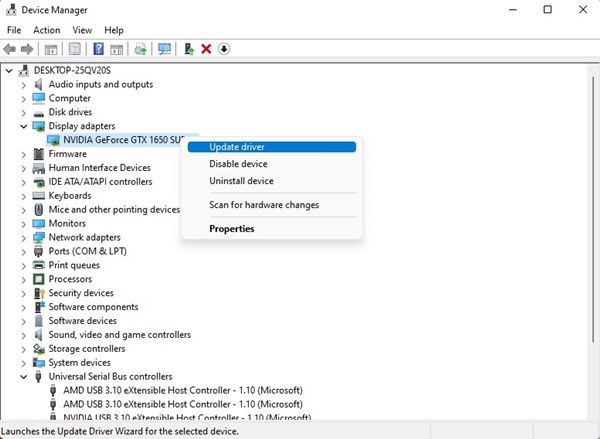
3. Now expand the Display adapters and select your installed driver. Now right click on the Display adapter and select the Update driver option.
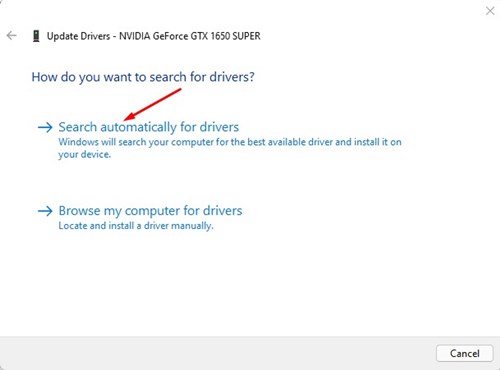
4. On the Update drivers window, click on the ‘Search automatically for drivers’ option as shown below.
That’s it! You are done. This is how you can update the display driver on your Windows 11 PC to fix the Yellow tint issue.
5) Connect Another Monitor
If the Yellow Tint still appears on your display, you need to check for the hardware problems. To confirm that your PC’s display has hardware problems, you need to connect another monitor/display to your PC.
If a Yellow tint appears on a laptop, you need to call the local technician or take the laptop to the service center to troubleshoot the problem.
So, these are the few best ways to resolve the Yellow tint issue on Windows 11 screen. I hope this article helped you! Please share it with your friends also. If you have any doubts related to this, let us know in the comment box below.
The post How to Fix Yellow Tint Issue on Windows 11 Screen (5 Best Ways) appeared first on TechViral.
from TechViral https://ift.tt/P9qFEMc

No comments:
Post a Comment