Despite Windows 11’s many new features and a more refined look than Windows 10, it is not without its flaws. The new operating system from Microsoft is still being tested, and it receives regular updates.
Most of the updates Windows 11 receives contain bug fixes and security improvements. Although Windows 11 updates were important, the size of updates might range between a few megabytes to a few hundred megabytes.
If you have a decent internet connection with no restriction on bandwidth consumption, you can install all available updates. However, if you have limited internet bandwidth, it’s best to avoid unnecessary Windows 11 updates.
As Windows 11 downloads & installs updates automatically in the background, you might encounter problems while using it during the installation part. You might even be forced to restart your PC out of nowhere.
3 Best Methods to Stop Automatic Updates on Windows 11
So, if you are dealing with such problems, you are reading the right guide. In this article, we will share a step-by-step guide on how to stop automatic updates on Windows 11. We have shared three methods; you can follow any of them.
1) Stop Automatic Updates via Settings
In this method, we will use the Windows 11 Settings app to stop the Automatic updates. Here are some of the simple steps you need to follow.
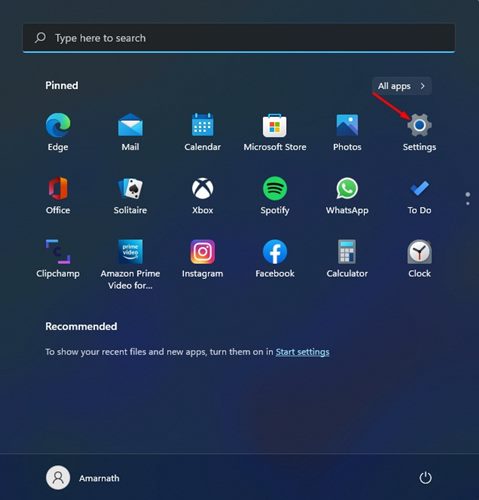
1. First of all, click on the Windows 11 Start button and select Settings.
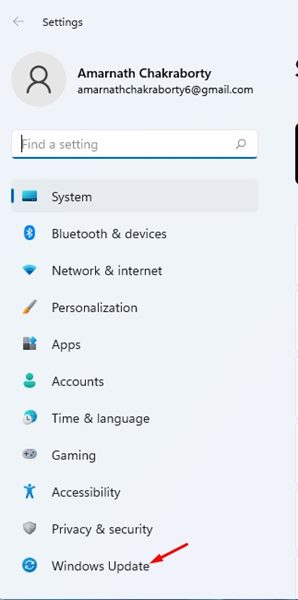
2. On the Settings page, click on the Windows Updates option.
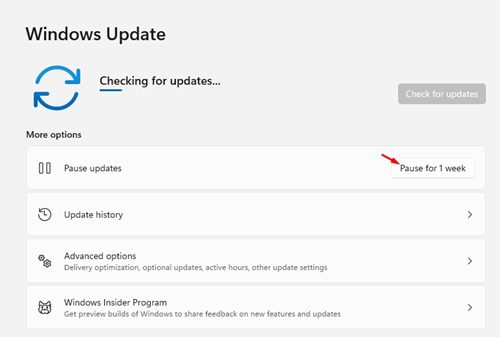
3. On the right pane, click on the Pause for 1 week option as shown below.
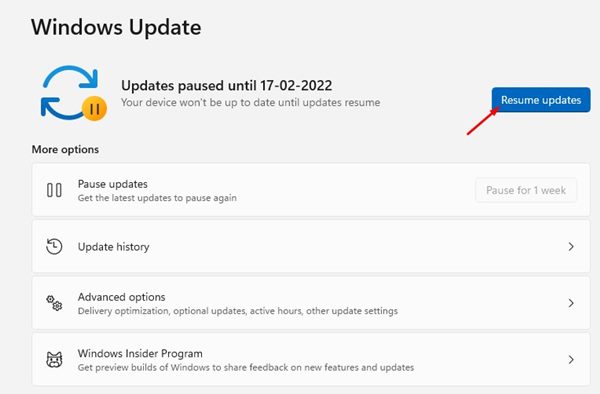
4. This will pause the updates. If you ever wish to resume the update, click on the Resume updates button.
That’s it! You are done. This is how you can stop automatic updates on Windows 11 via the Settings app.
2) Stop Automatic Updates via Registry
In this method, we will use the Windows Registry to stop the Automatic updates. Here’s what you need to do.
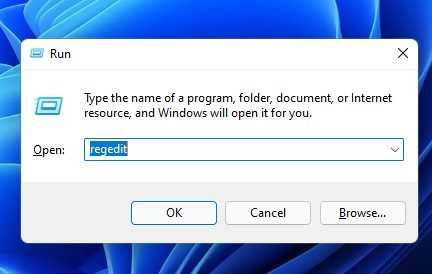
1. First, press the Windows Key + R button to open the RUN dialog box. On the RUN dialog box, type in regedit and hit the Enter button.
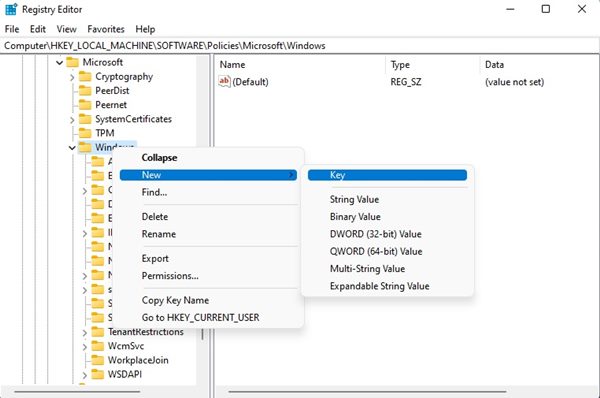
2. This will open the Registry editor. You need to navigate to the following path:
HKEY_LOCAL_MACHINE\SOFTWARE\Policies\Microsoft\Windows
3. Right-click on the Windows folder and select New > Key.
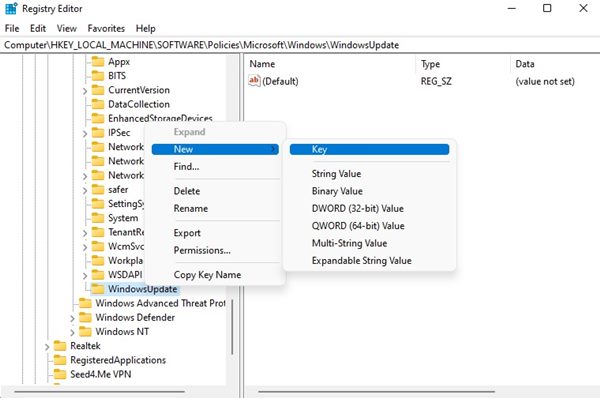
4. Name the new key ‘WindowsUpdate‘. Once done, right-click on the WindowsUpdate folder and select New > Key.
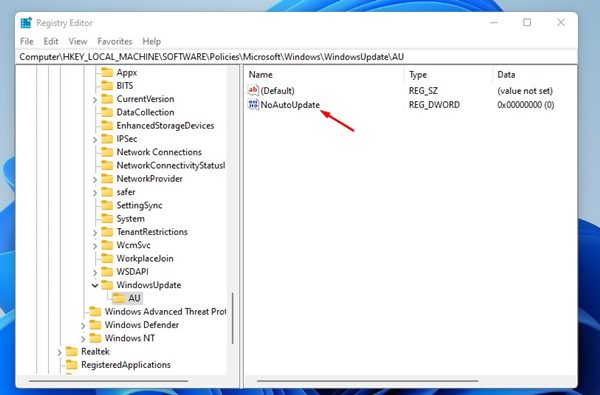
5. Name the new key folder ‘AU‘. Right-click on the AU folder and select New > DWORD (32-bit Value)’
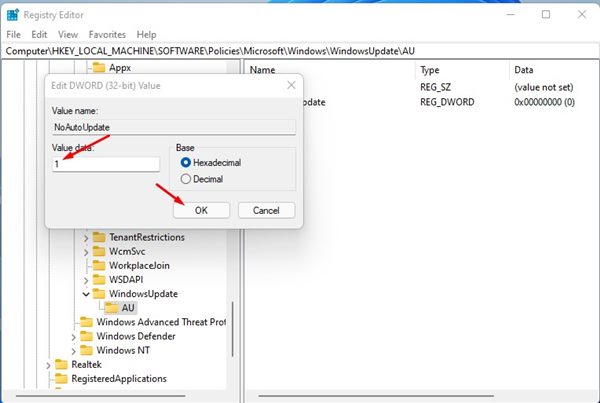
6. Name the new DWORD 32-bit key to ‘NoAutoUpdate‘.
7. Double click on the NoAutoUpdate and change its Value data to 1.
8. Once done, click on the Ok to save the changes.
That’s it! You are done. After making the changes, restart your computer. This will stop automatic updates on Windows 11.
3) Stop Automatic Updates via Group Policy Editor
In this method, we will use the Group Policy editor to stop automatic Windows 11 updates. Here are some of the simple steps that you need to follow.
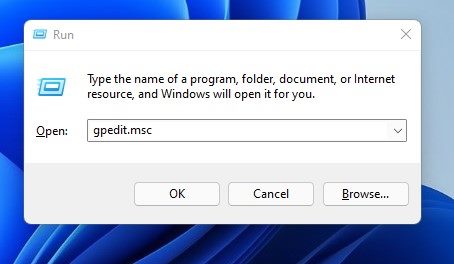
1. First of all, Press the Windows Key + R button to open the RUN dialog box. On the RUN dialog box, type in gpedit.msc and hit the Enter button.
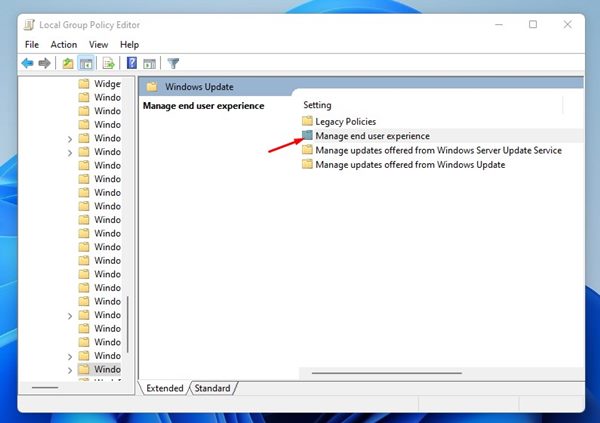
2. On the Local Group Policy Editor, navigate to the following path:
Computer Configuration > Administrative Templates > Windows Components > Windows Update > Manage end user experience
3. On the right, find the Configure Automatic Updates policy.
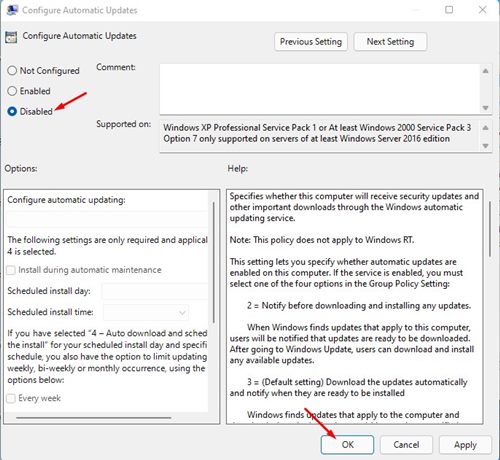
4. Double click on the Policy and select the Disabled option and click on the ‘Ok’ button.
That’s it! You are done. This will stop automatic updates on Windows 11. Just make sure to restart the computer after making the changes.
It’s pretty easy to stop automatic updates on Windows 11, and we are pretty sure that these methods will help you achieve that. I hope this article helped you! Please share it with your friends also. If you have any doubts related to this, let us know in the comment box below.
The post How to Stop Automatic Updates on Windows 11 (3 Best Ways) appeared first on Tech Viral.
from Tech Viral https://ift.tt/gBLxDvQ


No comments:
Post a Comment