Thanks to the advancement in technology, our personal and work computers were now connected to the internet most of the time. It doesn’t matter if you use the internet for business purposes or entertainment; internet connectivity has now become a mandatory thing.
As your computer connects to the internet world, security risks also increase significantly. To deal with the security risks, Windows 10 provides you a Windows Defender. With the latest version of Windows, Microsoft has added lots of new security features to the Windows Defender, making it more powerful than ever.
How To Enable Exploit Protection Feature of Windows 10
For those who don’t know, Windows Defender also has an Exploit protection feature. The Exploit Protection feature of Windows Defender helps protect devices from malware that uses exploits to spread and infect. It’s an important feature, and it should be turned on.
So, in this article, we have decided to share a working method to enable the Exploit protection feature of Windows Defender in 2020.
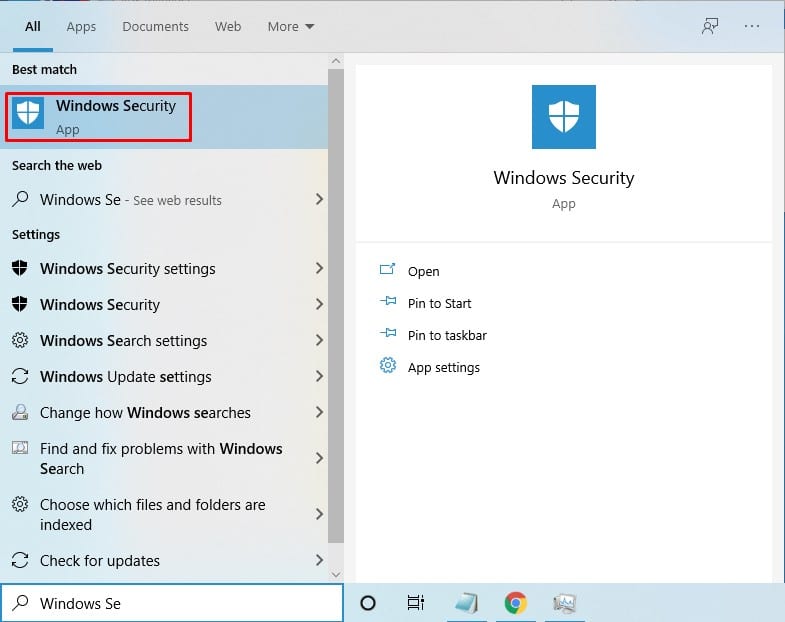
Step 1. First of all, click on the ‘Start’ button and search for ‘Windows Defender’. Open the ‘Windows Defender Security Center’ from there.

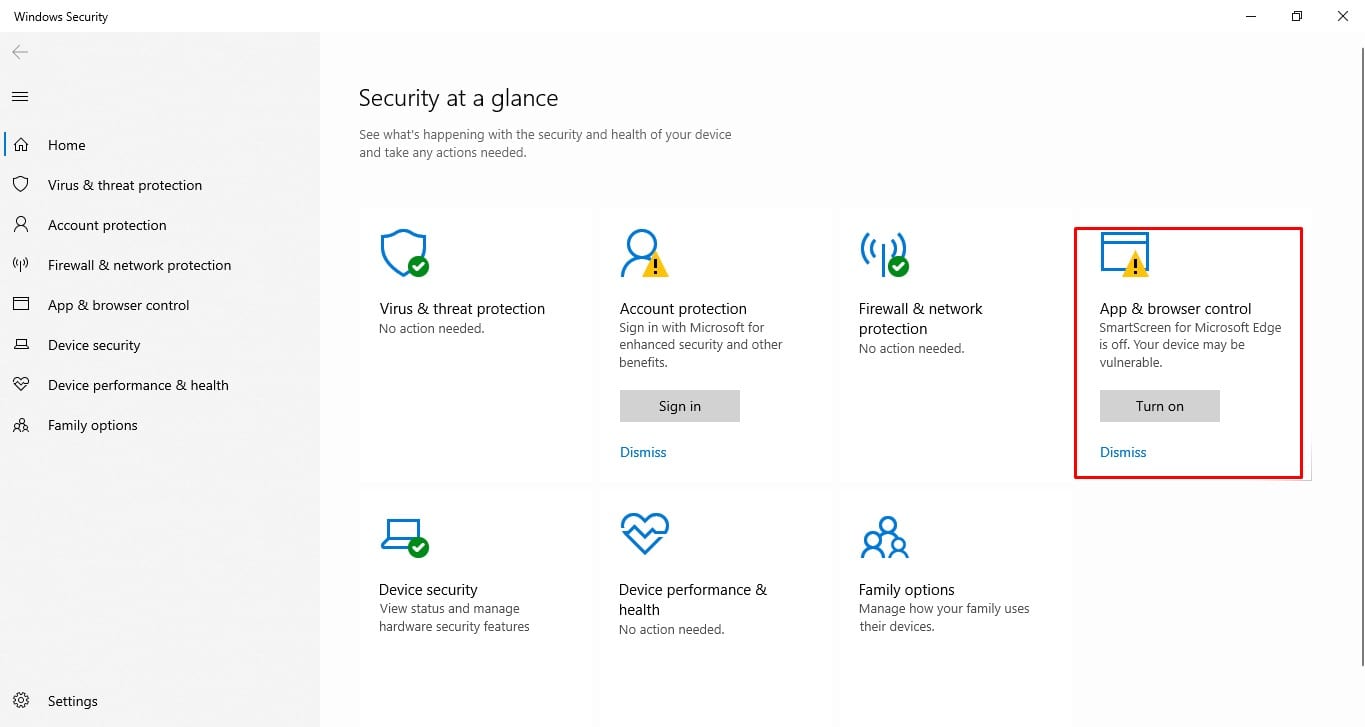
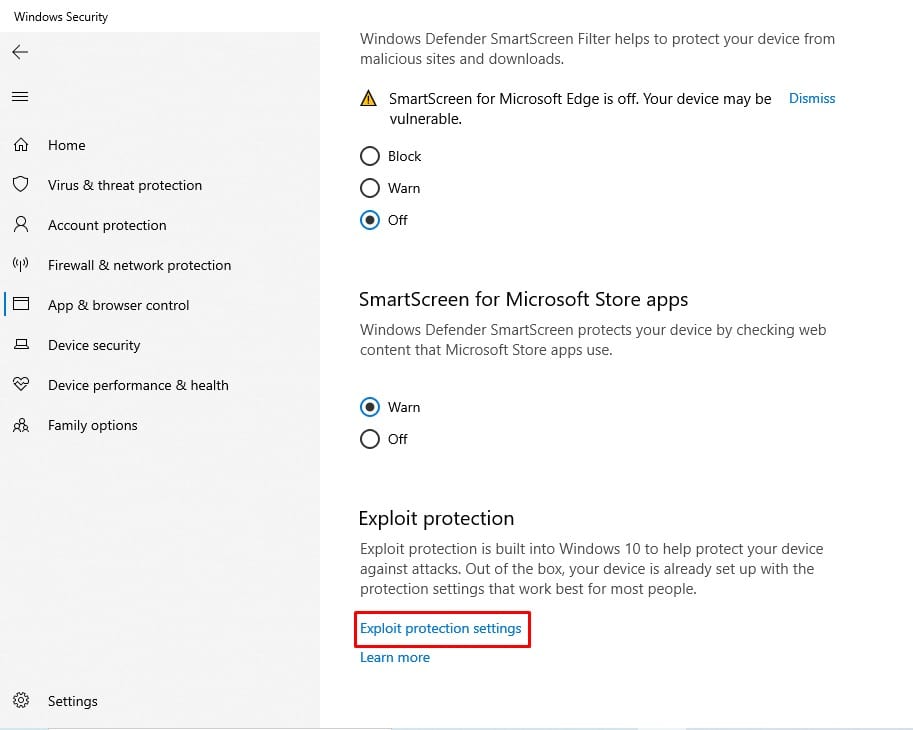
Step 2. On the Windows Defender, click on the ‘App & Browser Control’. Next, scroll down and find the option ‘Exploit Protection’.


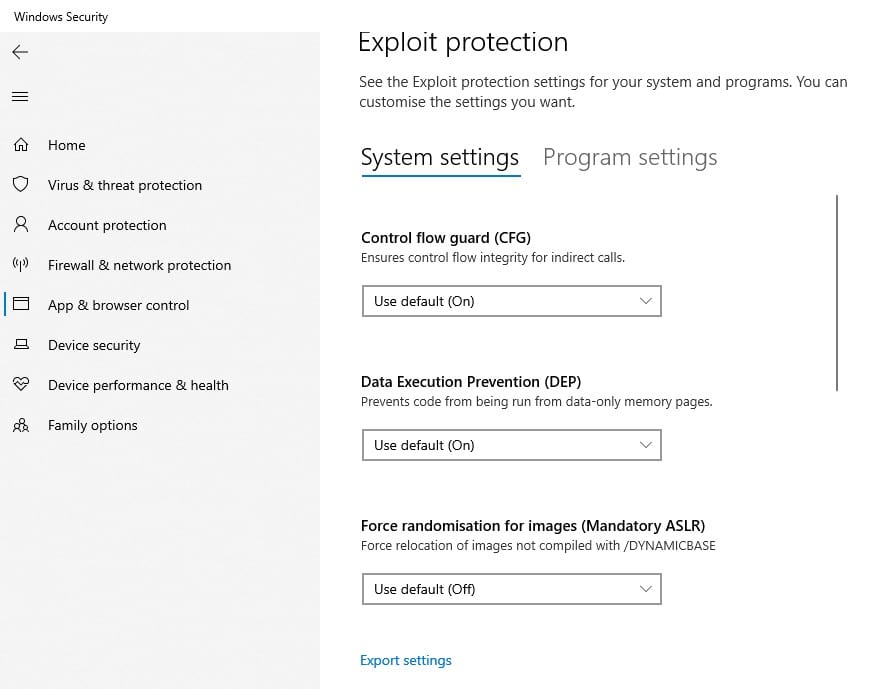
Step 3. Click on the ‘Exploit Protection’. You need to activate both the ‘Control Flow Guard’ and the ‘Data Execution Prevention (DEP)’ option. To activate, simply select ‘On by default’ from the drop-down menu.

Step 4. Once done, restart your computer to make the changes.
That’s it! You are done. This is how you can enable the Exploit Protection feature on Windows 10.
So, this article is all about how to enable the Exploit Protection feature of the Windows 10 operating system. I hope this article helped you! Share it with your friends also.
The post How To Enable Exploit Protection Feature of Windows 10 appeared first on Tech Viral.
from Tech Viral https://ift.tt/38rpb7y
No comments:
Post a Comment