
Let’s admit, our work computers, personal devices, and even smart home devices were under the risk of near-constant attacks from various hacking threats. To deal with such risks, security researchers recommend setting up a VPN or Proxy servers.
Both Proxy servers and VPNs were meant for security and privacy purpose, but they are a bit different. The proxy server is just another computer that sits between you and your ISP. Proxy servers were usually configured in corporate environments to filter web traffic.
Lots of businesses use proxy servers to block access to certain websites or provide network users with more anonymity. However, few sites restrict access to computers that connects through a proxy server. So, if you are having trouble accessing a few websites, then it’s time to check the proxy settings.
How To Check The Proxy Server Settings in Windows 10
Even if you have not set a proxy server on your PC, sometimes computers accidentally or malicious get set to use a proxy server. So, in this article, we have decided to share a few best methods to check the proxy settings in the Windows 10 computers.
1. Using Windows 10 Settings App
You can check the Proxy settings of your computer via Windows 10 Settings app. Just follow some of the simple steps given below.
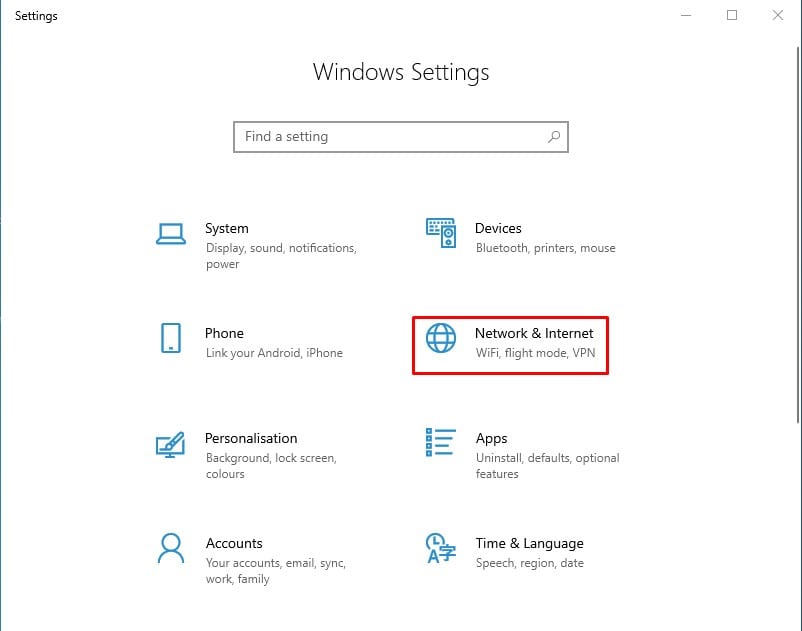
Step 1. First of all, click on the Start menu and then on ‘Settings’. On the Windows Settings, click on the ‘Network & Internet’ option.
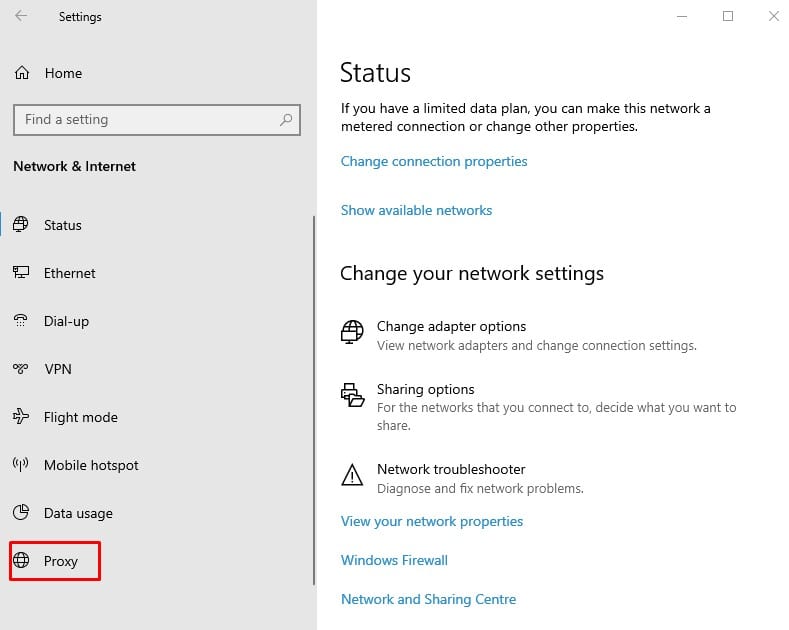
Step 2. From the right-hand side, select ‘Proxy’
Step 3. From the Proxy panel, you will be able to review the proxy settings. In most cases, everything should be set to off.
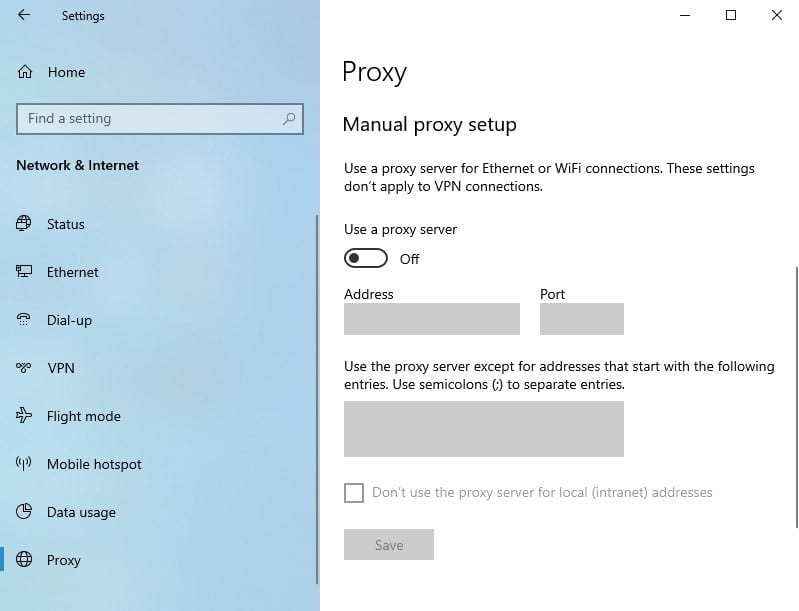
If anything is turned on, then your web traffic is going through a proxy, and you could feel your internet connection being slower than usual.
2. Through Control Panel
If you are not using the latest version of the Windows 10 operating system, then you could choose to use the Control Panel to access the proxy settings. Follow some of the simple steps given below to check the Proxy Server Settings on your PC.
Step 1. First of all, click on the ‘Start’ button and search for Control Panel.
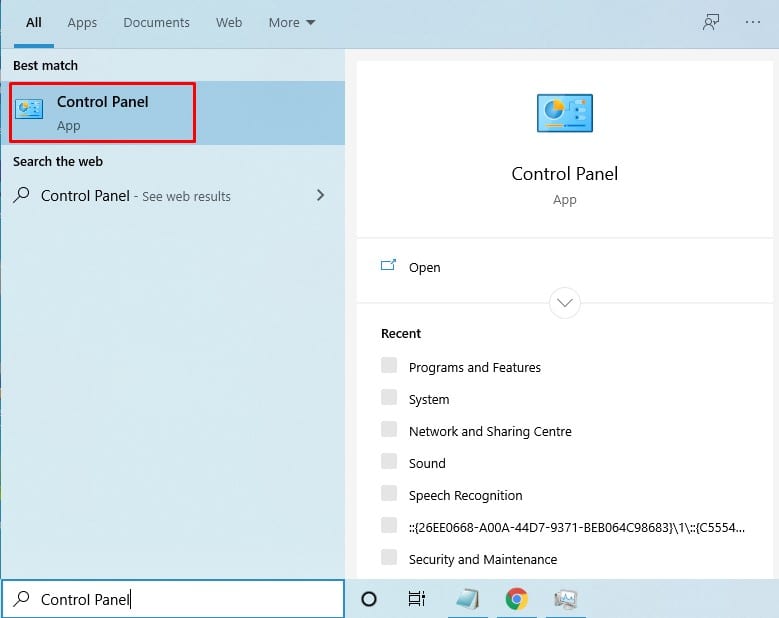
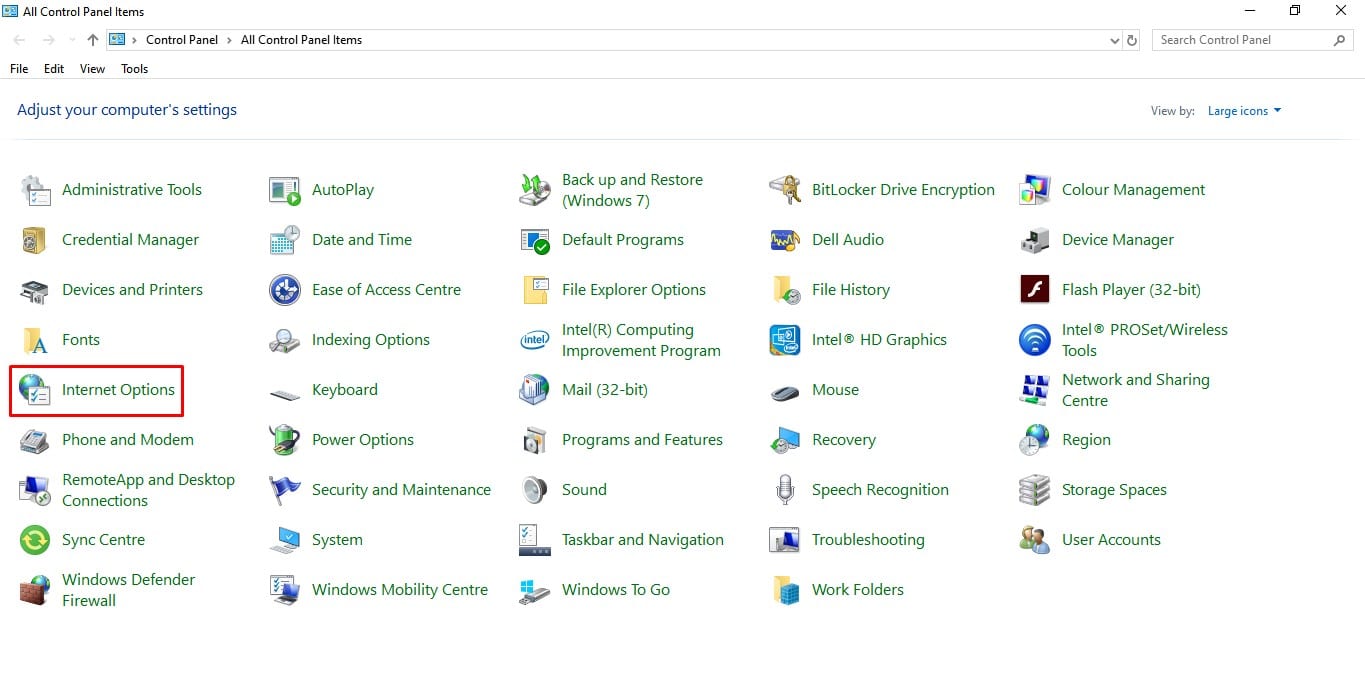
Step 2. Open control panel, and click on the ‘Internet Options’
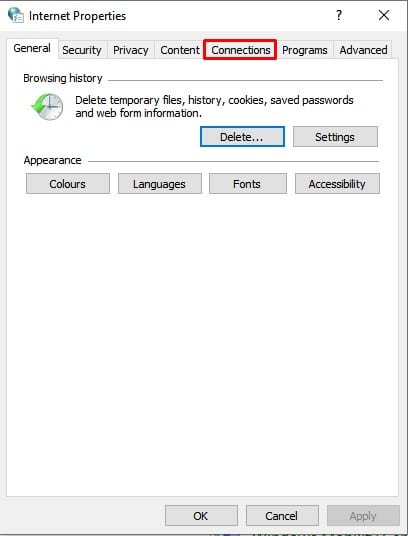
Step 3. Under the Internet Properties, click on the ‘Connections’ tab.
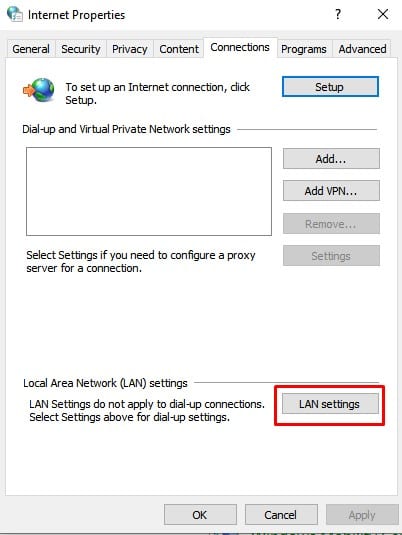
Step 4. On the Connections tab, click on the ‘LAN settings’
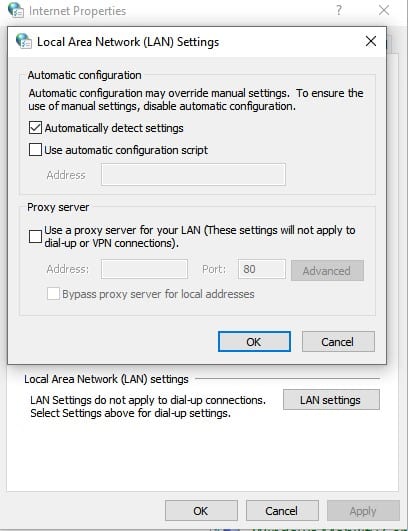
Step 5. Here you will be able to see the Proxy server settings.
That’s it! You are done. This is how you can check the Proxy server settings on your computer via Control Panel.
So, this article is all about how to check the Proxy Server Settings on your computer. I hope this article helped you! Share it with your friends also.
The post How To Check The Proxy Server Settings in Windows 10 appeared first on Tech Viral.
from Tech Viral https://ift.tt/2Z1Oqu1
No comments:
Post a Comment