
Despite being the most used desktop operating system, Windows 10 is not without its flaws. In fact, Windows 10 has more bugs than any other desktop operating system. But, the good thing is that Windows 10 receives frequent updates that deal with bugs.
Recently, lots of Windows 10 users have messaged us regarding Brightness control not working problem. Windows 10 users were found facing brightness problems while watching movies or playing video games. Also, some of the users on Microsoft Forum have claimed that they are unable to decrease or increase the screen brightness.
Fix Windows 10 Brightness Control Not Working Issue
So, if you are also facing similar problems, then you are reading the right article. In this article, we are going to share a few best methods to deal with brightness issues on Windows 10 computers like Brightness Control Not Working.
Update the Display drivers
Well, outdated or corrupted display drivers often triggers brightness problem. So, in this method, we are going to update the display drives to fix Brightness control not working issue.
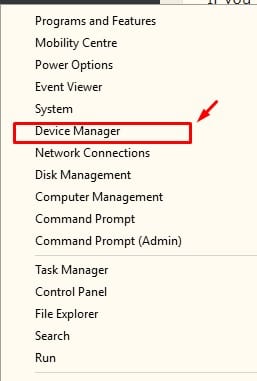
Step 1. First of all, Right-click on the Start menu and then click on ‘Device Manager’
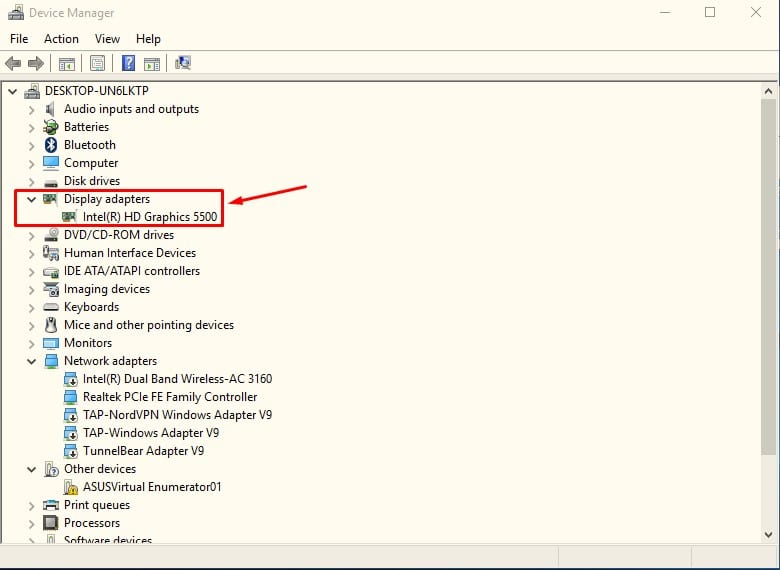
Step 2. Now you will see the device manager Window. You need to find and expand the ‘Display Adapters’
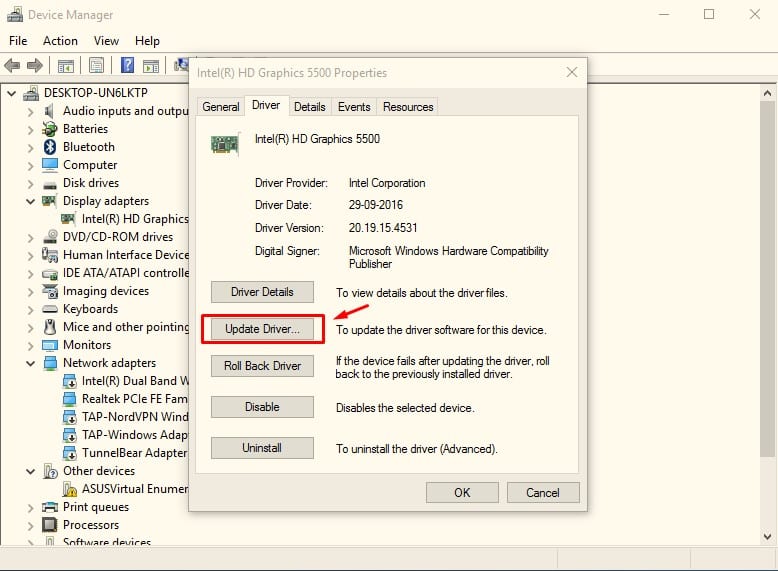
Step 3. Now, you need to right-click on the relevant driver and then choose the option ‘Update Driver’
Step 4. Next, you will be asked to select how you want to search for driver software. Simply select ‘Search Automatically for updated driver software’
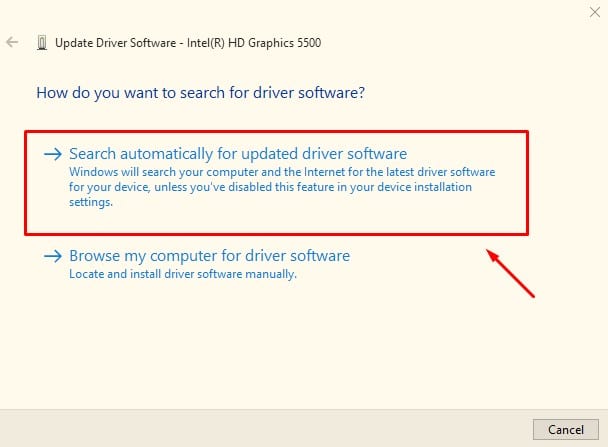
Step 5. Now, your computer will search for driver updates on the internet.
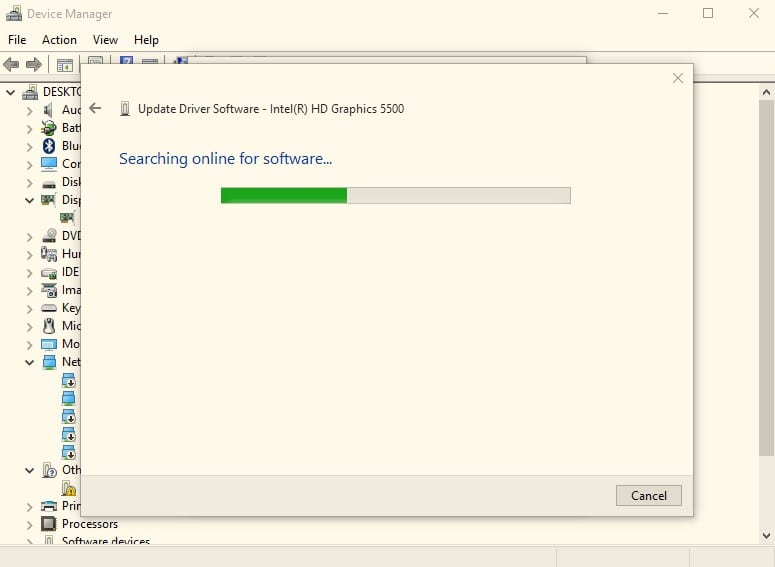
Step 6. Wait until the driver installs on your computer. Once done, restart your computer.
That’s it! You are done. This is how you can fix brightness control not working by updating the display driver.
Use Third-Party Driver Updating Tools
Well, if you don’t want to go through the manual stuff, then you can also rely upon any third-party driver updating tool to update the display drivers. Below, we are going to list 3 best driver updating tools that you can use to update display drivers and fix Brightness Control Not Working problem.
1. Driver Booster
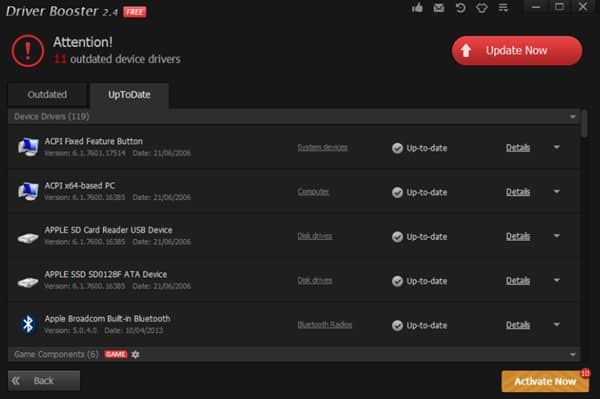
Well, if you are searching for a simple to use, yet effective driver updating tool for Windows, then Driver Booster might be the best pick for you. Guess what? Driver Booster has over 200,000 drivers and it can update the graphics driver, display drivers, network drivers, etc.
2. Slim Drivers
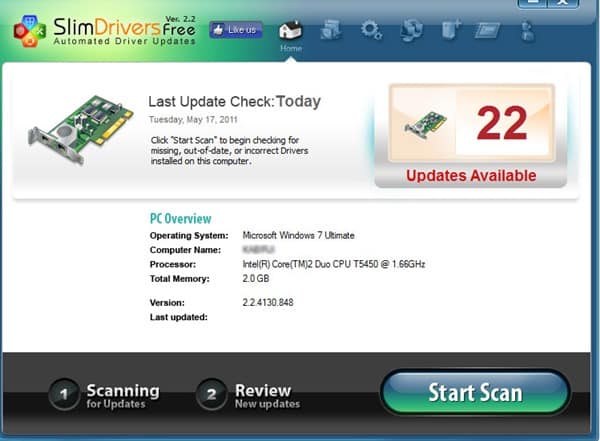
It is another best and simple to use driver updating tool that you can use on your Windows operating system. The great thing about Slim Drivers is that it has a cloud-based scanning system which makes the tool extremely lightweight. Once scanned, it will provide you the direct download link of the drivers.
3. Driver Talent
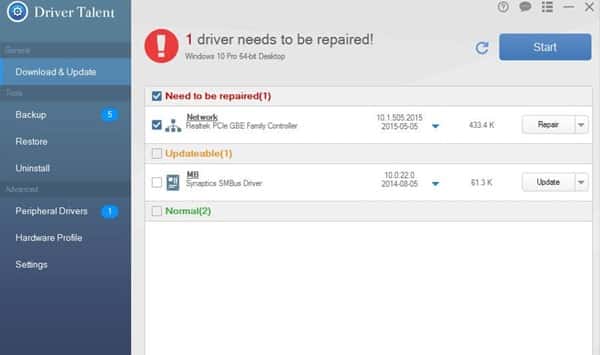
The great thing about Driver Talent is that it also provides users an option to backup existing drivers. It scans for outdated drivers and automatically downloads the latest version of drivers for free. So, Driver Talent is another best Windows 10 driver updater that you can use right now.
Using Microsoft’s Basic Display Adapter
Sometimes, Microsoft’s basic display adapter works well to fix most of the display driver related issues. In this method, we are going to use the Microsoft Basic Display Adapter to fix Windows 10 Brightness not working issue.
Step 1. First of all, right-click on the Start Button and then select Device Manager.
Step 2. In the next step, double-click on the Display Drivers. Now find the display adapter driver and select ‘Update Driver’
Step 3. In the next step, select the option ‘Browse my computer for driver software’
Step 4. Now choose the option ‘Let Me Pick from a list of available drivers on my computer’
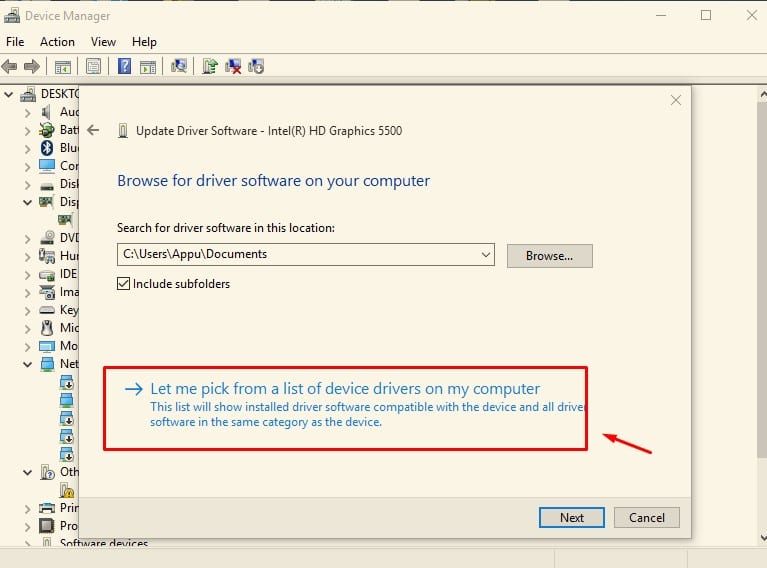
Step 5. In the next window, select ‘Microsoft Basic Display Adapter’
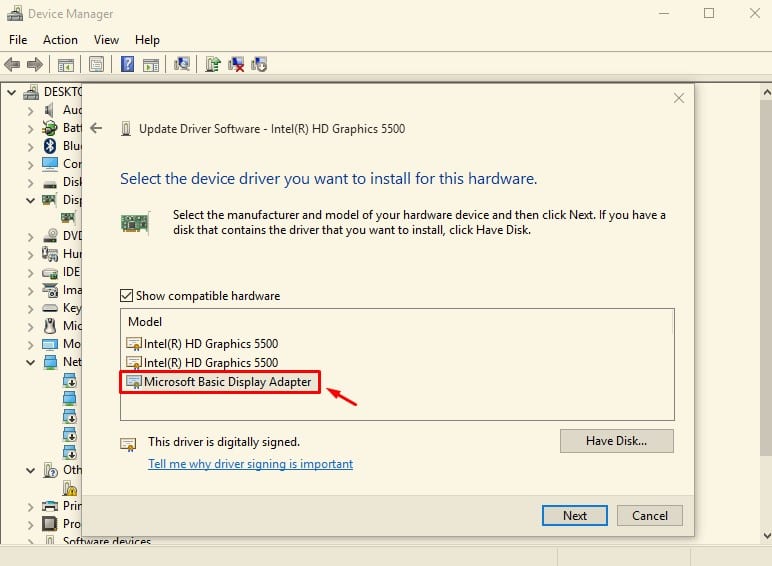
That’s it, you are done! Now your Windows 10 computer will install the Microsoft Basic Display adapter driver on its own. Once done, restart your computer, and the issue should be fixed by now.
Enable Adaptive Brightness
Well, if you are using a Windows 10 laptop, then you can use the all-new adaptive brightness feature. The feature uses the ambient light sensor to automatically adjust your screen’s brightness as per your surrounding. The best thing about Adaptive Brightness is that it can adjust the brightness based on time and battery percentage. Here’s how you can use adaptive brightness.
Step 1. First of all, head to the Control Panel and then click on ‘Power Options’
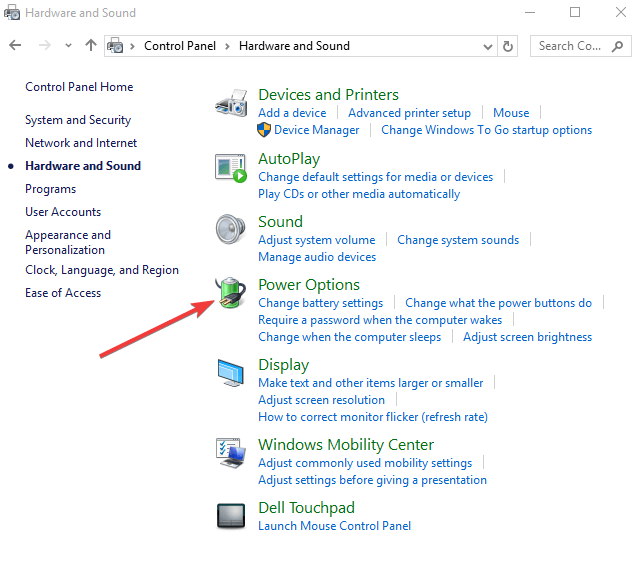
Step 2. In the next step, you need to click on the Change Plan Settings. You will find the option next to the current power plan.
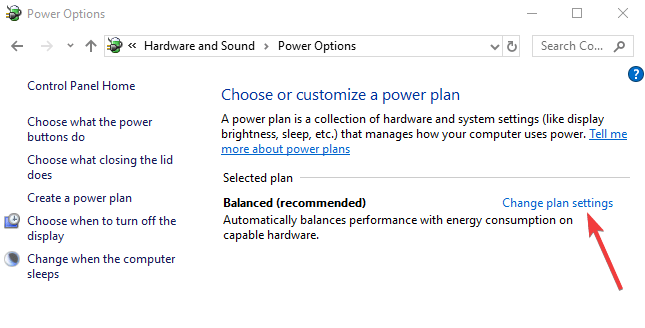
Step 3. Now, under the ‘Plan Settings’, you need to click on ‘Change Advanced Power Settings’
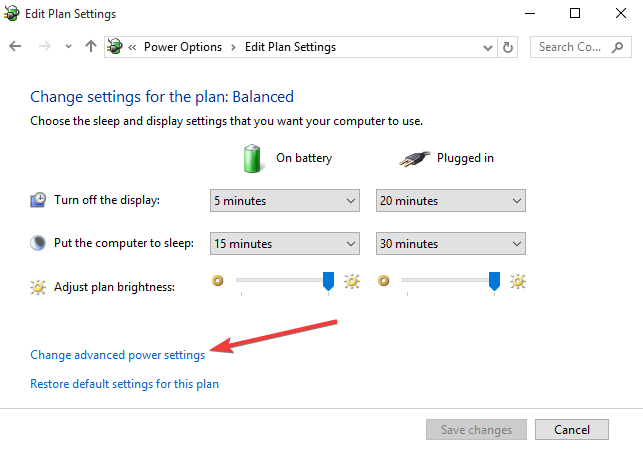
Step 4. Next, you need to click on Display and there find and enable the option ‘Enable Adaptive Brightness’
That’s it, you are done! Now, just click on ‘Apply then ‘Ok’ to continue. From now, Windows 10 will automatically adjust the brightness as per the surroundings.
So, this is how you can fix the ‘Windows 10 Brightness control issue’. Well, the methods given above can fix almost every display driver-related problems, including the Brightness Control Not Working. I hope this article helped you! Share it with your friends also.
The post How to Fix Windows 10 Brightness Control Not Working Issue appeared first on Tech Viral.
from Tech Viral https://ift.tt/3hjnCvL
No comments:
Post a Comment