
Well, if we look around, we will find that now almost every has a personal computer and smartphone. Sometimes, we want to transfer files from computer to our Android smartphone. Well, copying files from a computer to your Android device has always been pretty straightforward and for that lots of apps exist.
If you don’t want to rely upon the third party file transfer apps, you can also connect two devices via USB cables or Bluetooth. However, what if I tell you that you can move files without any wires? Well, it’s absolutely possible with WiFi file transfer apps. But, again that requires a desktop client and Android apps.
Recently, we came across an Android app that mounts your device as a network share folder on your PC. That means, your Android device will act as a network share folder and you can share files between devices in just one tap. To do that, you just need to install an Android app known as Pocketshare.
Turn Your Android into a Wireless Flash Drive for PC or MAC
So, in this article, we are going to share a detailed guide on how to use your Android phone as a wireless flash drive for Windows or Mac computer 2019. So, let’s check out how to use Android as a wireless flash drive on PC.
Step 1. To get started with the method, you need to install “Pocket share: Flash Drive / NAS” on your Android device. This app could be found on the Google Play Store so you won’t need to go through the websites to find it up.
Step 2. Next, go to the settings and tap on ‘Configure Windows’ (For Windows PC Only) and highlight the URL that’s displayed on the screen. Next, tap on the ‘Save’ button.
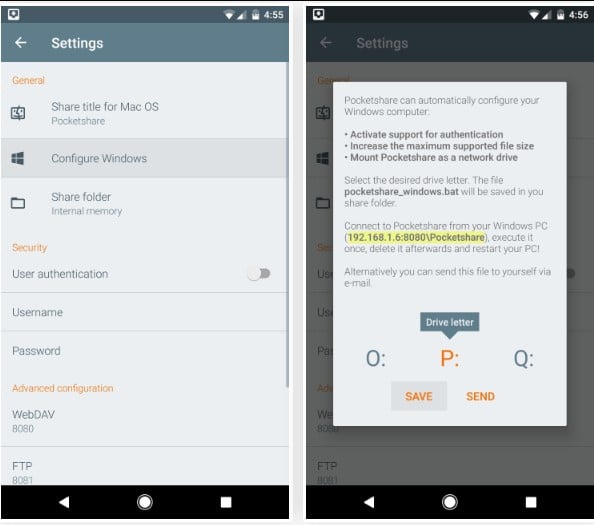
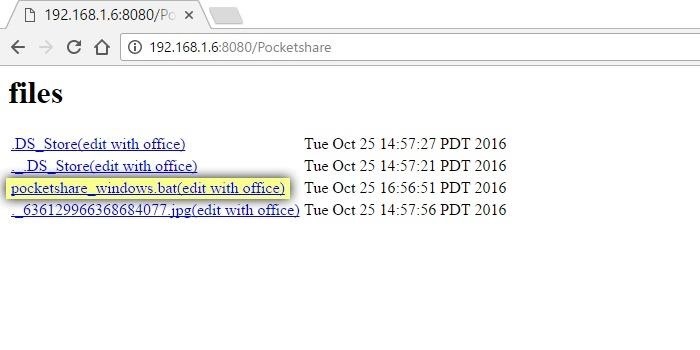
Step 3. Now, open the web browser on Windows computer and head to the URL that you have copied in the previous step. Right-click on the ‘pocketshare_windows.bat’ and save the link on your computer.
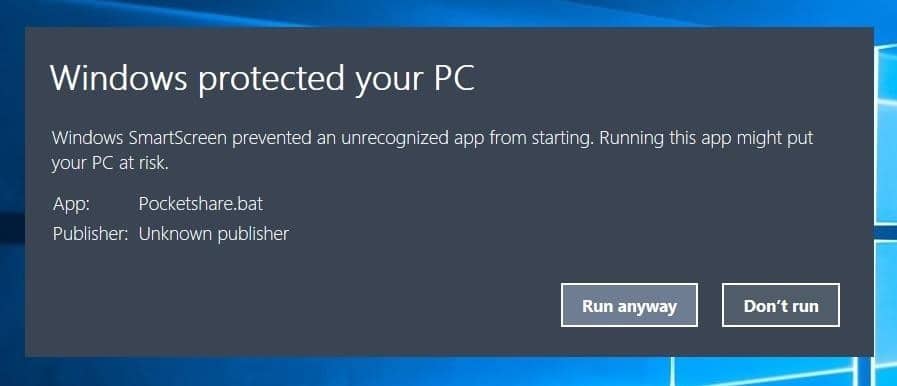
Step 4. Next, open the Pocketshare.bat file on your computer and you will see a security prompt. You need to click on ‘More info’ button and then select ‘Run anyway’
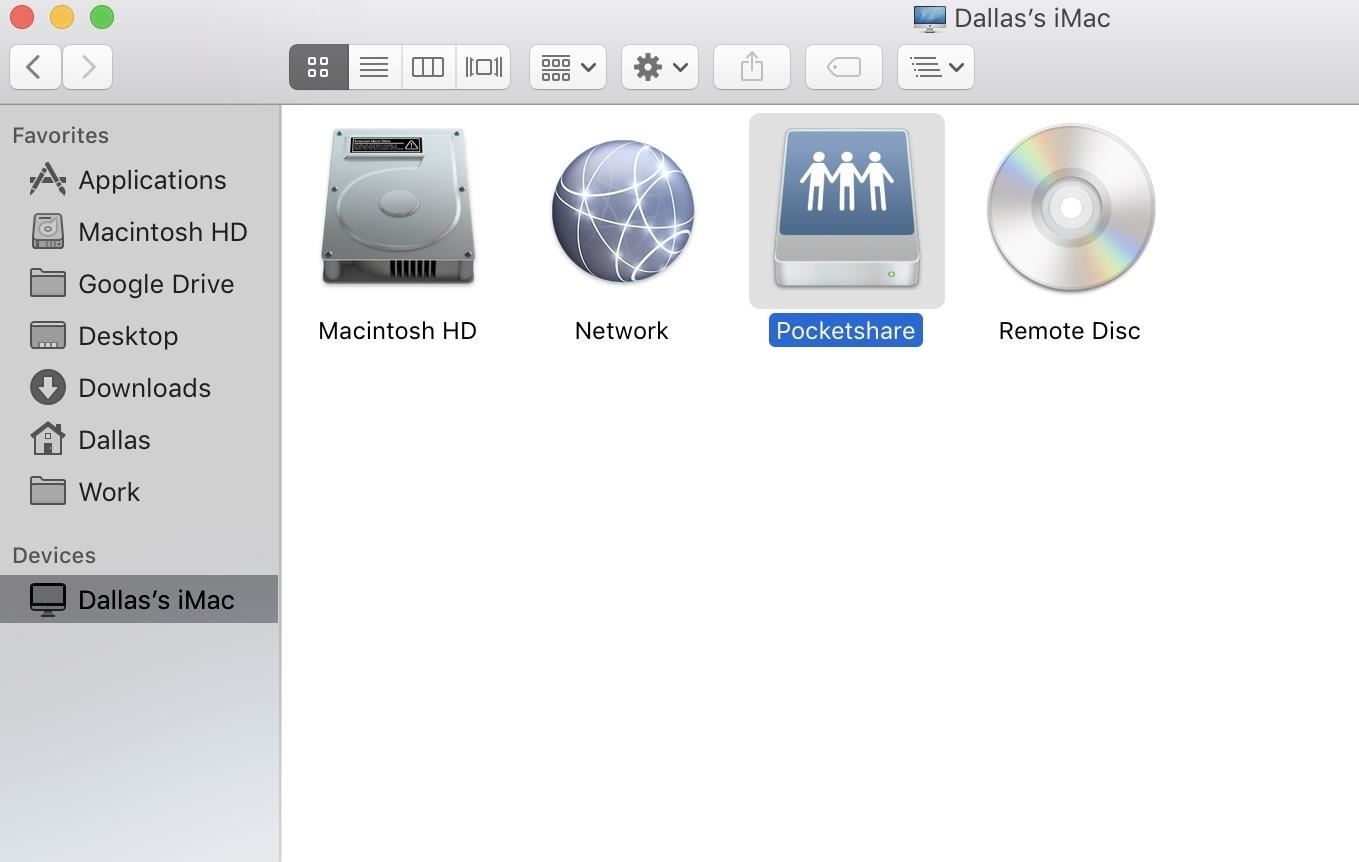
Step 5. Now restart your computer. Upon the restart, you would see a network drive labeled as ‘Pocketshare’. On Apple devices, the device will be listed under the ‘Devices in Finder’s’ option.
Step 6. Just make sure that your Android Pocketshare app has access to storage, media, etc. Now, whenever you want to transfer a file from your computer to the phone, connect both devices to the same WiFi network and you can simply drag and drop any file into the new network folder in PC.
Step 7. To check the copied files on Android, open the Pocketshare app and head to the ‘Files’ tab. If the ‘Files’ tab doesn’t have anything, then hit the refresh button.
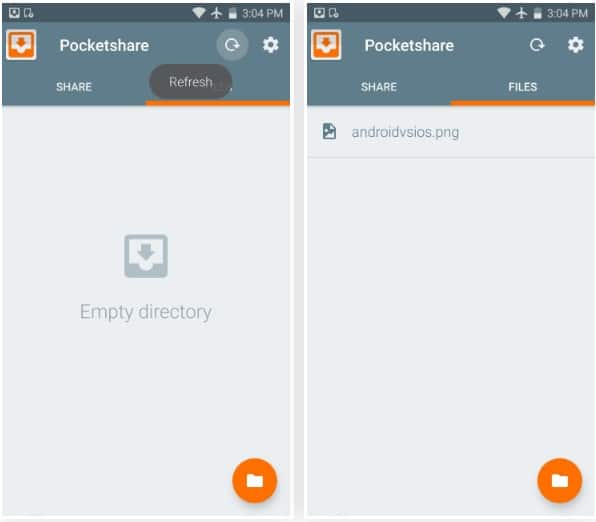
That’s it, you are done! This is how you can use your Android phone as a wireless flash drive for Windows or Mac.
Also Read: How to Make Your Android Look like an iPhone (Without Root)
So, this is all about how to turn your Android into a wireless flash drive for PC or MAC. I hope this article helped you! Share it with your friends also. If you have any doubts related to this, let us know in the comment box below.
The post Turn Your Android into a Wireless Flash Drive for PC or MAC appeared first on Tech Viral.
from Tech Viral https://ift.tt/2sXwYnl
No comments:
Post a Comment