
Those days were gone when you had to rely on premium video editing suites for Windows to remove audio from a video. On the latest Windows 11, you can edit videos for free and remove audio from a video with the stock video editor.
The latest builds of Windows 11 ship with a Clipchamp video editor that you can use for free. The free video editing tool can easily remove sound from a video, trim videos, apply 3D effects, and can handle many more video editing stuff. Hence, if you are looking for free ways to remove sound from a video in Windows 11, you need to start using the stock video editor of Windows 11.
Also Read: How to Create Tasks & Set Reminders in Windows 11
Steps to Remove Sound from Videos in Windows 11
We will be using the Clipchamp video editor that ships with Windows 11. Below, we have shared a step-by-step guide on removing sound from videos in Windows 11 for free. Let’s get started.
1) How To Remove Audio from a video
In this method, we will learn how to remove audio from a video in Windows 11. You need to follow some of the simple steps we have shared below. Let’s get started.
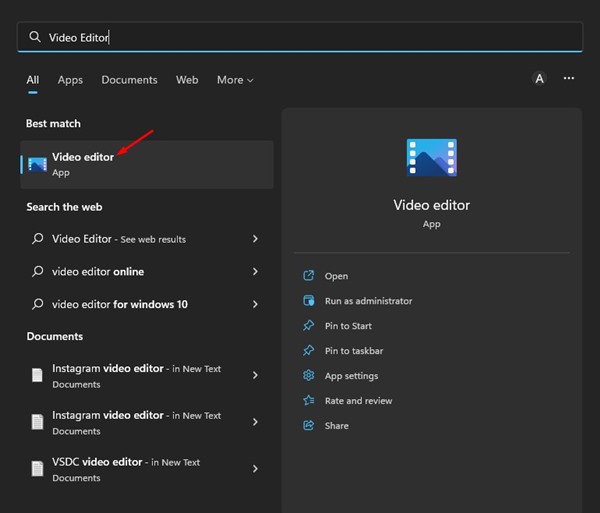
1. Click on the Windows 11 search and type in Video Editor. Next, open the Video Editor app from the list.
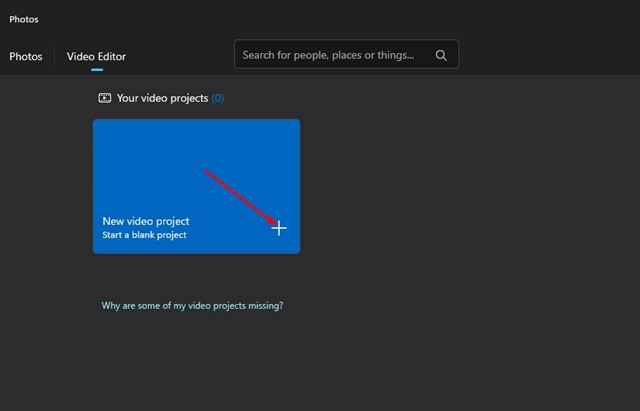
2. Click the New Video Project button on the Video Editor’s main screen.
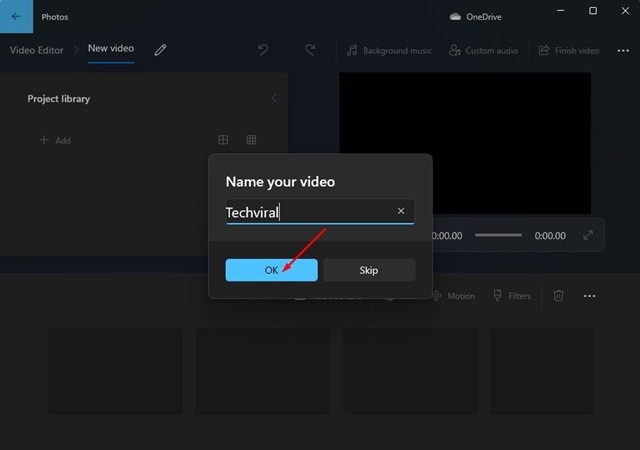
3. Next, name your new project and click on the Ok button.
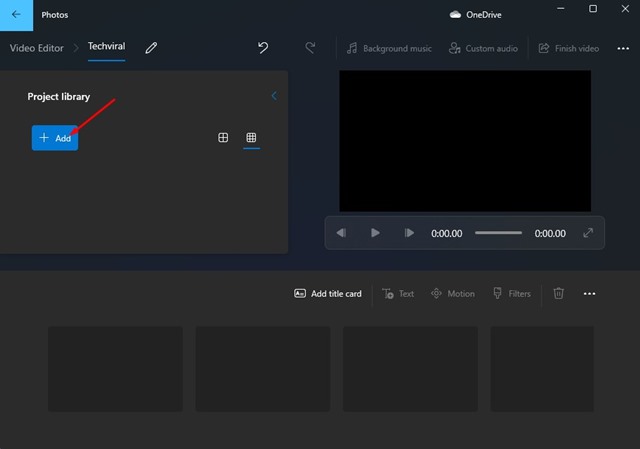
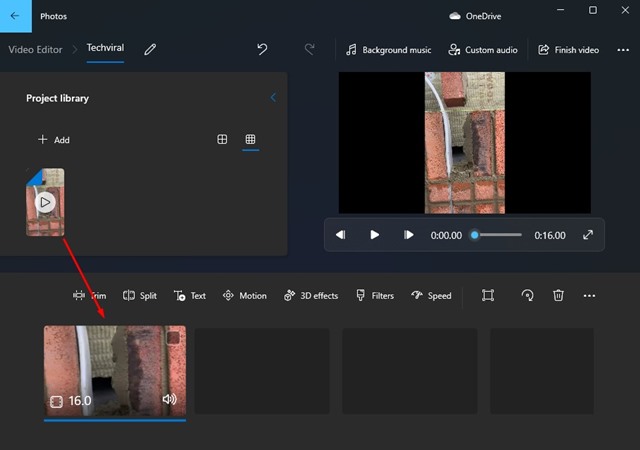
4. Once the project is created, click the Add button and select the video whose audio you want to remove.
5. Drag the video to the project library on the Storyboard section.
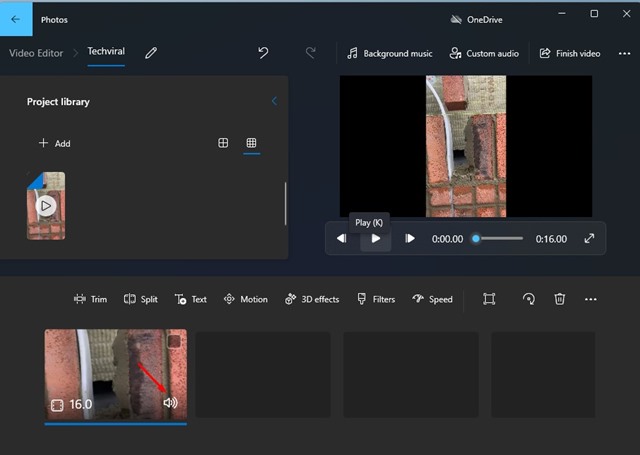
6. To remove the audio, click on the small speaker icon on your video at the bottom.
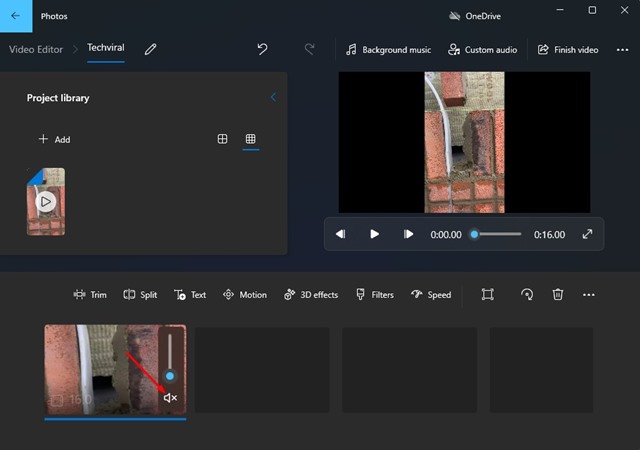
7. A volume slider will appear. You need to drag the slider to the bottom to mute the audio.
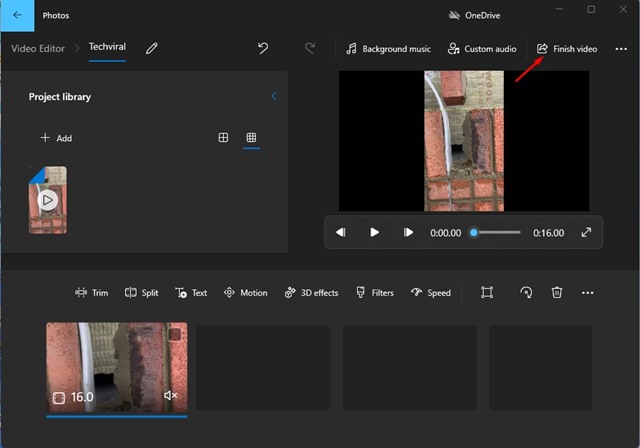
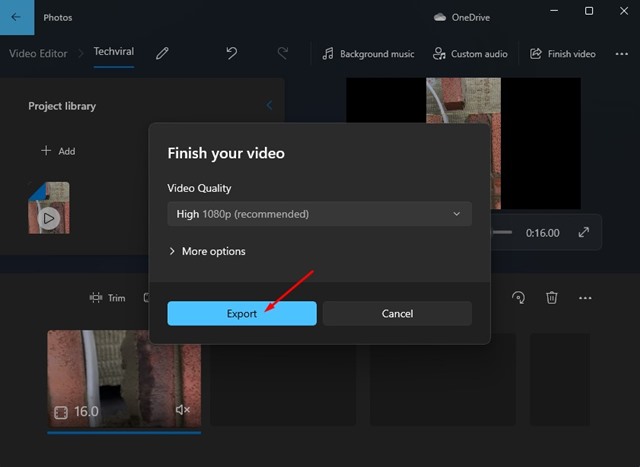
8. This will mute the audio of a video. To finish the project, click on the Finish video button at the top-right corner.
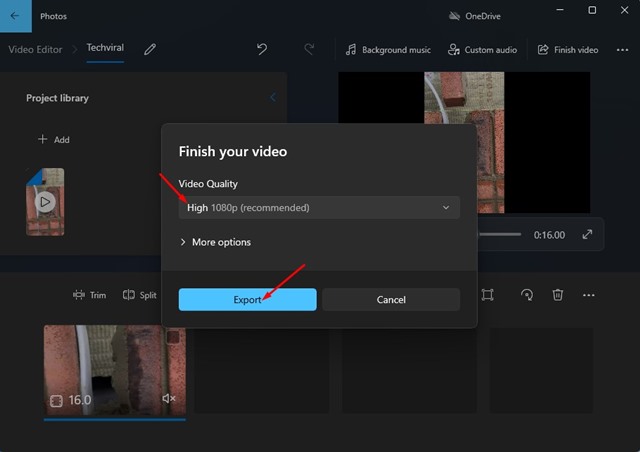
9. On the Export prompt, choose the video quality and click on the Export button.
That’s it! This is how you can remove sound from a video on Windows 11 computer.
2) How to Add Background Music To a Video
You can even use the Clipchamp video editor to add a piece of background music to a video. You need to follow some of the simple steps we have shared below.
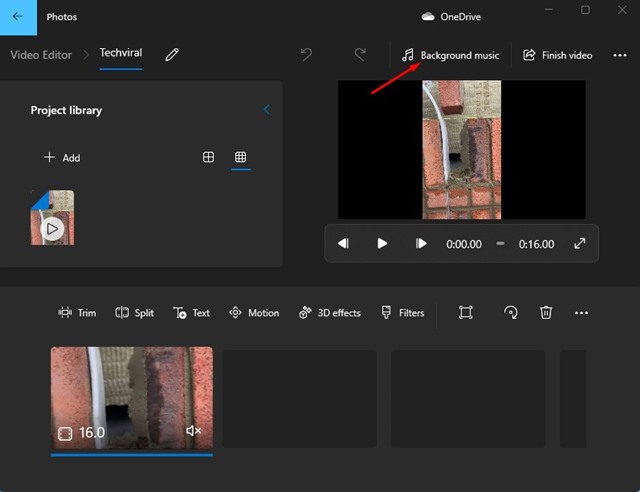
1. After removing the audio from a video, you need to click on the Background Music option in the top-right corner.
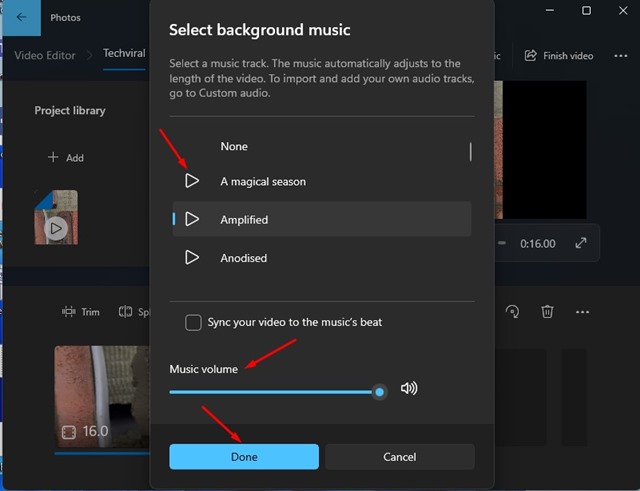
2. Select the music you want to add on the Select background music prompt. The video editor also lets you preview the music before adding it. Once done, adjust the music volume and click on the Done button.
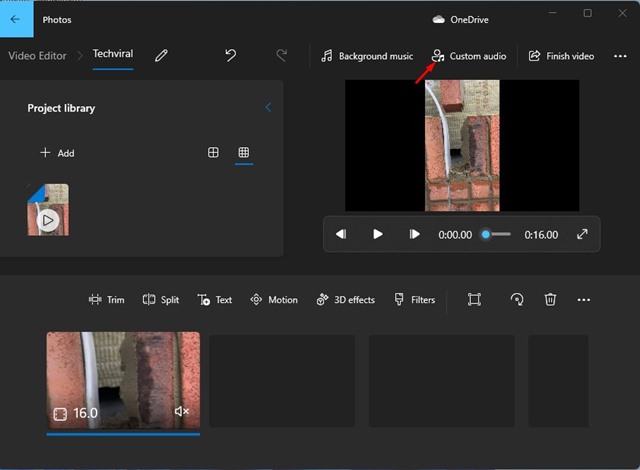
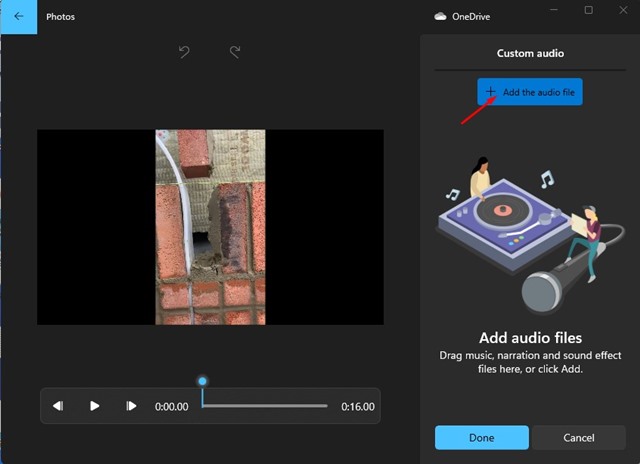
3. If you want to add your music track, you need to click on the Custom Audio button at the top.
4. On the Custom audio pane, click on the Add the audio file button.
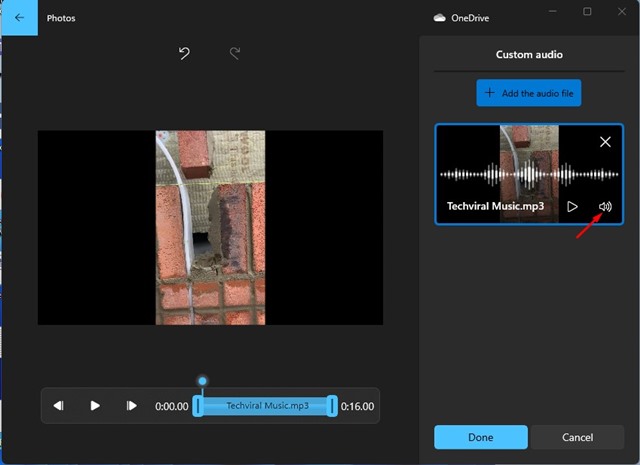
5. Select the music file you want to add to your video.
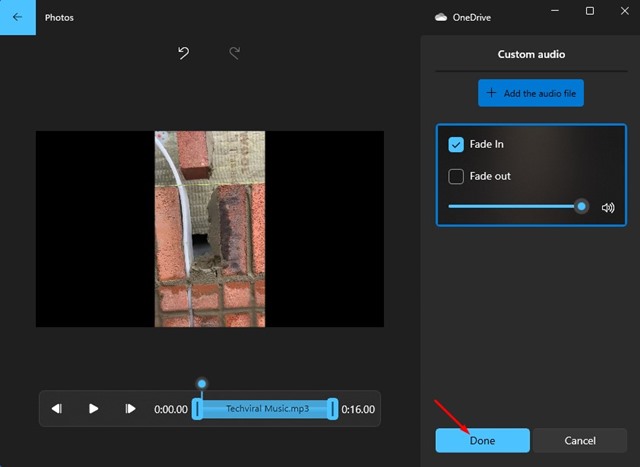
6. Next, on the right pane, click on the small speaker icon on your video thumbnail and adjust additional settings.
7. After making the changes, click on the Done button.
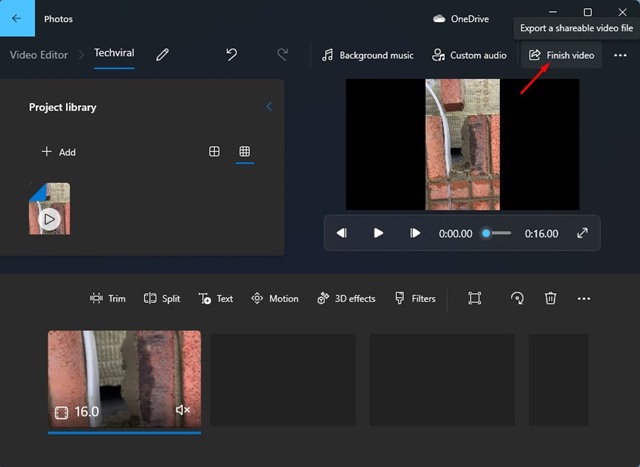
8. Next, click on the Finish video button in the top-right corner of the video editor.
9. On the Finish video prompt, select your Video Quality and click on the Export button.
That’s it! This is how you can add background music to a video on Windows 11.
Also Read: How to Save Spotlight Pictures on Windows 11
So, that’s all about how to remove sound from a video in Windows 11 for free. You can also use other free video editors for Windows to remove audio from a video. If you need more help with video editing, let us know in the comments.
The post How to Remove Sound from Videos in Windows 11 appeared first on Tech Viral.
from Tech Viral https://ift.tt/9jZReU4
No comments:
Post a Comment