
Let’s admit; Android is right now the most popular mobile operating system. Compared to every other mobile OS, Android offers you more features and customization options. The latest version of Android provides you an option to show internet speed on the Status bar.
It shows the network connections, WiFi signals, and battery percentage on the Status bar by default. However, what if you want to monitor the CPU frequency in real-time on your Android?
In that case, you would need to install several third-party apps. So, if you are looking for ways to show the CPU frequency in the Android Status bar, you are reading the right article.
Methods to Show the CPU Frequency in Android Status bar
In this article, we will share a step-by-step guide on how to show the CPU frequency in the Android status bar. Let’s check out.
Step 1. First of all, you need a rooted android as an Xposed installer can only be installed on a rooted android. So, Root your Android to proceed to get admin access.
Step 2. After rooting your Android device, you have to install the Xposed installer on your Android. For that, follow our guide to install Xposed Installer On Android.

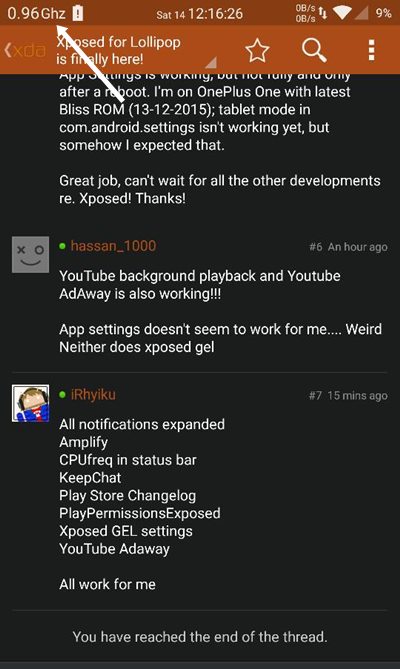
Step 3. You need to download and install the excellent Xposed module CPUFreq in Statusbar that shows the android CPU frequency right at the status bar.
Step 4. After installing the app on your device, you need to enable this in the Xposed module.
Step 5. Now reboot your device to make this Xposed module work properly on your device.
Step 6. After reboot, you need to open the CPUFreq in Statusbar app and then enable the CPU frequency option. You will instantly get the frequency indicator right on your status bar.
That’s it! You are done. This is how you can use the CPU freq app to show CPU frequency in the Android status bar.
Using Cpu Float
Cpu Float is one of the best Android apps you can use to show the CPU temperature on the Android status bar. As the app’s name says, Cpu Float is a floating app that monitors several key pieces of system information. Here’s how to use the app.
Step 1. First of all, download & install Cpu Float on your Android smartphone. You can get the app from the Google Play Store.

Step 2. Next, open the app from your Android app drawer and then grant all the much-needed permissions.
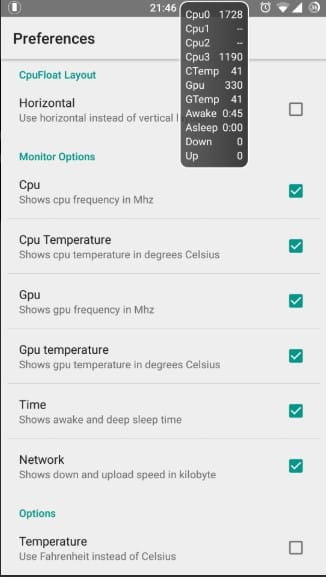
Step 3. Now you will see the main interface of the app. First, you need to tap on the Preferences and then enable the option ‘Status Bar.’
Step 4. Under the Monitor section, enable the ‘CPU‘ and ‘CPU Temperature.’
Step 5. Now press the home button of your Android, and now you will see the CPU frequency on the Status Bar.
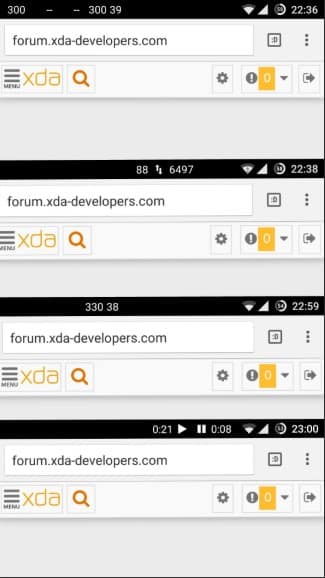
That’s it; you are done! This is how you can show CPU frequency on your Android’s Status bar through Cpu Float.
Using TinyCore
Well, TinyCore is another best system monitoring app on the list that makes your Status-bar a little more useful by adding a CPU or RAM indicator to it. The great thing about the app is that it works on both rooted and non-rooted Android smartphones.
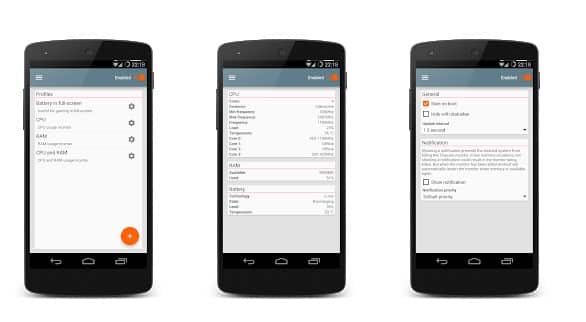
You can easily show the CPU usage percent, CPU frequency, RAM Usage, Battery level on your Android’s status bar with this app.
So, this guide is all about how to show CPU Frequency in the Android Status bar. I hope this article helped you! Please share it with your friends also. If you have any doubts related to this, let us know in the comment box below.
The post How To Show the CPU Frequency In Android Status Bar appeared first on TechViral.
from TechViral https://ift.tt/2oCGvQm
No comments:
Post a Comment