
The external USB devices that we use daily are detected automatically by the Windows operating system as soon as we connect them. In fact, Windows 10 allows users to customize the OS’s behavior when it detects an external driver.
This feature is called ‘AutoPlay’, and it lets you set default actions for USB drives, Memory cards, or any media or device connected to the computer. The same feature is also available on Windows 11, but it’s hidden deep under the Settings.
When you insert a removable drive into a Windows 11 PC, AutoPlay will ask you how you’d like Windows to open the drive or play the media files. Here in this article, we will share a step-by-step guide on configuring autoplay on Windows 10.
Also read: How to Rename Your Windows 11 PC
Steps to Configure or Disable AutoPlay On Windows 11
Not only that, but we will even show you how to disable the AutoPlay feature altogether. So, let’s check out how to configure or disable autoplay on Windows 11 operating system.
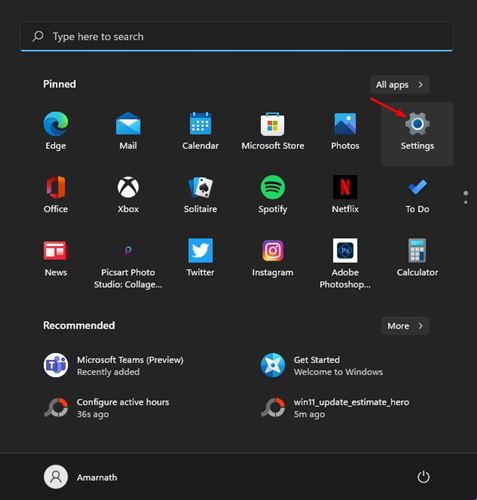
Step 1. First of all, click on the Start button and select ‘Settings‘. Alternatively, press the Windows Key + I button to launch the settings app directly.
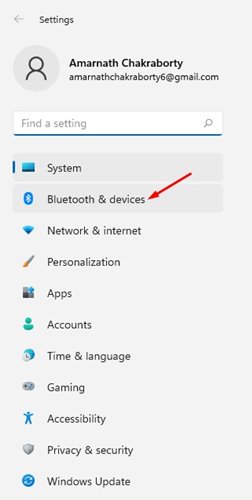
Step 2. On the Settings page, click on the ‘Bluetooth & devices’ option.
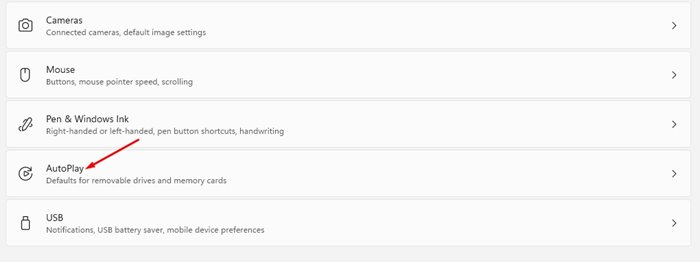
Step 3. Click on the ‘AutoPlay‘ option on the right pane, as shown in the screenshot below.
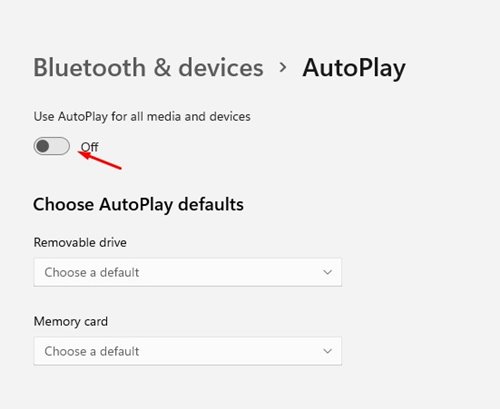
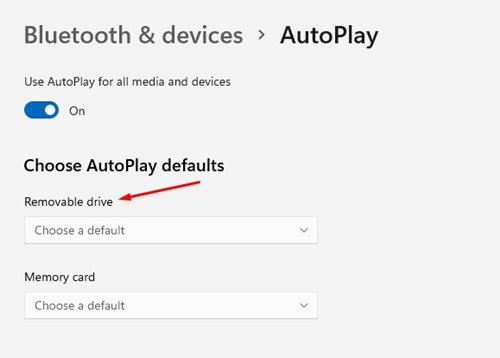
Step 4. To turn off the AutoPlay feature, flip the switch under “Use AutoPlay for all media and devices” to Off.
Step 5. If you don’t want to disable the feature, you can configure the AutoPlay actions. For that, you need to locate the ‘Choose AutoPlay Defaults’ section.
Step 6. Under the Removable Drive, you will find different options like Configure Storage Settings, Take No Actions, Open Folders to View Files, As Me Every Time. You need to select the option as per your choice.
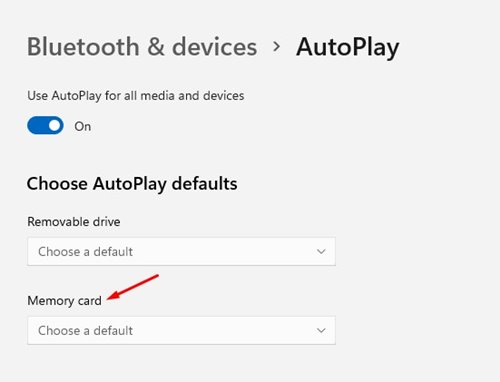
Step 7. Next, on the Memory Card option, you will find many options like Import Photos and Videos, Play Media Files, Take No Action, Open Folders to View files, Ask me Every Time. You need to pick the option that matches your personal preference.
That’s it! You are done. This is how you can configure or disable autoplay on Windows 11.
So, this guide is all about how to configure or disable autoplay on Windows 11. I hope this article helped you! Please share it with your friends also. If you have any doubts related to this, let us know in the comment box below.
The post How to Configure or Disable AutoPlay On Windows 11 appeared first on TechViral.
from TechViral https://ift.tt/3CnBnUu
No comments:
Post a Comment