Let’s admit; sometimes, while browsing the web, we come across several pieces of information or image that we want to save. Although the web browser allows you to save the images or copy the text, what if you want to capture the selected region of the screen or entire webpage?
This is where the screenshot utilities come into play. Windows 10 and 11 include a built-in screenshot utility known as Sniping Tool. The tool allows you to capture screenshots, but it misses some essential features like it can’t capture scrolling screenshots.
Although many third-party screenshot utilities are available for Windows, you don’t need to install any additional app if you are a Mozilla Firefox user. With Mozilla Firefox, you can take a screenshot of a web page or a selected region directly within your web browser.
Take Screenshots using Firefox Screenshot Tool on Windows 10/11
The functionality doesn’t even need any add-on or extension installation. It’s a built-in feature that’s available on Firefox for Windows, Linux, and Mac. Hence, in this article, we will share a detailed guide on accessing the Firefox Screenshot tool.
Accessing the Firefox Screenshot tool is remarkably easy. You need to follow some of the simple steps given below. So, let’s check out.
Step 1. First of all, open the Mozilla Firefox browser on your computer.
Step 2. Now open the website where you want to capture a screenshot. Right-click anywhere on the screen and select the ‘Take Screenshot’ option.
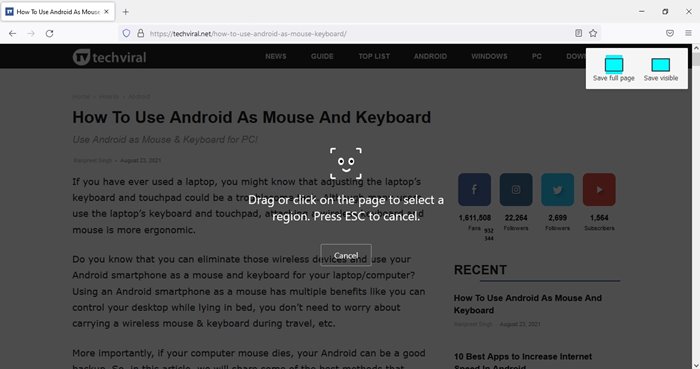
Step 3. Firefox will now go into screen capture mode. You will find three different options to capture the screenshot.
Step 4. Suppose you want to capture the screenshot manually, drag or click on the page to select a region. Once done, click on the ‘Download‘ button.
Step 5. If you want to save the entire webpage, click on the ‘Save Full page’ option and click on the ‘Download‘ button.
Step 6. Select the ‘Save Visible’ option and click on the ‘Download‘ button if you want to capture only the visible screen.
That’s it! You are done. The only demerit of the Firefox Screenshot utility is that it can only capture web pages. To capture app or game screenshots, you still need screenshot software for Windows.
So, this guide is all about how to take screenshots using the Firefox Screenshot tool on Windows 10/11. I hope this article helped you! Please share it with your friends also. If you have any doubts related to this, let us know in the comment box below.
The post How to Take Screenshots using Firefox Screenshot Tool On Windows 10/11 appeared first on TechViral.
from TechViral https://ift.tt/3AZXWOg


No comments:
Post a Comment