Snapchat is undoubtedly the most popular image and video-sharing app ever for Android and iPhone. It received much praise when first introduced to the public due to its unique concept.
Today, Snapchat is being used by almost everyone, but it’s more popular among young adults. It’s one such app that you will never regret having on your smartphone.
If you are a regular Snapchat user, you may know that the app allows you to send stickers to your friends. But do you know you can create your own sticker or save the one you received?
Hence, this article will discuss the steps for saving stickers on Snapchat. Also, we will learn how to create customized stickers on Snapchat. Let’s get started.
How to Save Stickers on Snapchat?
Let’s say your friends sent you a sticker that interests you. In that case, you can save and use the sticker on your chats.
To save a sticker on Snapchat, you need to open the chat where the sticker has been sent. Now you must long-press on the Sticker you want to save and select the ‘Save in Chat’ option.
Another way to save Stickers on Snapchat is to tap on them. This will automatically save the sticker on your Snapchat app. To use the saved Snapchat stickers, you need to open the chat and tap on the smiley icon on the chat space.
Now you can access all saved stickers on the Snapchat app.
How to Create Custom Stickers on Snapchat?
Creating custom stickers on Snapchat is easy, and you won’t have to use any third-party application. Below, we have shared steps to create custom stickers on Snapchat.
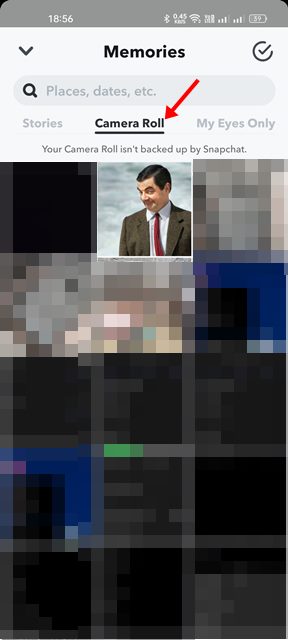
1. First, open the Snapchat app on your Android or iPhone. When the app opens, tap the Memories button below the capture Snap button.
2. On the Memories, switch to the ‘Camera Roll‘ and select the image you want to convert into a sticker.
3. This will open the image. Next, tap on the pencil icon at the bottom left corner.
4. On the next screen, tap the scissor icon at the top-right corner.
5. Select the ‘Draw‘ function at the bottom and manually draw the sticker’s border. Once done, tap on the Done button. You can also use the Rectangle or Ellipse tool to ease the process.
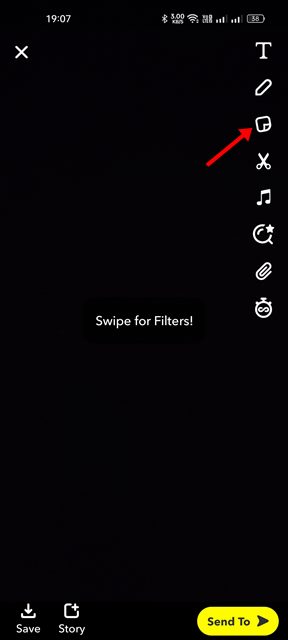
6. To access your sticker, open the Snapchat Story creation interface and tap the Sticker icon at the top-right corner.
7. On the Sticker tab, tap the scissor icon at the top to view all stickers you’ve created manually.
That’s it! That’s how easy it is to create custom stickers on the Snapchat app for Android and iOS.
How to Delete Custom Snapchat Stickers
If you wish to keep your Snapchat app clean and free from any mess, it’s best to delete the stickers you no longer use. Deleting Snapchat Stickers is easy; follow the steps we shared below.
1. Open the Snapchat application on your phone and reach the Story creation screen.
2. Next, tap on the Sticker icon at the top-right corner.
3. Now, select the Scissor icon at the top to view all stickers you have created.
4. Next, long press on the sticker you want to delete and select the ‘Delete‘ option.
That’s it! You must repeat the same steps for all stickers you want to delete from the Snapchat app.
Other Ways to Personalize Snapchat?
Stickers are not the only thing that adds more fun to the app. You can also change your friend emojis on Snapchat to keep track of your friends.
Friend Emojis on Snapchat is designed to represent your relationship with your friends and can be changed per your need.
Also, changing the Snapchat Emoji can greatly improve the in-app experience. It’s easy to change friend emojis on Snapchat. For that, follow our guide – Change Snapchat Emojis.
Stickers are great, and they can drastically improve the chat experience. But, just like Snapchat, WhatsApp allows you to create custom stickers. For that, follow our guide – Convert any picture into a WhatsApp Sticker.
So, this guide is all about saving Stickers on the Snapchat application. Let us know if you need more help saving Snapchat stickers in the comments. Also, if the article helped you, make sure to share it with your friends.
The post How to Create & Save Stickers on Snapchat (Full Guide) appeared first on TechViral.
from TechViral https://ift.tt/mLiSznf


No comments:
Post a Comment