Everyone knows very well that hackers now rule the internet. No matter how robust your security implementation is, hackers will always find a way to hack into your precious accounts.
However, several online platforms offer a system of two-factor authentication to fight the most against piracy in user accounts. Now, many of you might be thinking that what is two-factor authentication? Don’t worry; here in this tutorial, we will tell you what it is.
What is 2-Step Verification?
It is a security system that consists, as a general rule, of sending a code or password to the user through SMS or e-mail. Once you receive the secure OTP or code, you must put it on your account to sign in.
We all know that user-based authentication and password remain the most commonly used method for online services. However, if your credentials are discovered, any user can easily access or hack your crucial information.
Hence, to increase the security of your account, nothing better than enabling 2-Step Verification, also known as two-factor authentication, as we told you earlier.
Steps to Turn On 2-Step Verification For Google Gmail
2-Step Verification adds an extra layer of security to your account. As once you set up this well-known and almost unhackable security system, every time you authenticate or sign in to your account, you will receive an OTP or code on your smartphone to confirm the authentication to successfully sign in to your account. Hence, now without wasting much time, let’s get started.
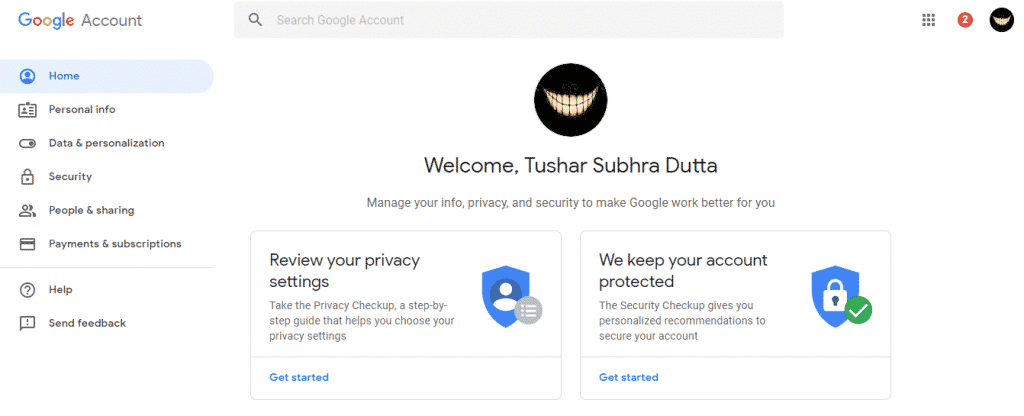
1. First of all, access your Account Settings here.
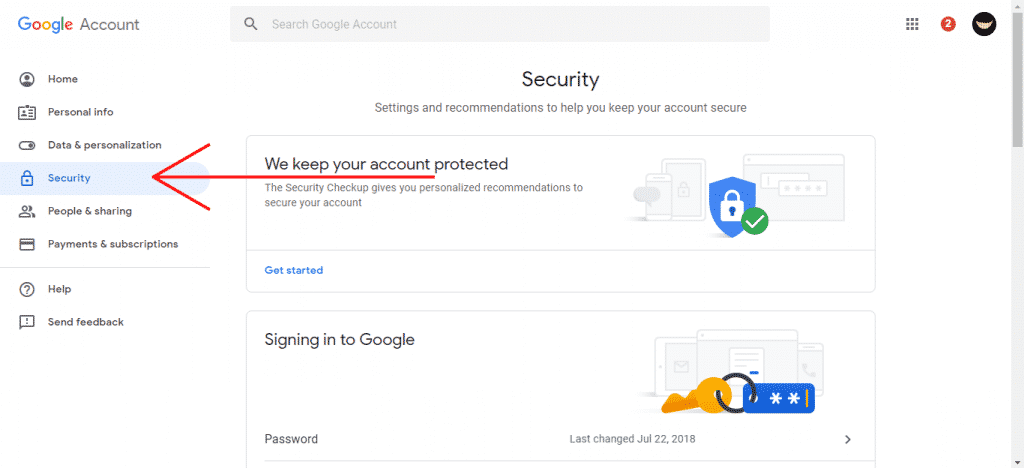
2. Next, click on the Security tab on the left side and search for 2-Step Verification.
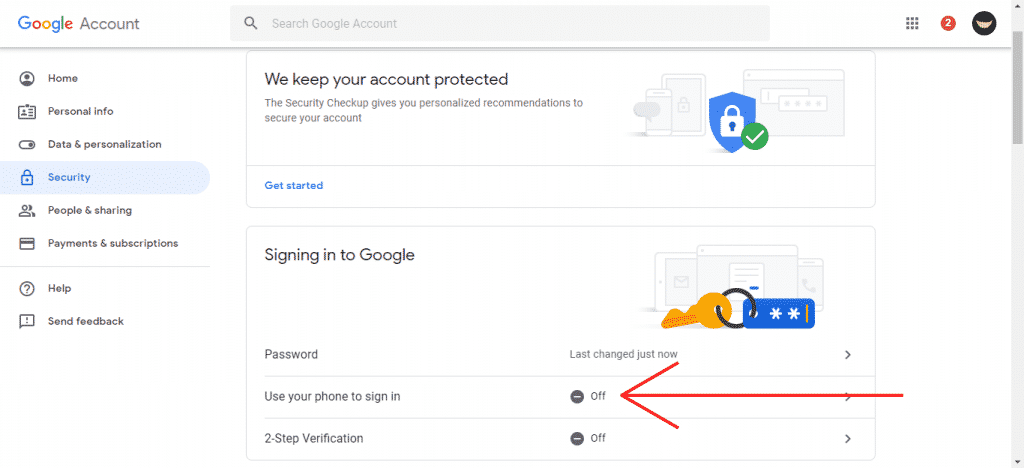
3. Scroll down a little, then turn on the 2-Step Verification option.
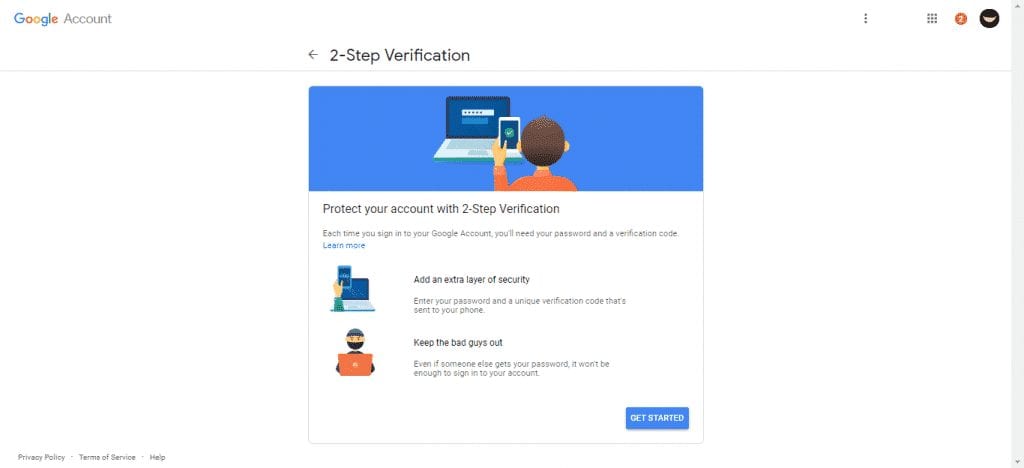
4. Once you activate the option, you will receive all the information regarding your sign-in.
5. Now, you will get this window mentioned below.
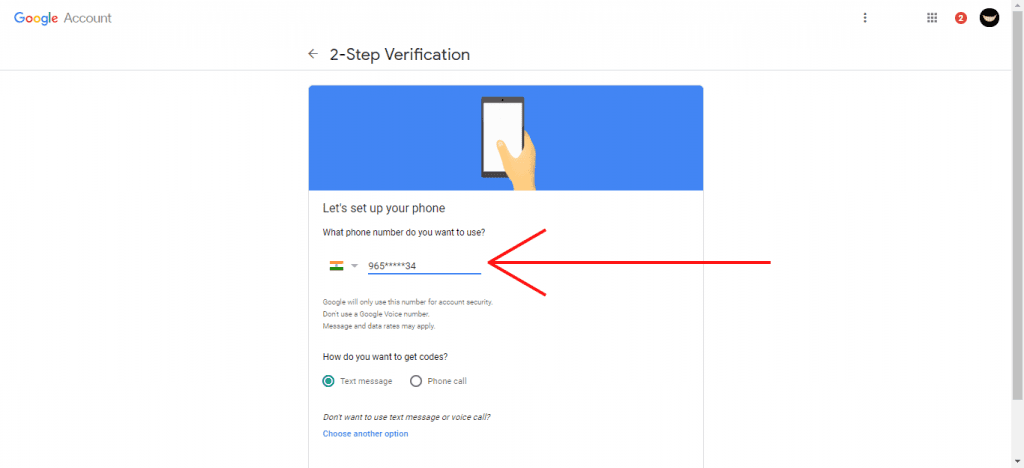
6. Now, Google will ask you to enter the mobile phone number to which Google will send the authentication or OTP code for each session or sign-in. (Note: The user can receive the code by Text Message or via call).
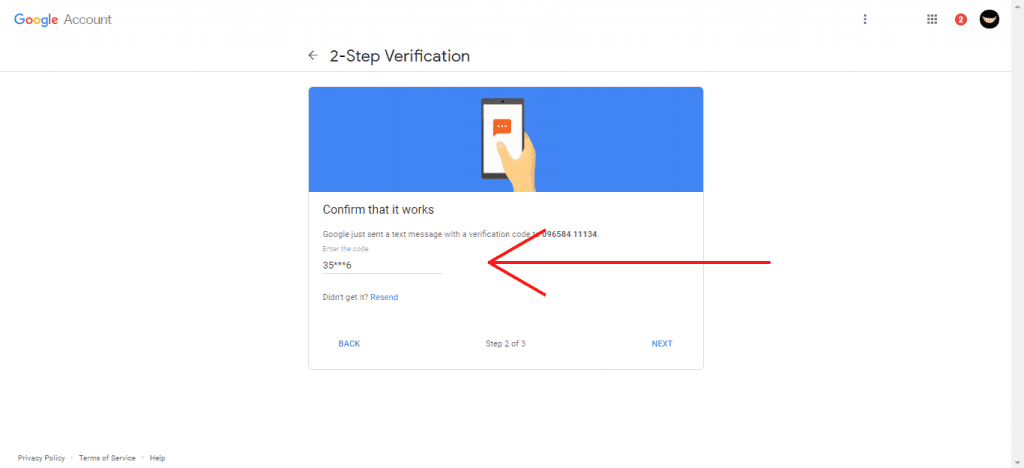
7. After the above step, you will get a code or OTP on your mobile via SMS or call, whatever means you have selected. Enter the code you received from Google via SMS or Call to activate the 2 Step Verification security system on your Gmail and Google Account.
That’s it! Now you are done.
So, these are some of the simple steps to activate the two-factor authentication on your Gmail account. If you need more help activating this security feature in your Google account or Gmail, let us know in the comment box below.
The post How To Turn On 2-Step Verification For Google Gmail appeared first on TechViral.
from TechViral https://ift.tt/ZwSaEAW
No comments:
Post a Comment