
If you are a photo editor or a web designer, you might know the importance of borders in an image. However, when it comes to photo editing, users rarely consider adding a border to a picture.
At times, subtle changes to an image can make it appear different. For example, adding a border can give your image a new and unique touch. Most people think that adding borders to an image requires PhotoShop; but, that’s not true.
It’s relatively easy to add borders to an image on Windows 10. You can either use online web editors or free software to add attractive frames to any image without technical knowledge.
Also Read: How to Copy Text From Images in Google Photos
2 Best Methods to Add Borders to Images in Windows 10
So, if you are interested in adding borders to an image, you are reading the right article. In this article, we will share a few best methods to add borders to an image. Let’s check out.
1. Using Microsoft Paint
Microsoft Paint is a free image editing tool that comes built-in with Windows 10 operating system? The new Microsoft Paint offers you an easy way to draw borders around the image. Here’s how to use it.
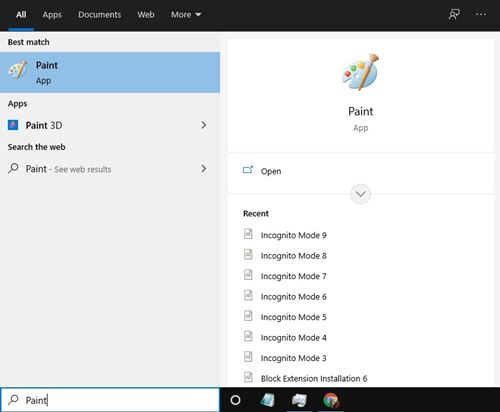
Step 1. First of all, open Windows search and type in Microsoft Paint. Then, open the Microsoft Paint app from the list.
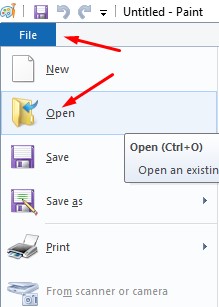
Step 2. Next, click on the File tab and select ‘Open‘. Now choose the image that you want to edit.
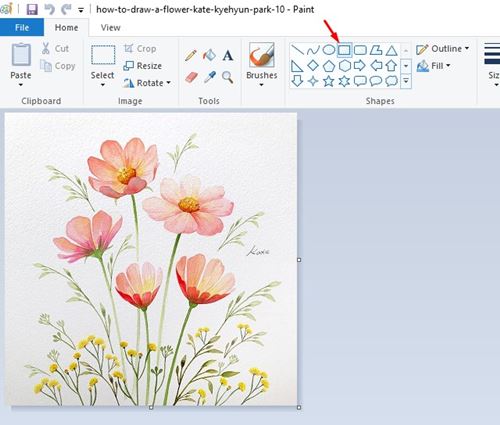
Step 3. After importing the image, click on the Shapes tab and select the ‘Rectangle‘ shape.
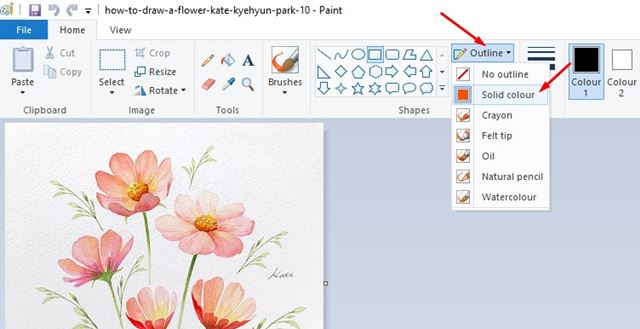
Step 4. Next to the shapes, click on the ‘Outline‘ tab and select a solid color. Now pick the color of the border. Under the outline, you can also choose the size of the border.
Step 5. Now place the mouse cursor at the top-left of the image and draw a rectangle filling all edges.
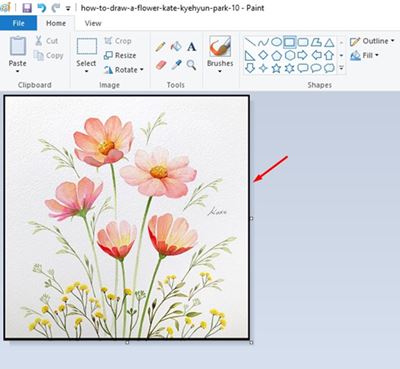
Step 6. Once done, click on the File tab and use the ‘Save as’ option to save the image.

That’s it! You are done. This is how you can add borders to an image via Microsoft Paint.
2. Using PhotoScape
Well, PhotoScape is a free photo-editing application that is of great use. You can use it to add borders to any image. Also, PhotoScape is much easier to use than Microsoft Paint.
Step 1. First of all, download and install PhotoScape on your system.
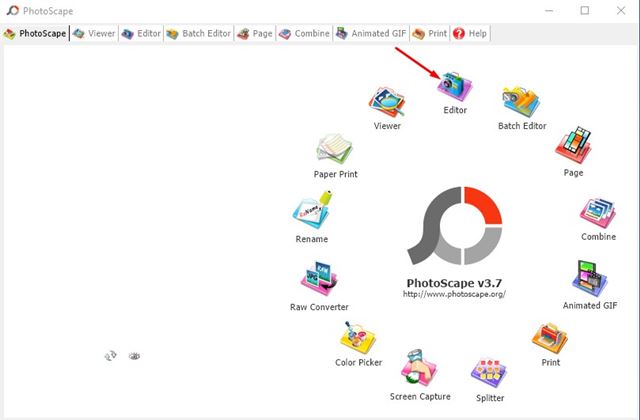
Step 2. Now open PhotoScape and click on the ‘Editor‘
Step 3. Now drag and drop the image you want to add a border.
Step 4. Under the Home tab, use the drop-down menu behind the ‘Photo + Frame’ option to select the border.
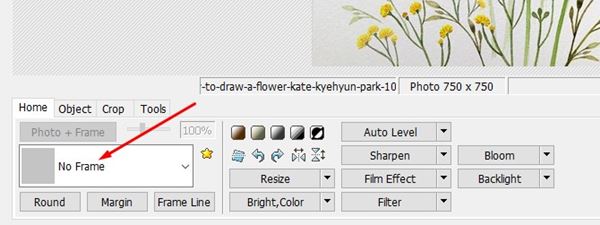
Step 5. Photoscape offers you a wide range of border options to choose from.

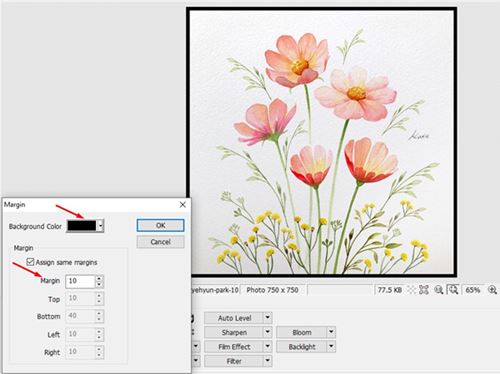
Step 6. To add a colored border, click on the ‘Margin‘ option as shown below.
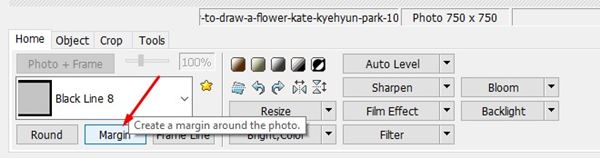
Step 7. Select the background color and set the margin as per your wish.
Step 8. To save the file, click on the ‘Save‘ button.
That’s it! You are done. This is how you can use PhotoScape to add a border to an image.
So, this guide is all about how to add borders to an image for free. I hope this article helped you! Please share it with your friends also. If you have any doubts related to this, let us know in the comment box below.
The post How to Add Borders to Images in Windows 10 (Free Methods) appeared first on TechViral.
from TechViral https://ift.tt/3inJKsC
No comments:
Post a Comment