
Compared to the previous version of Windows, Windows 10 offers more tools and features. Not many would know that their Windows 10 computer also has a hidden video editor that works like a Windows Movie Maker. The hidden video editing feature is actually a part of the Photos app that comes built-in with Windows 10.
With the Windows 10 Photos app, you can trim videos, merge videos, or create amazing slideshows with images. Also, the Microsoft Photos app can create videos automatically from your chosen photos.
Microsoft Photos app won’t eliminate the need for a video editing suite, still, it’s worth a try. It can even create a video from images. Also, Compared to professional video editing software, the video editor of the Photos app is comparatively easy to use.
Also Read: Best Google Photos Alternatives
Create a Video from Images Using Microsoft Photos App
So, in this article, we are going to share a detailed guide on how to create a video from images using the Photos app on Windows 10 computer. Let’s check out.
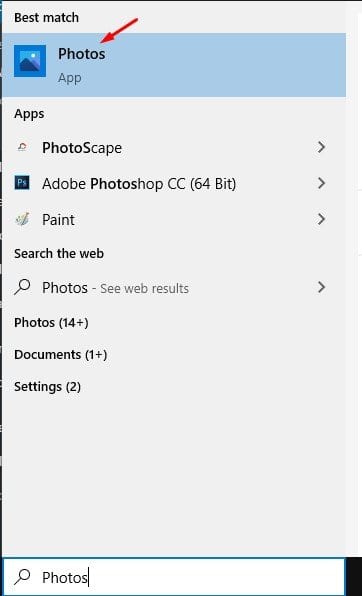
Step 1. First of all, click on the Windows search and type in ‘Photos’. Open the Photos app from the list.
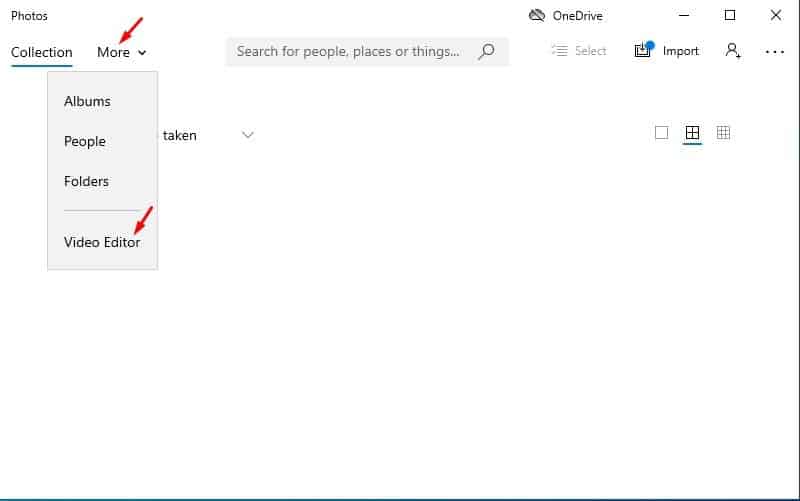
Step 2. On the Photos app, click on the ‘Video Editor’ option.
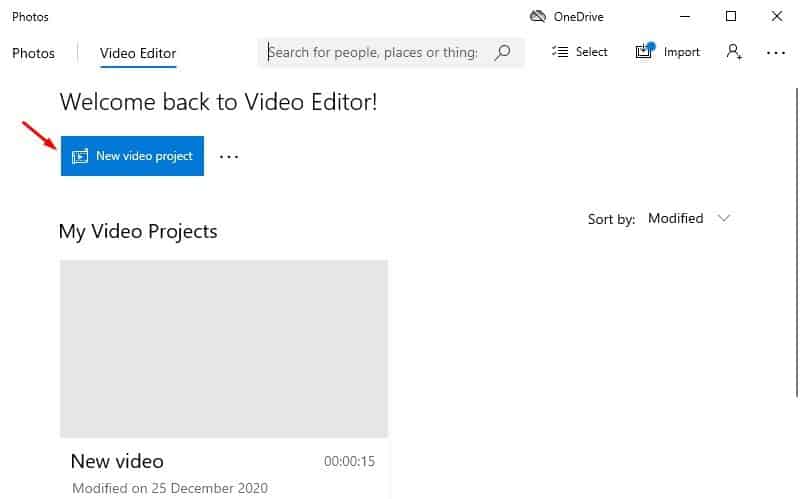
Step 3. On the next page, click on the ‘New video project’ option.
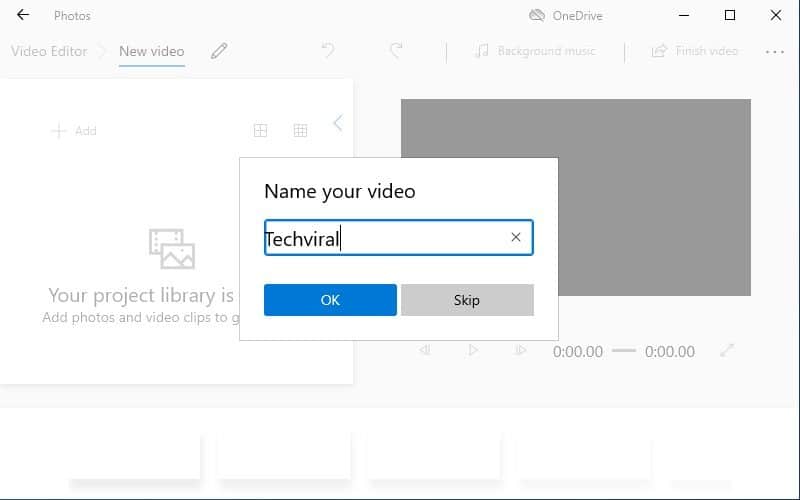
Step 4. Now you will be asked to name your video. Simply type in the video project name.
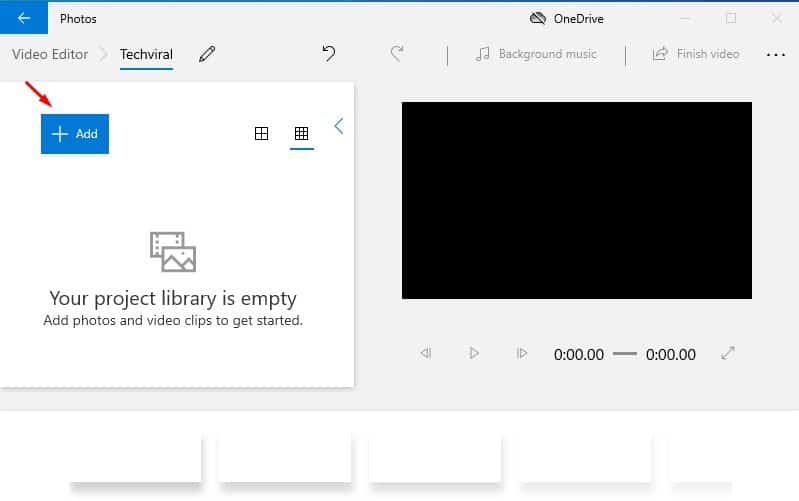
Step 5. Now click on the ‘+Add’ button to add your images.
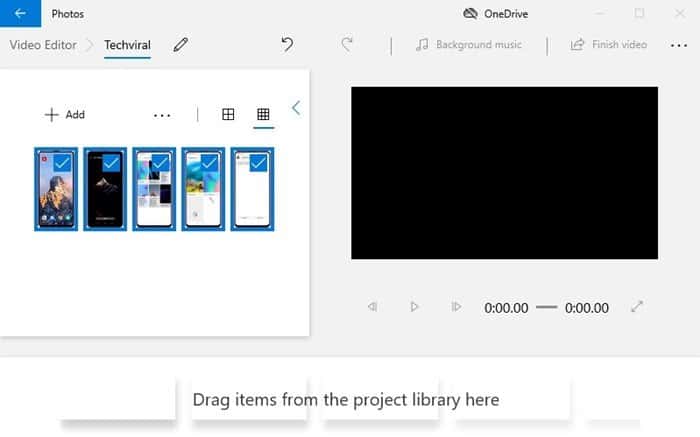
Step 6. Select the photos which you want to turn into videos. I have selected 5 images here.
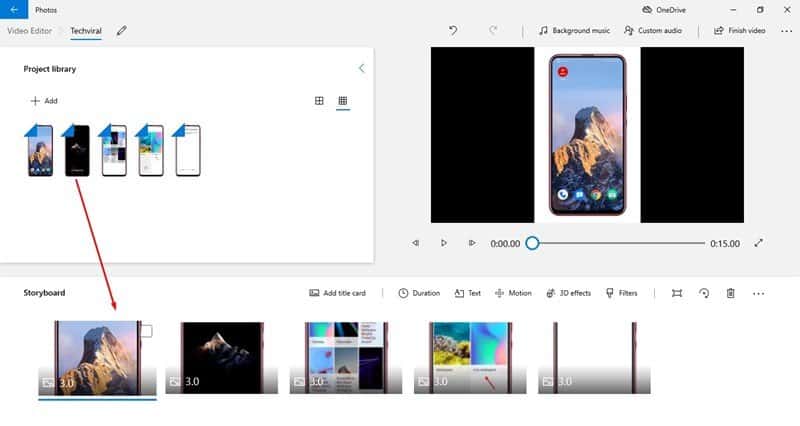
Step 7. Now you need to drag and drop the images into the storyboard.
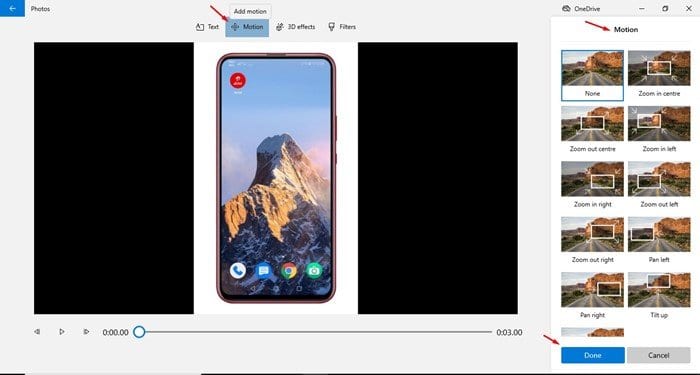
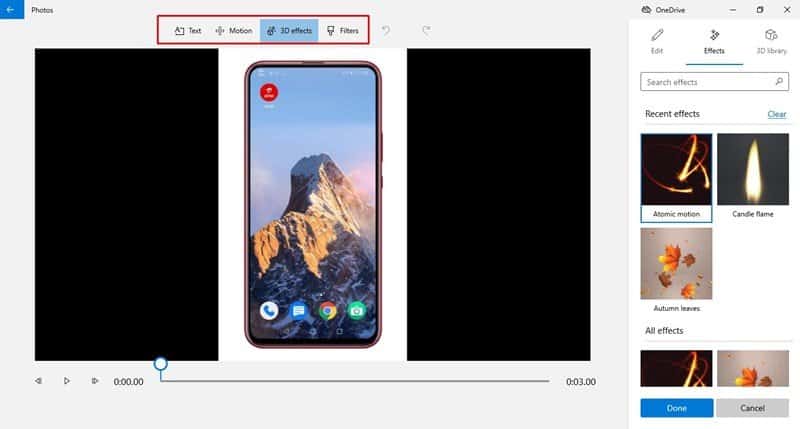
Step 8. Once done, click on the ‘Motion’ tab and select the motion that you want to apply to your video.
Step 9. Similarly, you can add 3D effects, Filters, and other things as well.
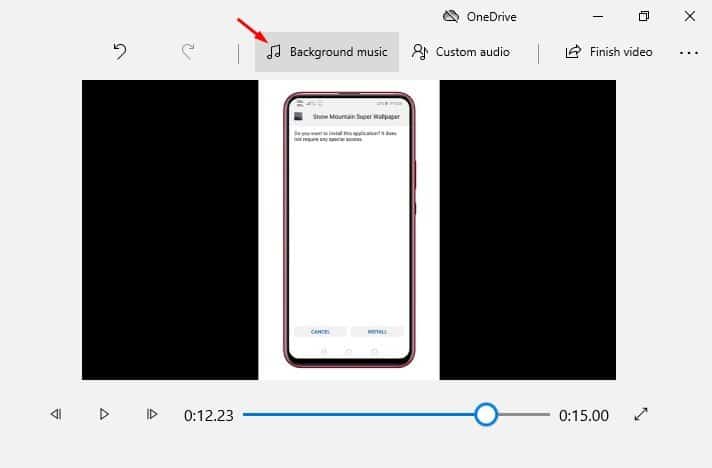
Step 10. You can even add background music to your video. For that, click on the ‘Background Music’ and select the music of your choice.
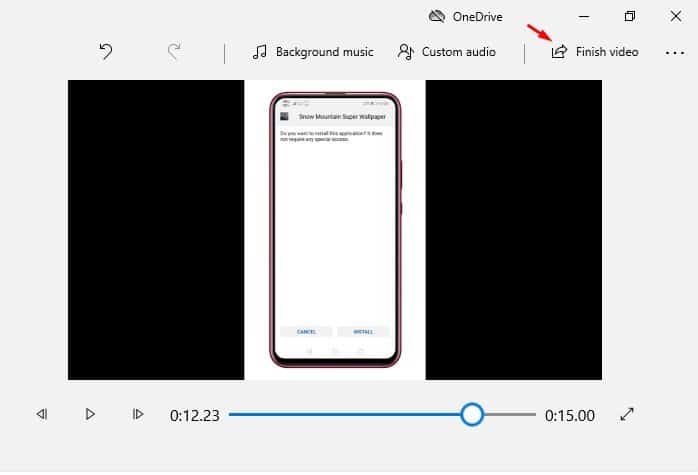
Step 11. Once done with the video creation, click on the ‘Finish video’ button.
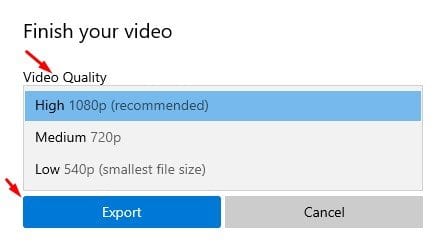
Step 12. Next, select the video quality and click on the ‘Export’ button.
That’s it! You are done. The video will be saved in the destination folder.
So, this is how you can create a video from images using the Photos app. I hope this article helped you! Please share it with your friends also. If you have any doubts related to this, let us know in the comment box below.
The post How to Create a Video from Images Using Microsoft Photos App appeared first on TechViral.
from TechViral https://ift.tt/3nSo0F9
No comments:
Post a Comment