
A few days ago, we shared an article on adding a custom DNS server on Android. Today, we are going to share the same for iPhone users. Just like Android, you can set up custom DNS servers to use on iPhone. The process is pretty easy, and it doesn’t require any additional app installation.
But, before sharing the method, let’s know how DNS works and what its role is. DNS or Doman name system is an automated process that matches the domain names to its IP Address.
What is DNS?
Regardless of the device you are using, when you enter a URL in the web browser, the role of DNS servers is to look at the IP Address associated with the domain. If matched, the DNS server comments on the visiting website’s web server, and hence the web page is loaded.
This is an automated process, and you don’t need to do anything in most cases. However, there are times when the DNS server fails to match the IP Address. At that time, users get various DNS related errors on the web browser as DNS probe started, DNS Lookup failed, DNS server not responding, etc.
How to Add Custom DNS Server On iPhone
All of the DNS related problems can be easily fixed by using a custom DNS server. On an iPhone, you can easily set a custom DNS server without installing any app. Below, we have shared a detailed guide on how to add a custom DNS server on the iPhone. Let’s check out.
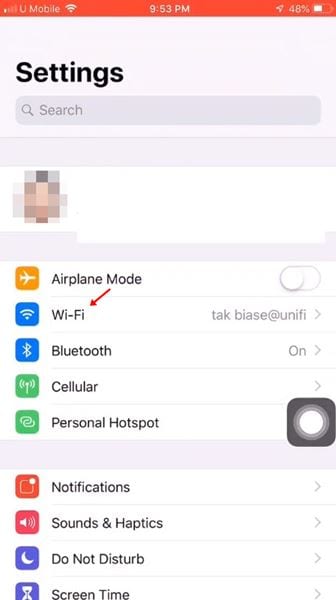
Step 1. First of all, open the ‘Settings’ app on your iOS device.

Step 2. On the Settings page, tap on the ‘Wi-Fi’ option.
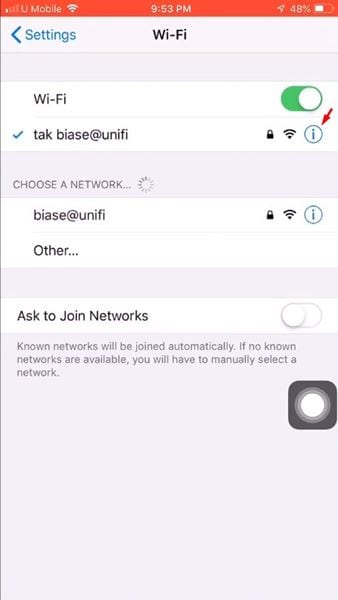
Step 3. On the WiFi page, tap on the (i) sign located behind the WiFi name.
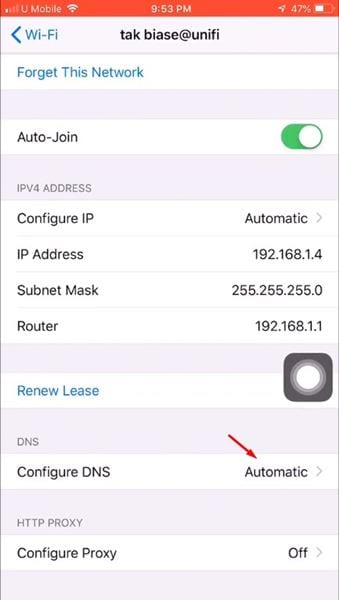
Step 4. On the next page, scroll down and find the ‘Configure DNS’ option.
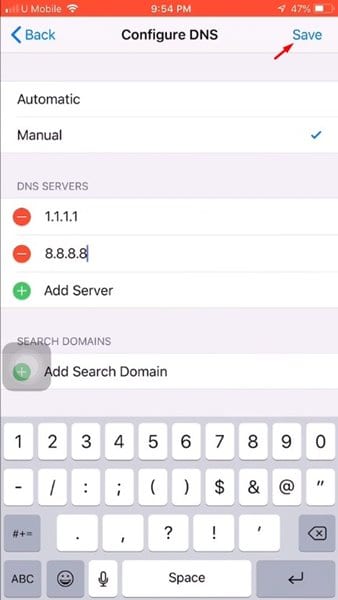
Step 5. Tap on the Configure DNS option and select the ‘Manual’ option.
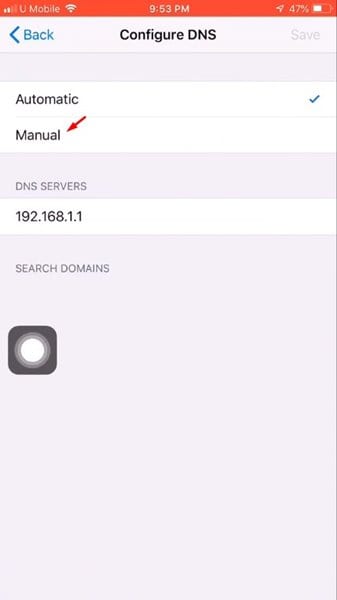
Step 6. Now tap on the ‘Add Server’ option and add the DNS servers there and tap on the ‘Save’ button.
Step 7. Once done, the WiFi network will re-connect.
That’s it! You are done. This is how you can change the DNS server on an iPhone.
For a complete list of Public DNS servers, check out the article –
So, this article is all about how to change the DNS server settings on an iPhone. I hope this article helped you! Please share it with your friends also.
The post How to Add Custom DNS Server On iPhone in 2020 appeared first on TechViral.
from TechViral https://ift.tt/35Gy4Jv
No comments:
Post a Comment