Compared to the previous versions of Windows, Windows 10 has more features. To deal with certain security issues, Microsoft introduced an enhanced Windows defender. The enhanced Windows defender app of Windows 10 also has a feature known as ‘Tamper Protection’
What is Tamper Protection?
Tamper Protection is a part of Windows security, which is disabled by default in certain Windows 10 build. According to Microsoft, the Temper Protection helps ‘prevent malicious apps from changing important Windows Defender Antivirus settings, including real-time protection and cloud-delivered protection’
Certain types of apps, especially the malicious ones, disables the Antivirus program as soon as they enter the system. This thing is done to promote the spread of the virus. The Tamper Protection of Windows defender helps to fix this issue.
The Tamper Protection makes it more difficult for a malicious software running on your PC to disable the real-time antivirus protection.
Steps To Enable Tamper Protection in Windows 10
If certain Windows 10 build, the tamper protection is enabled by default. Still, you can follow the method given below to find & enable the Tamper protection on Windows 10. Let’s check out how to enable Tamper Protection in Windows 10 computer.
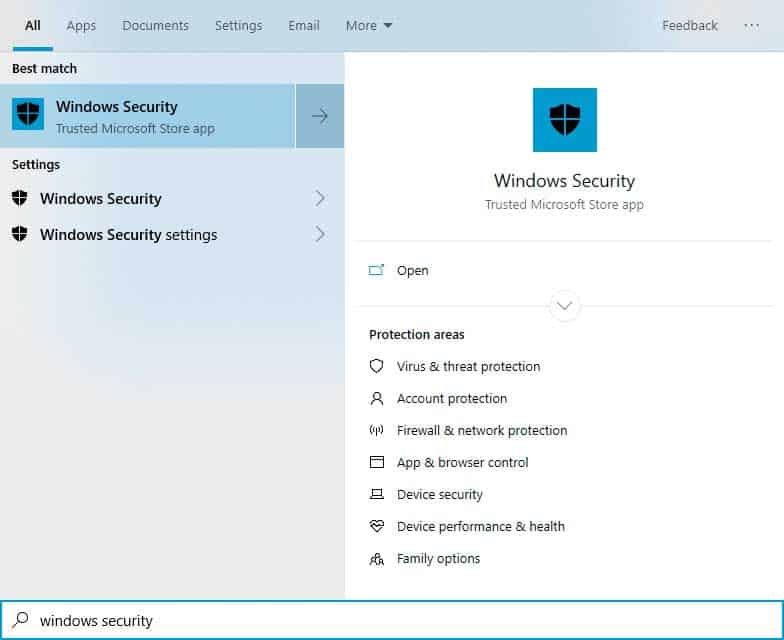
Step 1. First of all, search for Windows security on Windows search.

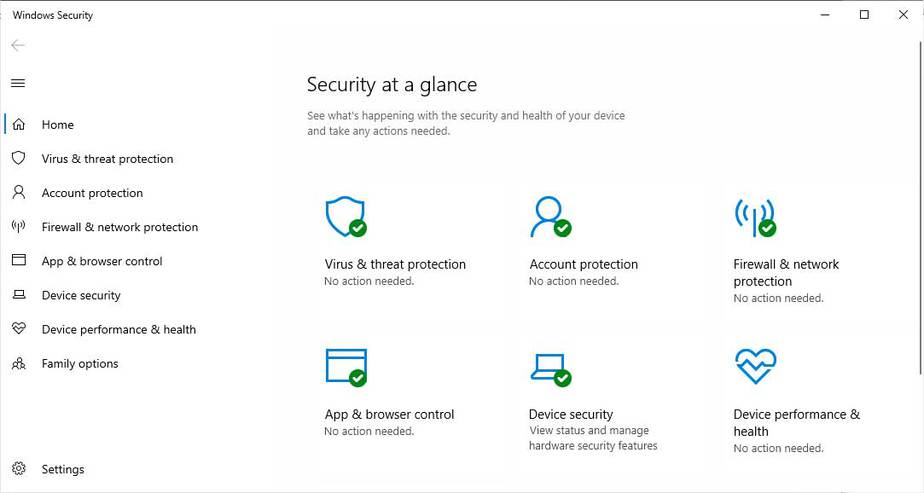
Step 2. Open the Windows security, and click on ‘Virus & threat Protection’

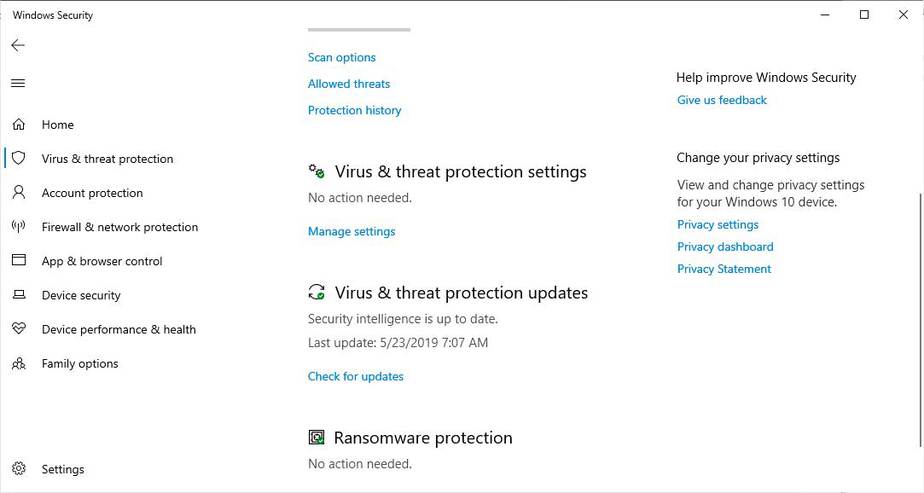
Step 3. Now click on the ‘Manage Settings’ under the ‘Virus & threat protection Settings’

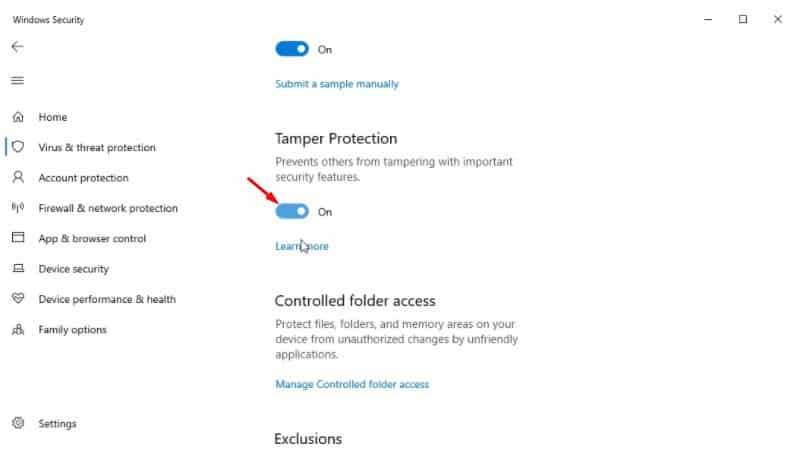
Step 4. Scroll down until you see Tamper Protection. Click on the toggle switch to enable the Tamper Protection feature.

That’s it! You are done. This is how you can enable the Tamper Protection feature.
So, this article is all about how to enable Windows 10 tamper protection security features. I hope this article helped you! Please share it with your friends also.
The post How To Enable Tamper Protection in Windows 10 appeared first on Tech Viral.
from Tech Viral https://ift.tt/32gfWnN
No comments:
Post a Comment