
Well, if we look around, we will find that there are hundreds of instant messaging apps available for both Android and iPhone. Out of all those, it was WhatsApp that usually steals the show. Compared to every other instant messaging apps, WhatsApp provides users far more features and privacy options.
Actually, WhatsApp is not only known for its text messaging features, but also for its voice and video calling. There are no restrictions on messages, voice and video calls. Despite its features, WhatsApp is still criticized for not having some important and crucial features like message scheduling, message locker, etc.
The official WhatsApp app doesn’t have any feature for message scheduling which disappoints lots of users. Recently, we have received multiple messages from WhatsApp users asking about how to schedule WhatsApp Messages on Android
How To Schedule Whatsapp Messages On Android
So, in this article, we are going to share some of the best free methods to schedule WhatsApp Messages on Android and iPhone. So. let’s check out how to Schedule WhatsApp Messages on Android & iOS 2019.
Requirements:-
- Rooted Android (How to root android).
- Whatsapp Scheduling App.
#1 Using WhatsApp Scheduling App
As the name of the app says, WhatsApp Scheduling app is one of the best and top-rated message scheduler that you can use on your Android device. With the WhatsApp Scheduling app, you can schedule text messages in no-time. So, let’s check out how to use the WhatsApp Scheduling app 2019.
Step 1. First, download and install the WhatsApp Scheduling app on your android device. (Note your android must be rooted as explained in requirements above).

Step 2. Once you’re done, open the app. It will ask you for Superuser permission to proceed. Now grant it the super user access. Next, Click on the icon(pencil Icon) in front of Pending messages and select Contact which can either be a person or group and type your message and set the scheduling time.
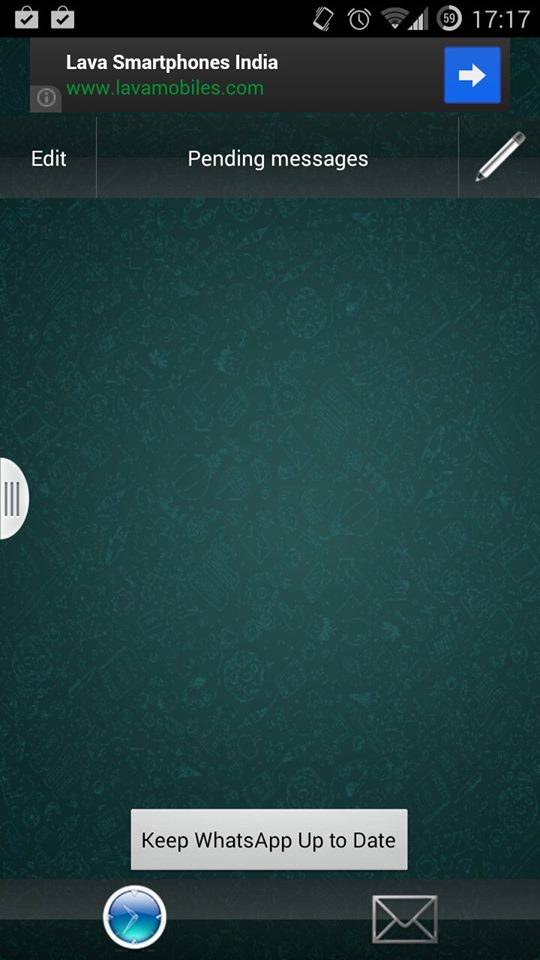
Step 3. Now finally, click Add and put up your desire contact and a message following it. And your message will be listed under the Pending messages tab and will be sent according to set time by you. You can also refer screenshot given below.
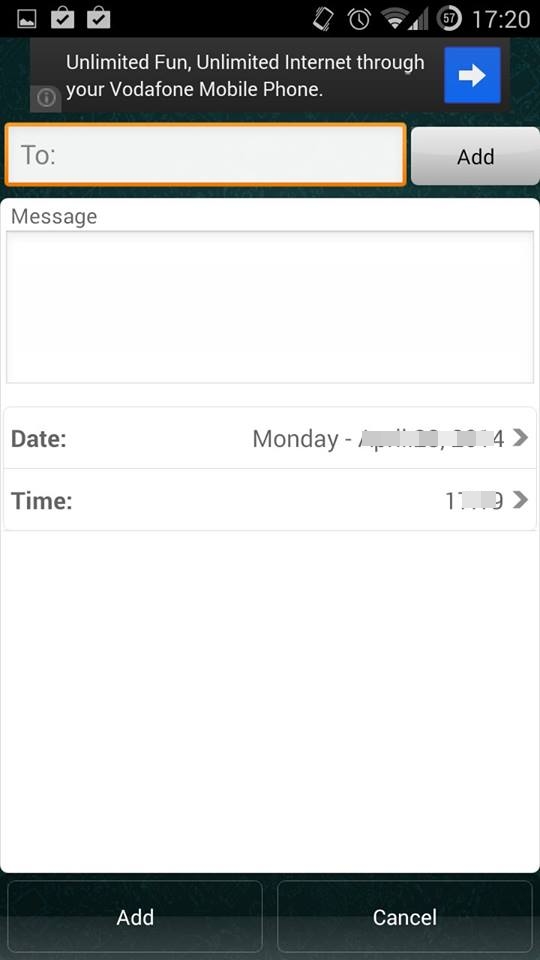
Step 4. And That’s it! You are ready with a scheduled WhatsApp message. You can have a complete look at your pending messages that are still to be delivered. You just need to open the app to have a complete look at your pending messages.
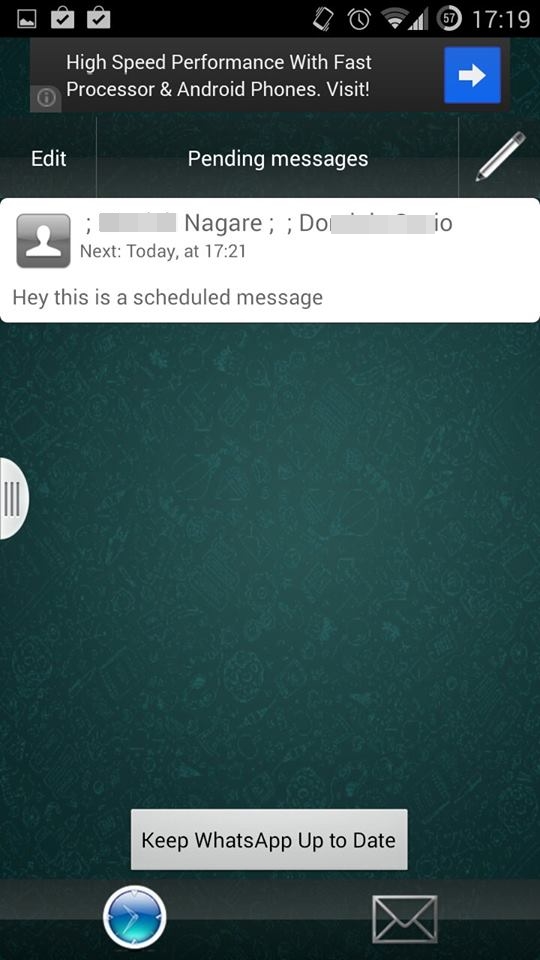
So this is the method for How To Schedule Whatsapp Messages On Android. I am assured that you will undoubtedly like this awesome method. As it will help you a lot like when you want to wish someone his/her birthday at night.
#2 Using Scheduler For WhatsApp
As the name of the app says, it’s another best app that can be used to schedule WhatsApp Messages 2019. However, the app is compatible with only the older version of Android. Let’s check out how to use Scheduler for WhatsApp to schedule WhatsApp text messages.
Step 1. First of all, you need to download Scheduler for WhatsApp App on your Android device.
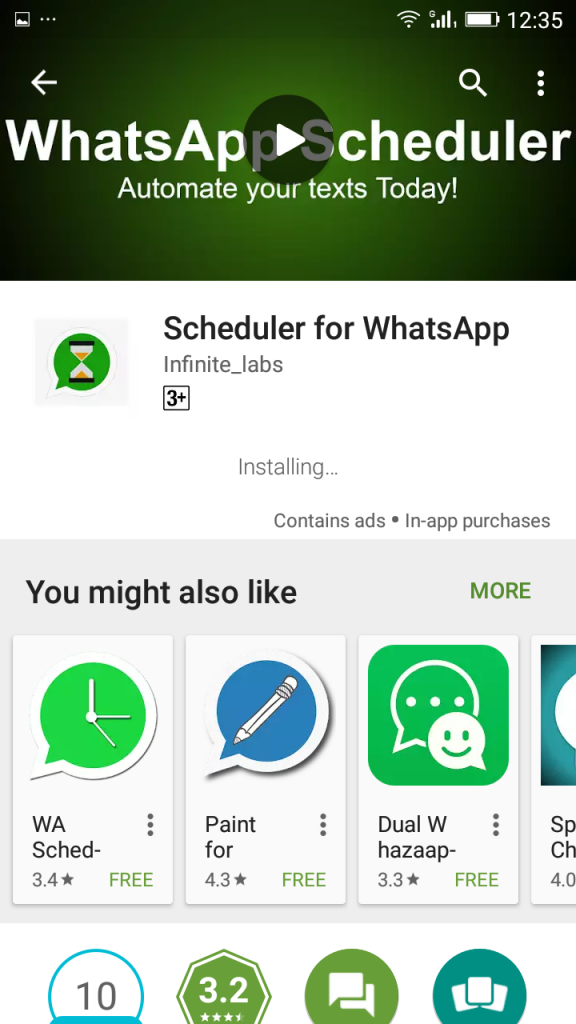
Step 2. Once installed, open the app it will ask you to enable Accessibility settings to schedule messages. Simply tap on “OK”
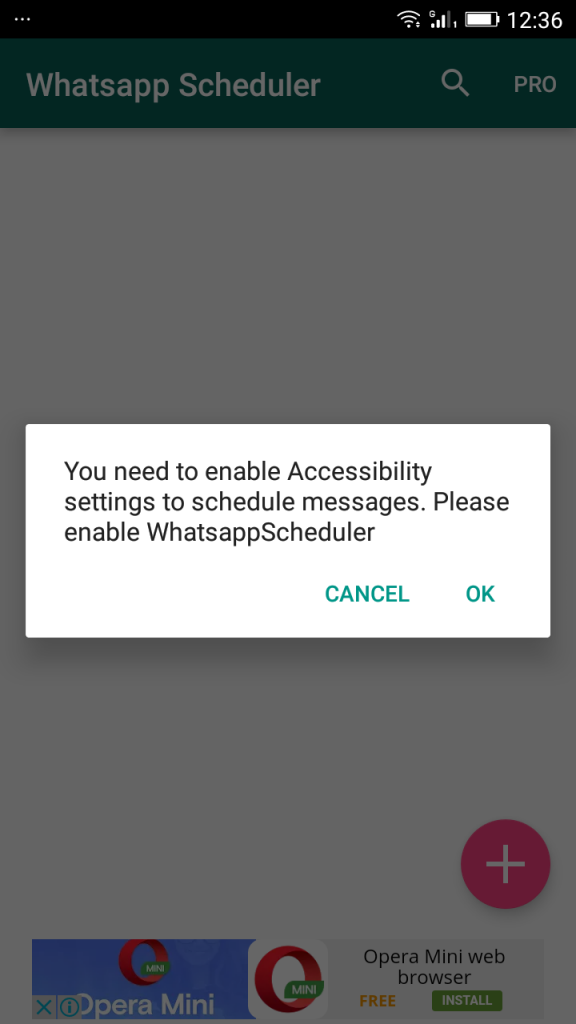
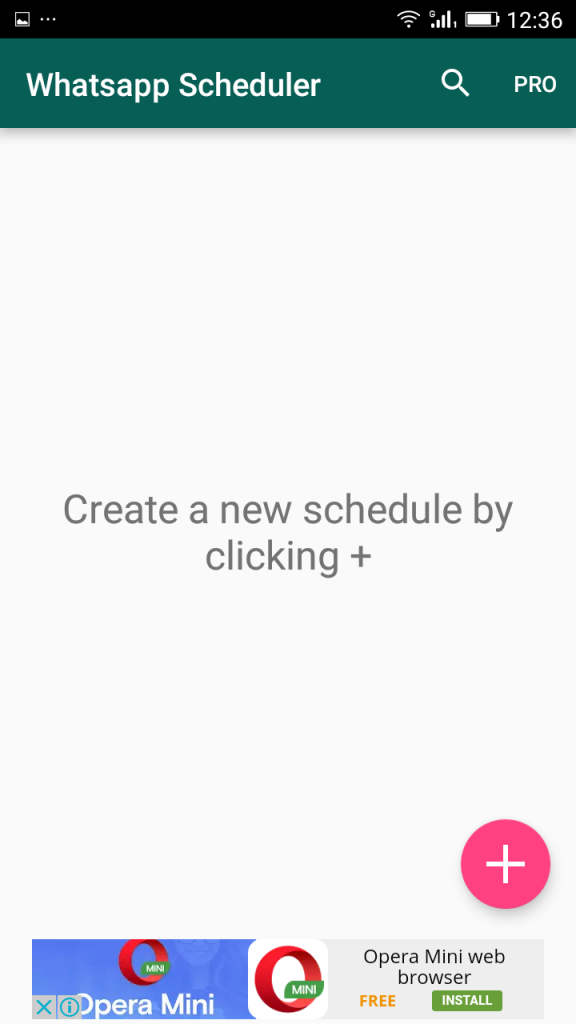
Step 3. Now there you need to Tap on the “+” to create a schedule.
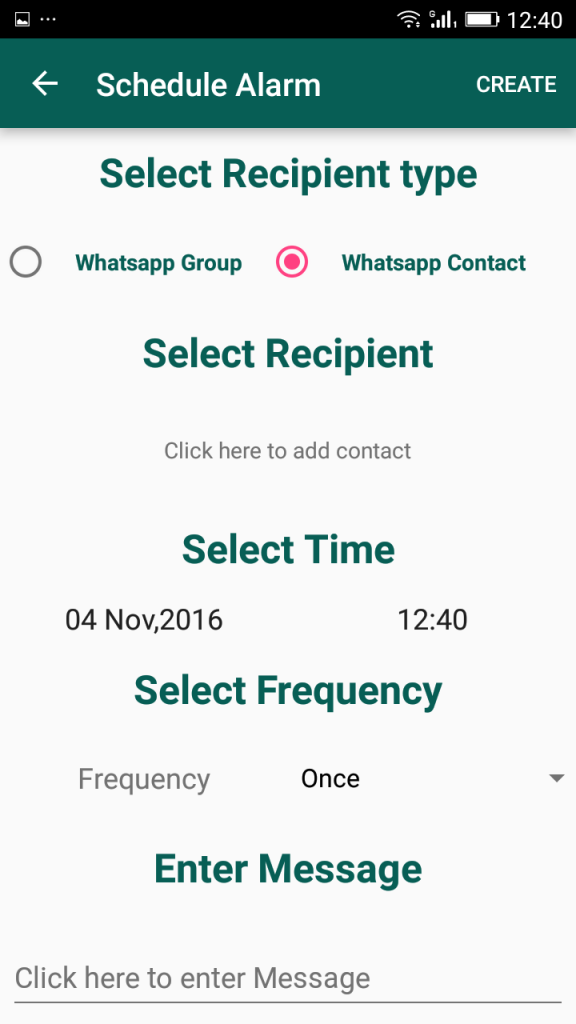
Step 4. Now you can “Select Recipient”, “Select Time”, “Select Frequency” and at last enter the message to create a schedule.
Step 5. Once you have created you can see the Scheduled task on the home screen of “Scheduler for WhatsApp”

That’s it! It works without root and by far the easiest way to send messages.
Also Read: How To Run Multiple Whatsapp Account In Android (Two Methods)
Using SQEDit – Auto Scheduling App
SQEDit the best free & easy-to-use scheduling app that lets you schedule text messages / SMS, send automatic emails, schedule Facebook posts, schedule WhatsApp messages & set call reminders –all without you having to lift a finger!
Step 1. First of all download and install SQEDit – Auto Scheduling App on your Android smartphone.
Step 2. Now launch the app and you will see the screen like below. Here you need to create an account. You can even sign in with your Facebook account.

Step 3. Now you will see the screen like below. Here you need to tap on “WhatsApp” to continue.
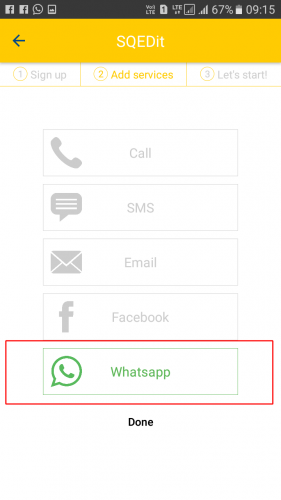
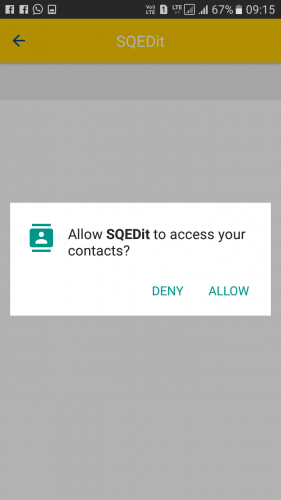
Step 4. Now you need to grant it the permission to access your contacts. Simply tap on “Allow” to continue.
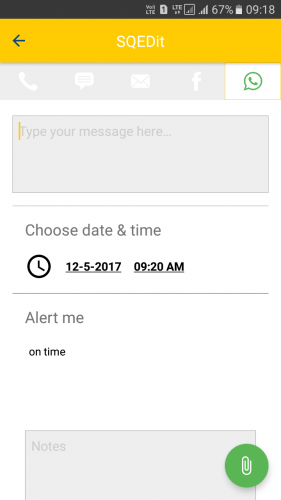
Step 5. Here you need to set the message date and time to schedule the WhatsApp message.
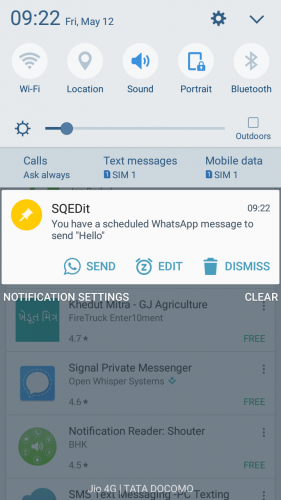
Step 6. Once set, you will get a notification like this before few seconds of the scheduled timing. You need to tap on the “Send” button.
Step 7. Now you need to choose the contact to whom you want to send.
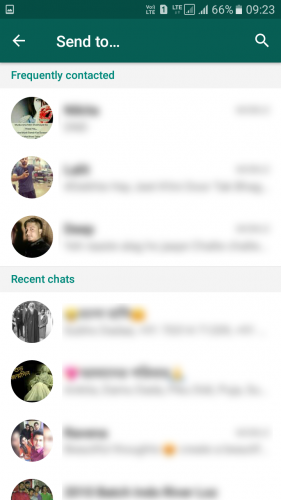
That’s it! you are done, this is how you can schedule Whatsapp message using the SQEDit app.
Using GBWhatsApp
Well, GBWhatsApp is one of the best ever mod made for WhatsApp. We have shared a detailed guide on how to install GBWhatsApp Apk on your Android smartphone which you should consider. Here we are about to discuss how to use GBWhatsApp to schedule messages on WhatsApp.
Step 1. First of all, download and install GBWhatsApp on your Android smartphone. You could visit the detailed guide from here.
Step 2. Open the app and login with your WhatsApp number. From the top right corner, tap on ‘Message Scheduler’ option.
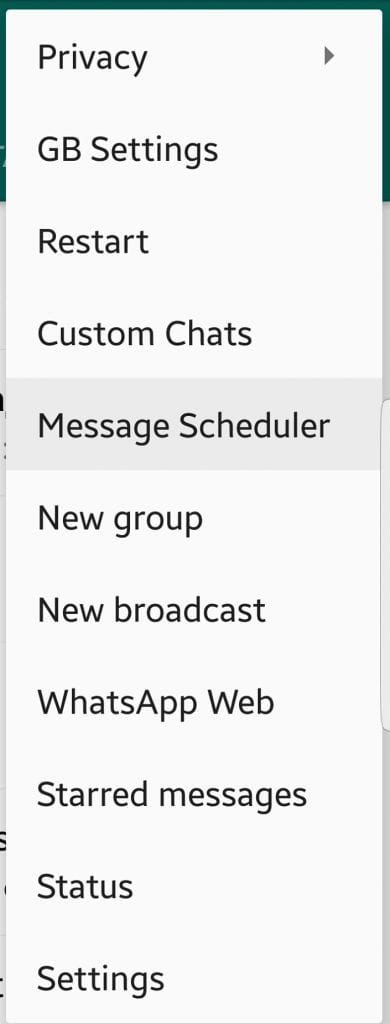
Step 3. In the next step, you need to tap on the “+” button and then add your new schedule.

Step 4. Now you need to fill in all the details and then tap on ‘Schedule’
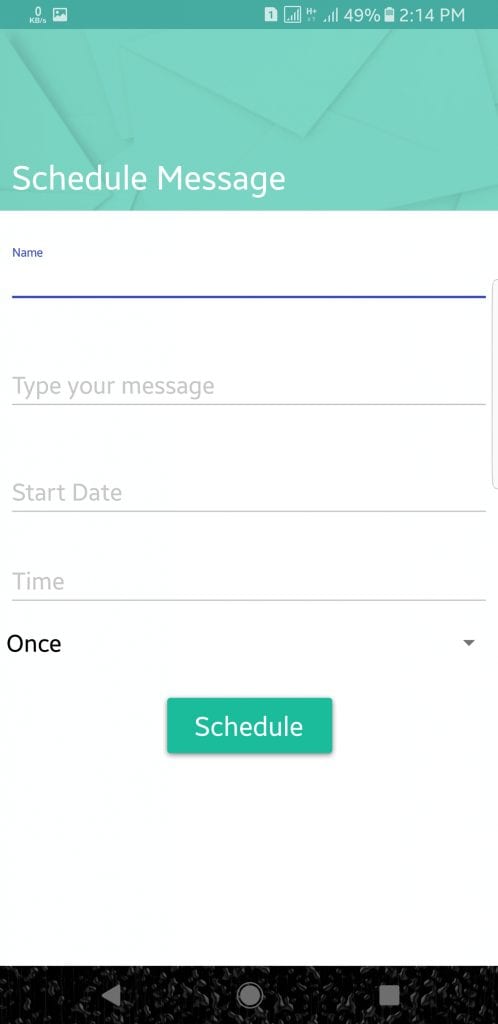
That’s it, you are done! This is how you can use GBWhatsApp to schedule WhatsApp Messages on Android.
Using WhatsApp Plus
Well, WhatsApp Plus is basically a modded version of the official WhatsApp Android app which brings in lots of features. With WhatsApp Plus, you can hide your last seen, blue tick, typing status, etc.
Just like GBWhatsApp for Android, WhatsApp Plus also comes with a message scheduling feature. You can easily schedule messages on WhatsApp via WhatsApp Plus Apk. Another plus point of using WhatsApp Plus is that you can use dual WhatsApp account on your smartphone.

You need to follow the complete guide listed below to install WhatsApp Plus on your Android. To Schedule text messages, you need to open the ‘Tools’ and then select ‘More Option’. Now you need to tap on ‘Schedule’ and then enter the message, start date and time.
That’s it, you are done! This is how you can use WhatsApp Plus to schedule WhatsApp Messages on Android. If you have any other doubts, then make sure to discuss it with us in the comments.
Schedule WhatsApp Messages On iPhone
Well, just like Android, you can also schedule WhatsApp messages on your iPhone. However, scheduling WhatsApp Messages is not an easy task on the iPhone as you need to use Cydia tweaks. That means you need to have a jailbroken iPhone to schedule WhatsApp Messages on iPhone.
Step 1. If you don’t have a jailbroken iPhone and if you wish to Jailbreak it, then follow this guide on how to jailbreak iPhone.

Step 2. After that, you need to install a tweak that is known as ‘Message Scheduler for WhatsApp’. You can download the app from Cydia.
Step 3. Next, open your official WhatsApp app on iPhone. Next, select the contact to which you want to schedule the messages.
Step 4. Type in the message and then long-press on the ‘Send’ icon. It will show you a pop-up window. There you need to select ‘Schedule a Message’
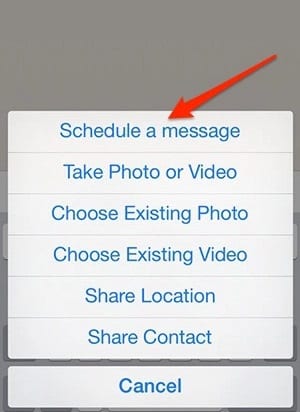
Step 5. Now, you need to set the date and time for the message to schedule.
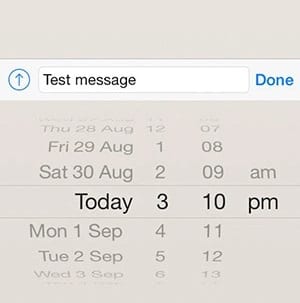
That’s it, you are done! The message will be scheduled. If you wish to edit the scheduled message, then long-press on the message to edit the way you want. If you have any other doubt, then make sure to discuss it with us in the comments.
You just need to schedule the greeting message and time to 12:00 and the message will be sent at the same time and there will be no need to wake up at 12:00 or wait for 12’o clock to message a person similarly this will help you a lot to recall something to someone by just scheduling the message. Don’t forget to share this cool post and Must leave a comment if you face any problem at any step.
The post How To Schedule Whatsapp Messages On Android & iOS appeared first on Tech Viral.
from Tech Viral https://ift.tt/2iXBHSJ
No comments:
Post a Comment