Today in this digital world, everything is based on data transfer that is possible through portable memory storage devices: the memory card, pen drives, and Hard drives.
However, sometimes viruses and improper ejection of these drives lead to corruption. And in that case, Windows can’t properly format your portable memory drive.
Best Ways to Repair Corrupted Memory Card/USB Pen Drive
So to resolve this issue, we are here with the best methods to repair corrupted memory card or USB drive. With these methods, you can easily repair your drive and use it.
1. Connect The USB Device To Another Computer
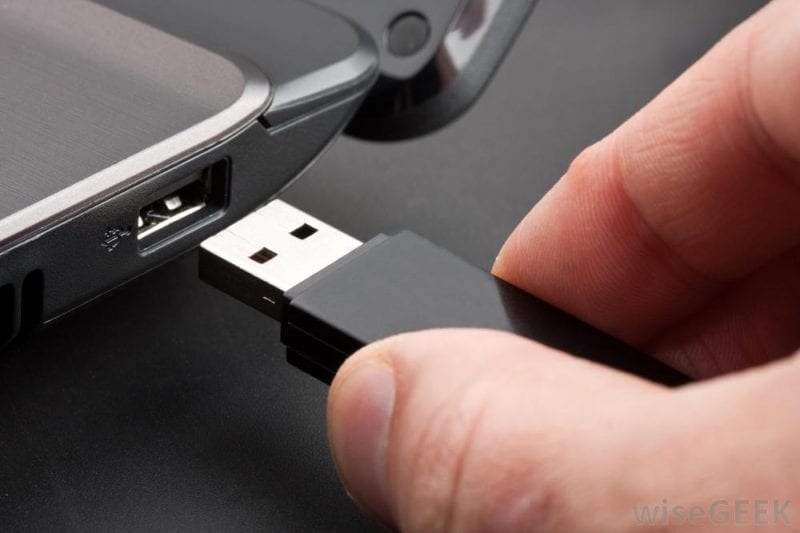
We mainly face SD card or Pendrive issues due to incompatibility or related issues. So, before you conclude that your USB or SD card is damaged and useless, try to connect it to other devices.
If the USB device works fine on other devices, you must work on your computer rather than a USB or SD card. So, this is the very first step that you should take to check or repair your SD card or USB flash drive.
2. Using Troubleshooter
You can use the Command Prompt to run the hidden hardware and devices troubleshooter in Windows. Running the hardware and devices troubleshooter will find and fix existing problems with all your connected hardware, including the USB flash drive.
So, if the USB flash drive is corrupted due to some unknown issue, running the hardware and devices troubleshooter may help. Here’s how you can run it.
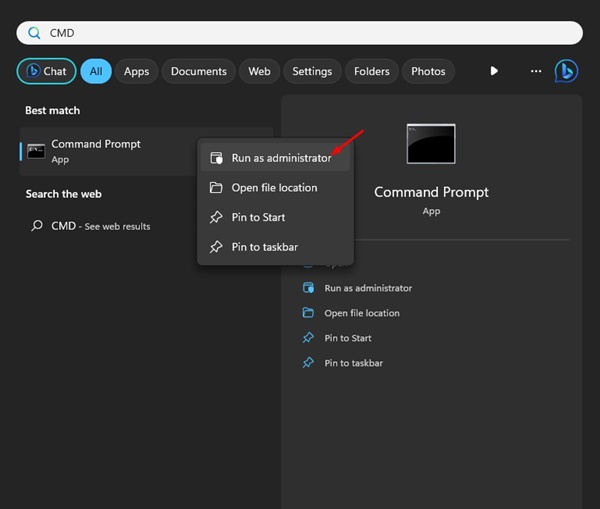
1. Click on Windows Search and type in CMD. Right-click on the CMD and select Run as administrator.
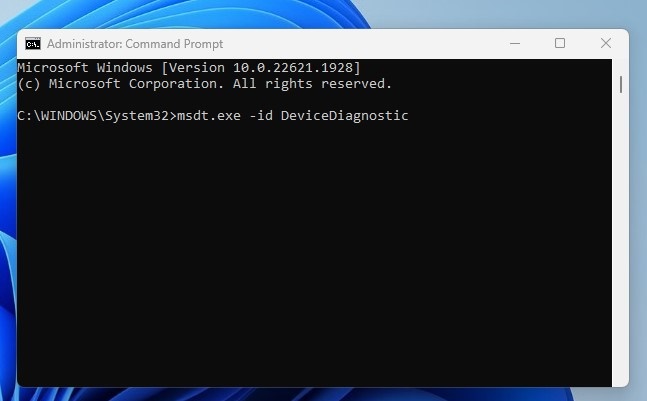
2. When the Command Prompt opens, execute the command:
msdt.exe -id DeviceDiagnostic
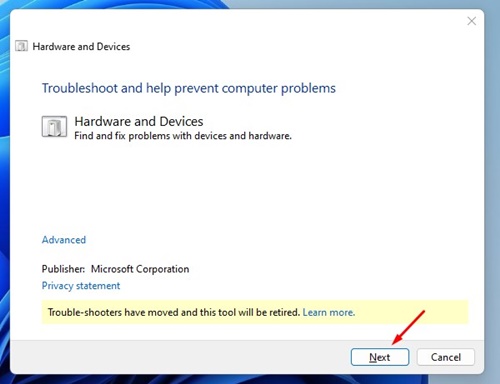
3. This will open the Hardware and Device Troubleshooter. Click on the Next button.
4. Now, follow the on-screen instructions to complete the troubleshooting part.
That’s it! The Hardware and Devices troubleshooter of Windows will automatically find and fix existing hardware or device problems.
3. Updating USB Driver
If Windows fails to read your USB drive, outdated drivers might be the reason. Sometimes updating the device driver could fix any existing problem. Here’s how you can update the device drivers
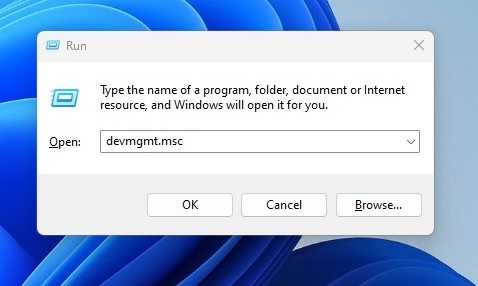
1. Open the RUN dialog box and type in devmgmt.msc. It will open up the Device Manager.
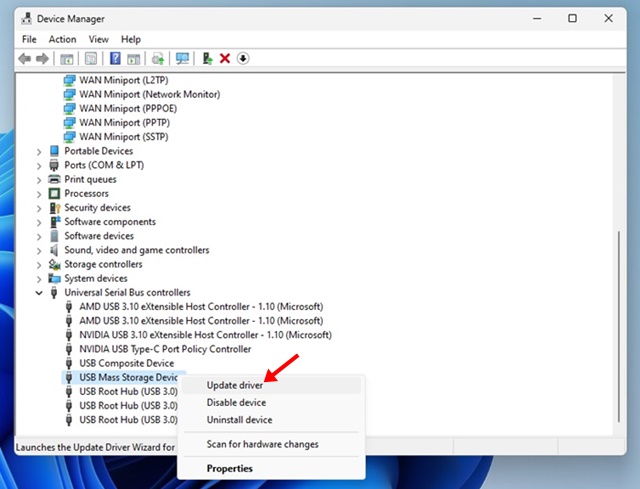
2. Now, you need to expand the Universal Serial Bus Controllers. Here you will see the corrupted or unrecognized USB devices as ‘Unknown Devices’
3. If there are no unknown devices, right-click on the USB Mass Storage Device, and select Update driver.
If the connected USB device needs an update, the Driver update wizard will let you know. Simply update it to fix existing issues of the Memory Card/Pendrive.
4. Changing the Drive Letter
Sometimes your computer cannot assign the drive letter to your storage media. This might be the reason the files on it can’t be accessed. Therefore, make sure your drive has a letter, or you need to assign the drive letter to your device. Here’s how you can fix your pen drive or memory card by assigning a correct drive letter.
1. First, click on the Windows search and type Disk Management. Next, open the Disk Management utility from the list of matching results.
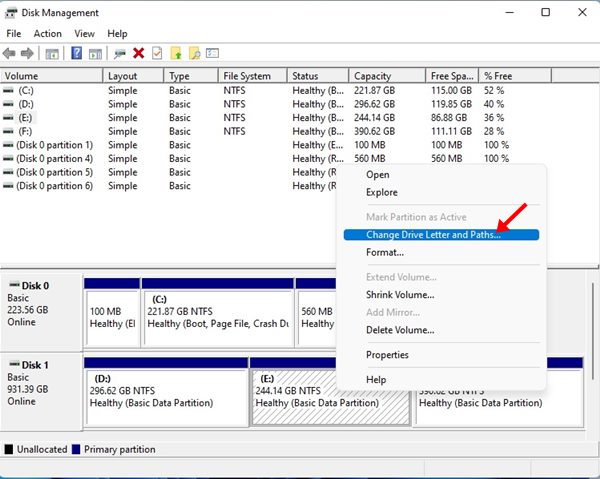
2. On the Disk Management tool, right-click on the drive whose letter you want to change. Here you need to pick your connected USB drive. On right-click menu, select Change Drive Letter and Paths.
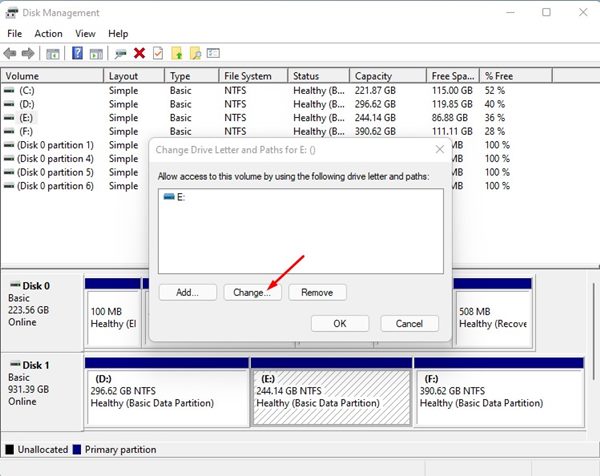
3. On the Change Drive Letter and Path for prompt, click the Change button.
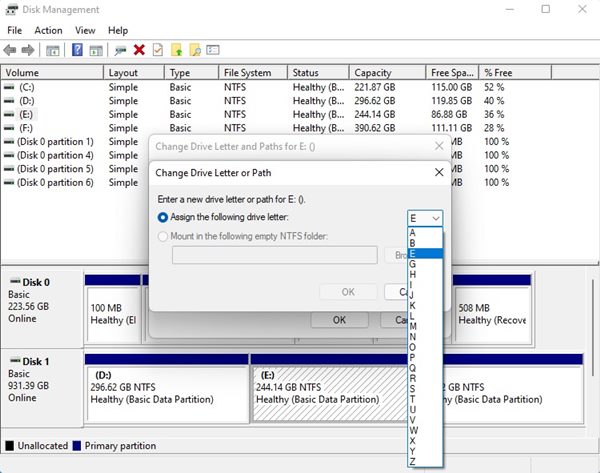
4. On the next prompt, select Assign the following drive letter and select the drive letter from the drop-down.
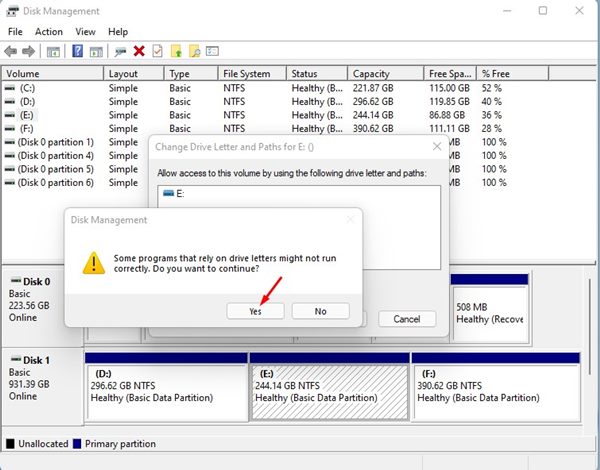
5. You will see a confirmation prompt; click the Yes button to change the drive letter.
That’s it! This will change the drive letter of your Pendrive.
5. Scan the Corrupted Memory Card with Antivirus Program
Malware and viruses are prominent reasons for corrupted data on the PenDrive. While the latest version of Windows has a robust security tool called Windows Security, certain malware can still slip off onto your USB drive.
So, it’s best to use a reliable antivirus solution to scan for malware and viruses. You can use antiviruses like Malwarebytes, AVG, or Kaspersky to find and remove viruses and malware from your USB flash drive.
6. Reinstalling the Device
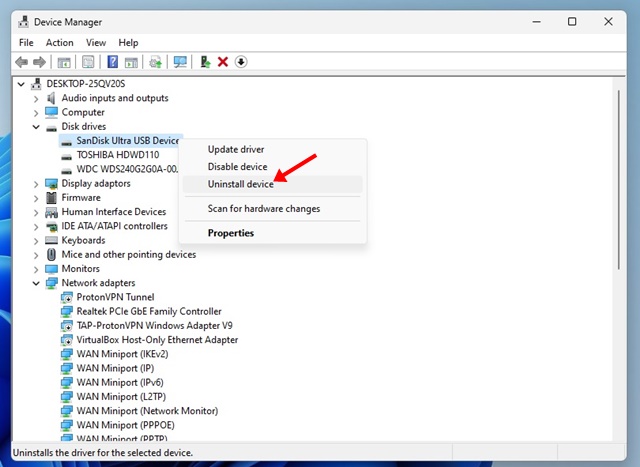
Sometimes, your computer may fail to install the appropriate drivers for your USB device. If this happens, you won’t see the connected USB device on File Explorer. It can be fixed by reinstalling the device itself; follow the steps below.
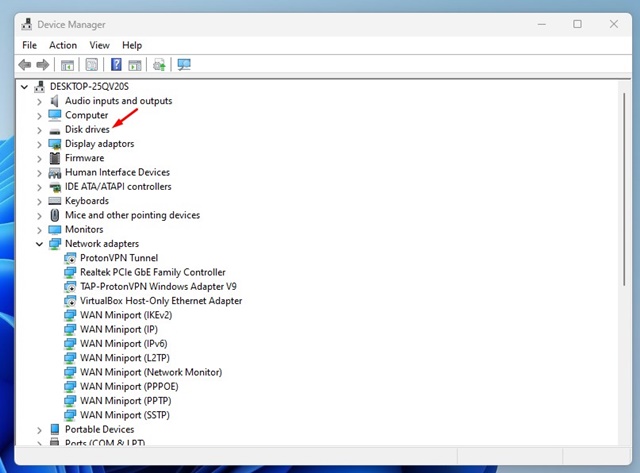
1. You need to right-click on My Computer/This PC and then click on Manage. Or else, open Device Manager from the Windows Search.
2. You need to expand the Disk Drives in the list and select your pen drive.
3. Now, you need to click on Uninstall and click on OK.
Now remove your Pendrive and restart your PC. Now connect your Pendrive again; your PC will detect it.
7. Repairing PenDrive using Windows Explorer
If you want to repair the USB drive from Windows Explorer, you must forget the data. Because in this method, we need to format the USB drive, leading to data loss. Therefore, you can follow the steps to repair the PenDrive.
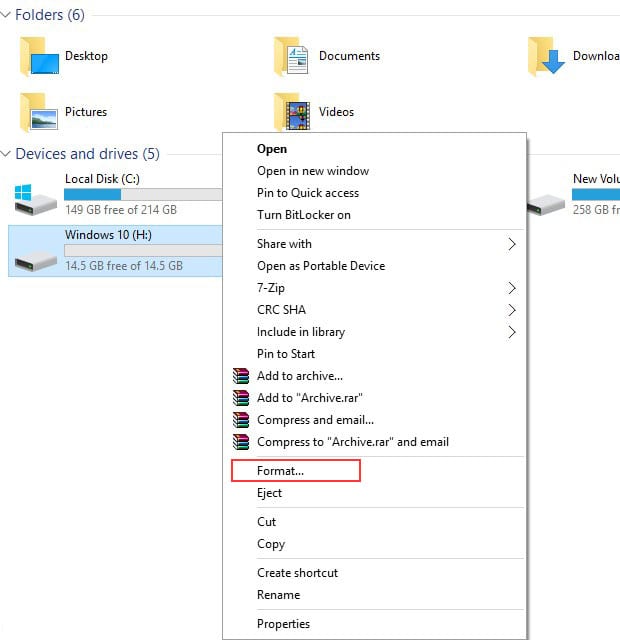
1. First, open My Computer or This Pc and right-click on the corrupted drive.
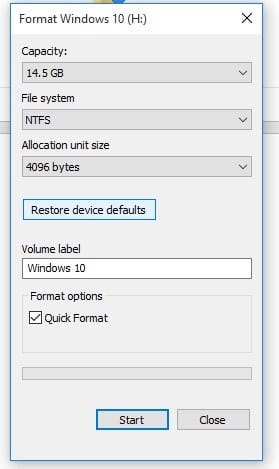
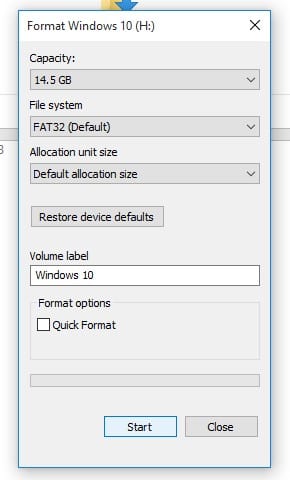
2. Now, select Format from the drop-down menu and click on Restore Device Defaults in the pop-up box.
3. Now click on Start to begin the format process. You can uncheck the Quick Format option for a deeper scan.
Now press Ok, and you will have the error-free SD card or Pendrive.
8. Using CMD
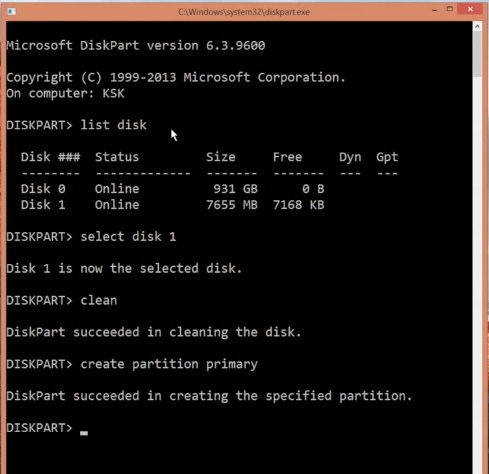
1. First, connect your Memory Card/USB Hard Drive to your computer and remove all other drives if you have connected.
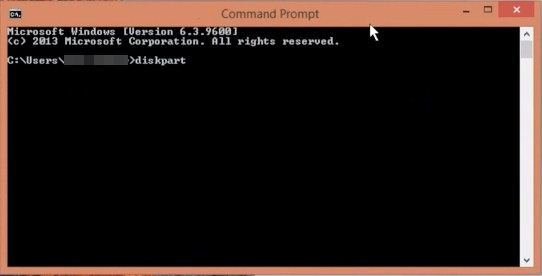
2. Now click on Windows search, type CMD, right-click on the CMD, and select ‘Run as administrator‘. Next, on the Command Prompt, type diskpart and press Enter. A pop-up may appear asking for permission; click on ok.
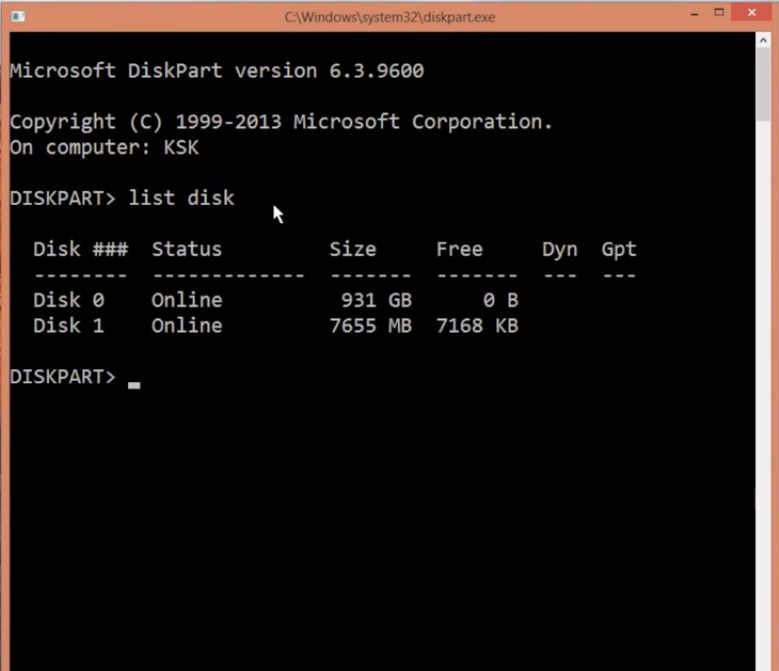
3. Now type list disk, and you will see all the disk will get listed there. You will see your external drive; note down its disk number.
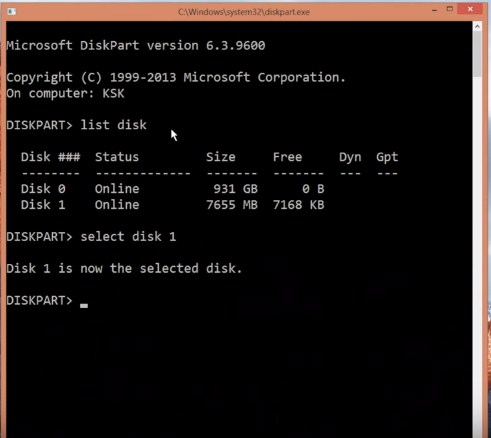
4. Now type select disk disk_number (for ex-select disk 1) and press enter.
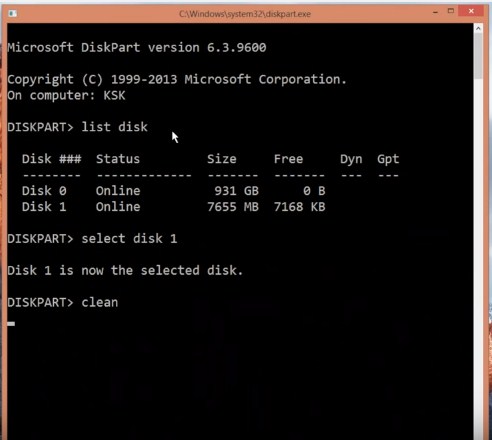
5. Next, type clean and press enter.
6. Type create partition primary and then press enter.
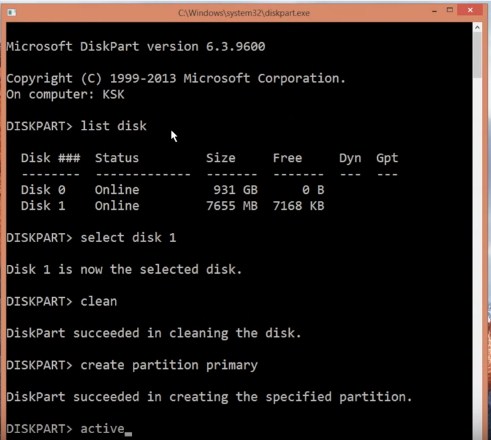
7. Now type active and press enter.
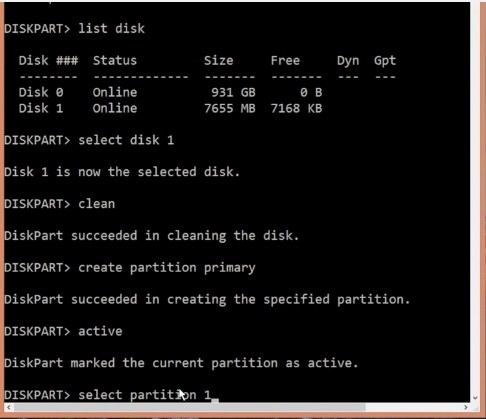
8. Next, enter the command select partition 1.
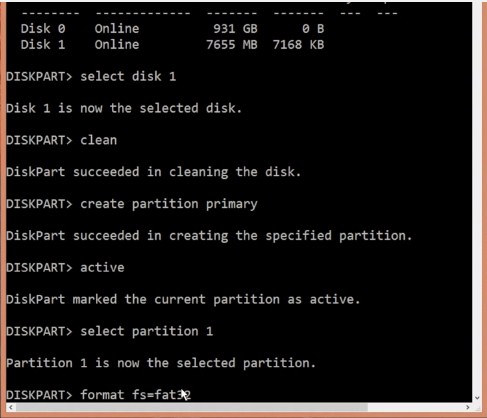
9. Next, type format fs=fat32 and press enter.
That will take some time; after that, your drive will be formatted successfully and ready to use.
9. Format SD Card Partition
Follow this only if the CMD method shows you an error while formatting the disk partition. This method came in handy when Windows was unable to complete the format. In this method, we will use EaseUS Partition Master to format the SD card completely. However, it’s worth noting that this method will delete all files stored on the SD card.
1. First of all, download & install the EaseUS Partition tool on your Windows computer. You can get the download link from here.
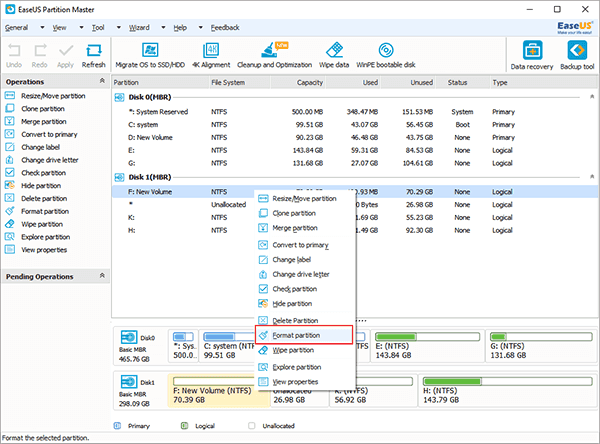
2. Connect the SD card to your computer and launch the EaseUS partition tool. Select the card which you want to format and then choose the option ‘Format Partition’
3. In the next step, select the file system to format. You can choose from FAT/FAT32, NTFS, EXT2/EXT3.
4. Now, click on ‘Apply’. The tool will now format the unreadable USB or SD card.
That’s it. Now, your Disk Manager can recognize your SD card without any issues.
10. Using USB Fix Software
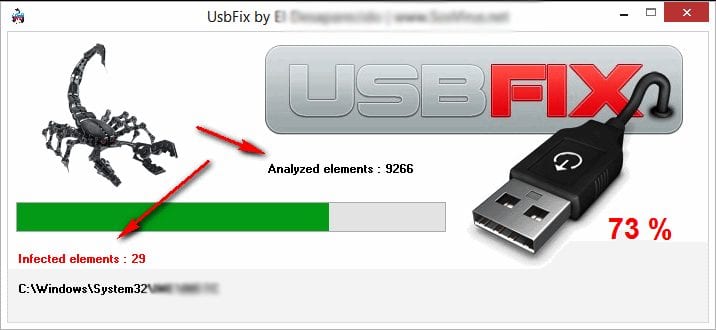
There are several reasons why your USB Drive might be corrupted; this can be due to viruses, malware, or hardware issue. However, the USB Fix tool scans your USB drive for potential viruses and malware. If the tool finds any malware or virus, it removes it instantly.
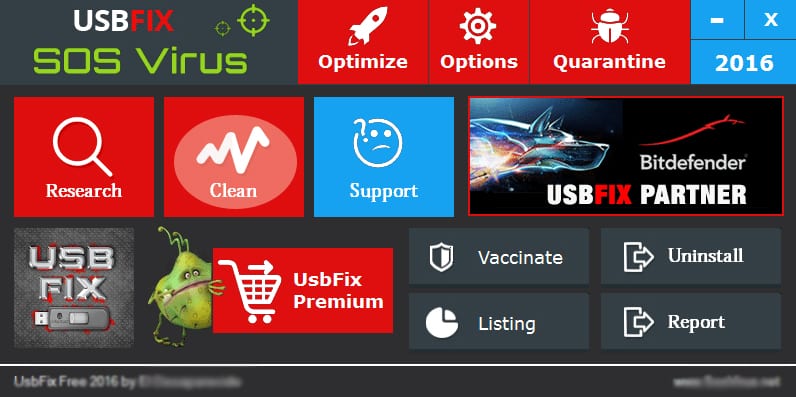
1. Download and install USBFix software on your Windows computer and then run it.
2. Once installed, it will ask you to restart your computer. Restart your computer, run the software again, and click the Clean button.
3. Wait for a few minutes or seconds until the tool completes the scan. If USBFix finds any problem, it will fix it for you.
This is how you can use USBFix to repair your corrupted Pendrive.
11. Follow the Instructions of the Manufacturer
If you have followed all methods but still can’t repair your corrupted USB flash drive, it’s best to take the help of the Manufacturer.
You need to visit the official website of the USB flash drive you are using and then follow the instruction it shares to fix it. If there’s no information, you can claim the warranty (if applicable).
If the manufacturer has a forum, you can submit your question and expect answers from people who have dealt with the same issue.
So, these are some of the simple steps to repair a corrupted memory card or pendrive in Windows. If you have followed all methods carefully, you’d have already fixed your corrupted USB drive. If you need more help repairing a corrupted memory card or Pendrive, let us know in the comments below.
The post How To Repair Corrupted Memory Card/USB Pen Drive appeared first on TechViral.
from TechViral https://ift.tt/xUaPTdo
No comments:
Post a Comment