 Microsoft’s Windows 11 is a new desktop operating system offering lots of flexibility and customization options. Let’s admit it, at some point while using Windows, we want to record our screen.
By recording your screen in Windows 11, you can show off the new features you’re playing with or even record your gameplay. Whatever the reason, you can easily record your PC screen on Windows 11.
On Windows 11, you can rely on built-in tools or third-party software for recording your screen. Hence, if you are looking for ways to record screens on Windows 11, you are reading the right guide.
3 Best Methods to Record Your Screen on Windows 11
In this article, we will share the 3 best ways to record your screen in Windows 11 operating system. Let’s check out.
1) Record Screen Using Xbox Game Bar
In this method, we will use the Xbox Game Bar app to record the screen on Windows 11. Here are some of the simple steps you need to follow.
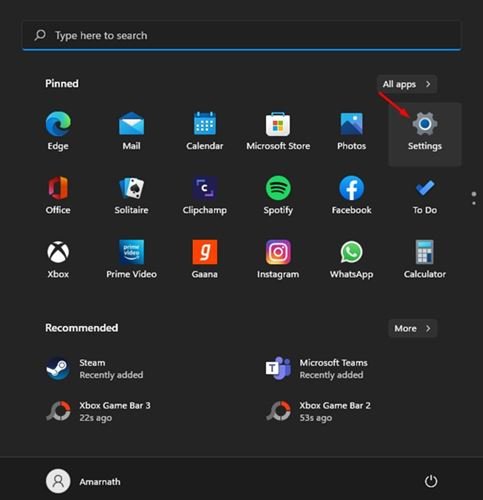
1. First of all, open the Windows 11 Start button and select Settings.
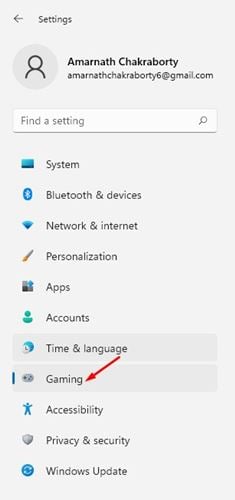
2. On the Settings page, click on the Gaming option as shown below.
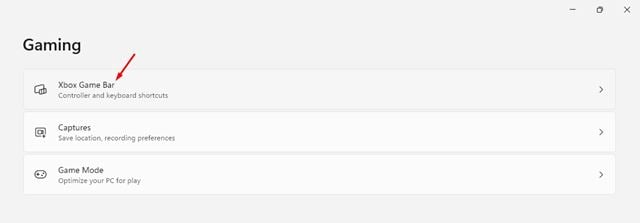
3. On the right, click on the Xbox Game Bar option.
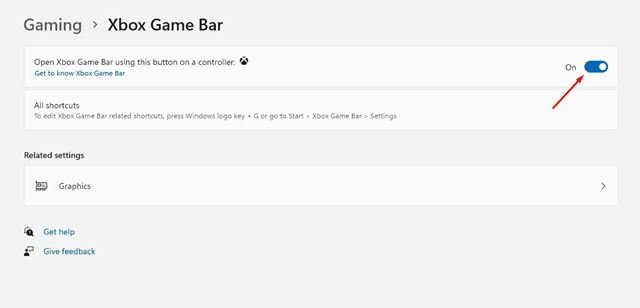
4. On the Xbox Game Bar screen, turn on the toggle next to the Open Xbox Game Bar using this button on Controller.
5. To record your screen, simply press the Windows Key + G button. This will open the Xbox Game Bar.
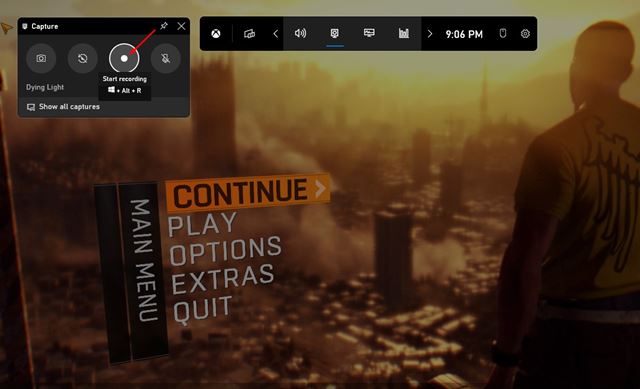
6. On the Capture pane, click on the Start Recording button as shown below.
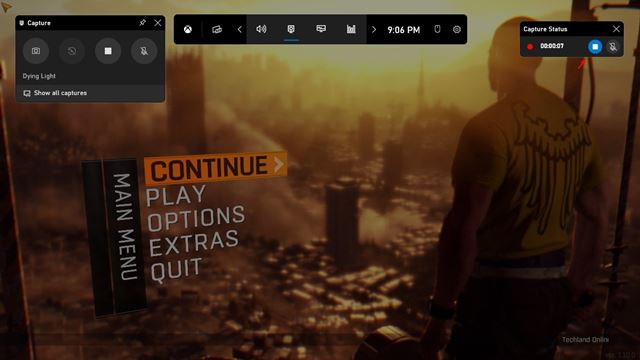
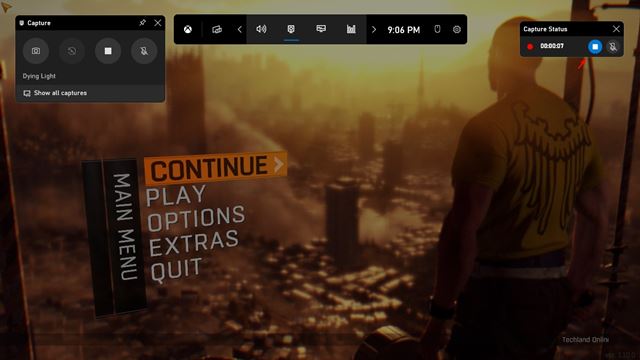
7. This will start the screen recording. To stop the recording, click on the Stop button as shown below.
That’s it! You are done. The recordings will be saved to the This PC > Videos > Captures folder. You can view or delete your recordings from that folder.
2) Record Windows 11 Screen via PowerPoint
In this method, we will use Microsoft PowerPoint to record the Windows 11 screen. Please note that this method also works on Windows 10 operating system. Here’s what you need to do.
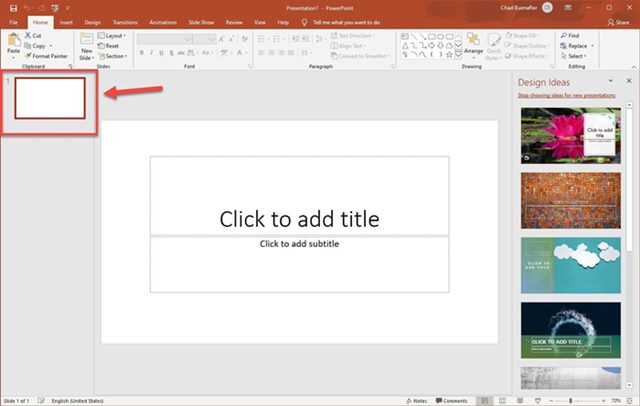
1. First of all, launch Microsoft Powerpoint and create a blank presentation.
2. Now, select a slide from the left pane as shown below.
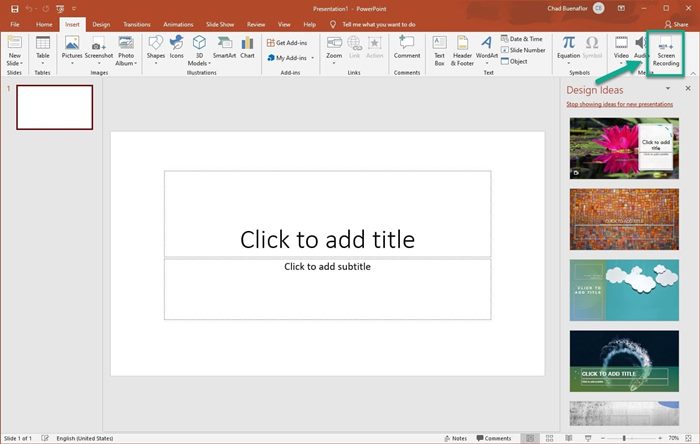
3. Now switch to the Insert Tab and select the Screen Recording option.
4. You will now see the screen recording pane. You need to click on the Select Area button and select the screen area you want to record.
5. Once done, click on the Record button. To stop the screen recording, click on the Stop button as shown below.
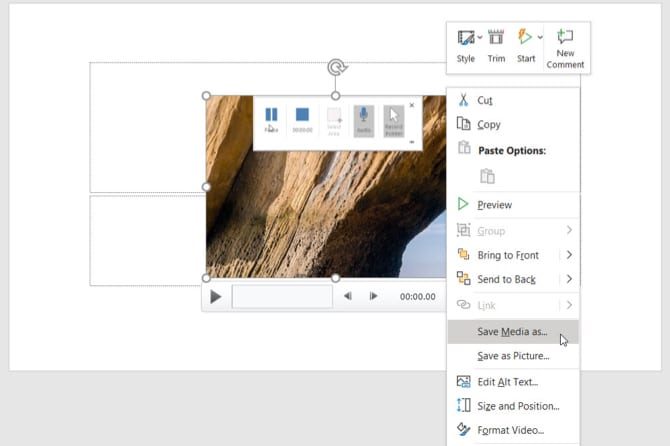
6. The screen recording will be presented in the new slide you created. Right-click on the recording and select Save Media As option to save the clip on your computer.
That’s it! You are done. This is how you can use Microsoft Powerpoint to record screen on Windows 11.
3) Record Screen using Bandicam Screen Recorder
Bandicam screen recorder is a free and easy-to-use screen recorder fully compatible with Windows 11. Compared to other third-party screen recording tools, the Bandicam screen recorder is easier to use and offers more features. Here’s how to use the Bandicam screen recorder to record Windows 11 screen.
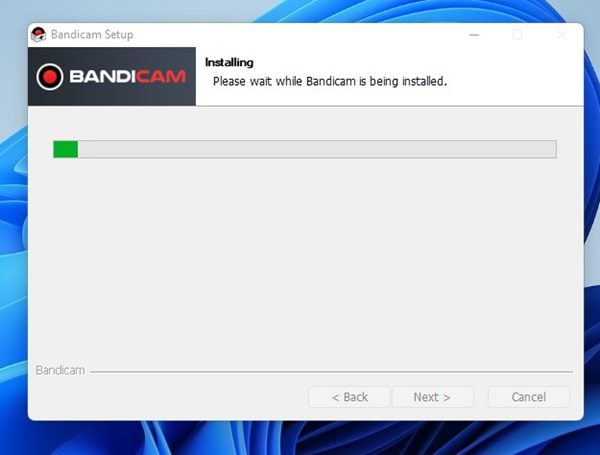
1. First of all, download & install the Bandicam screen recorder on your Windows 11 computer.
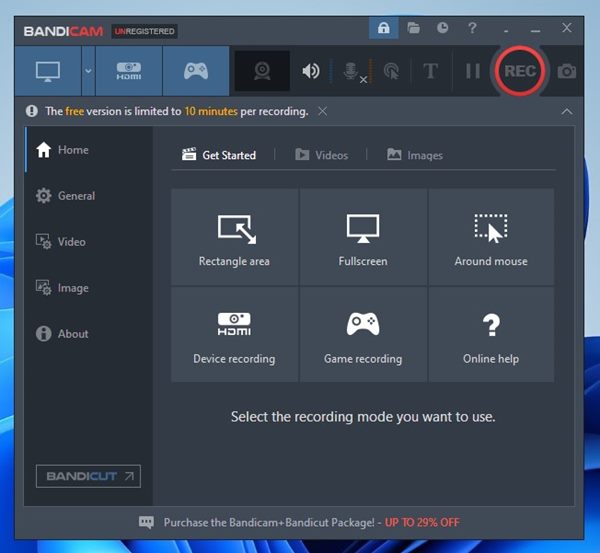
2. Once installed, open the application, and you will see a screen like below. Here you need to select the screen recording mode.
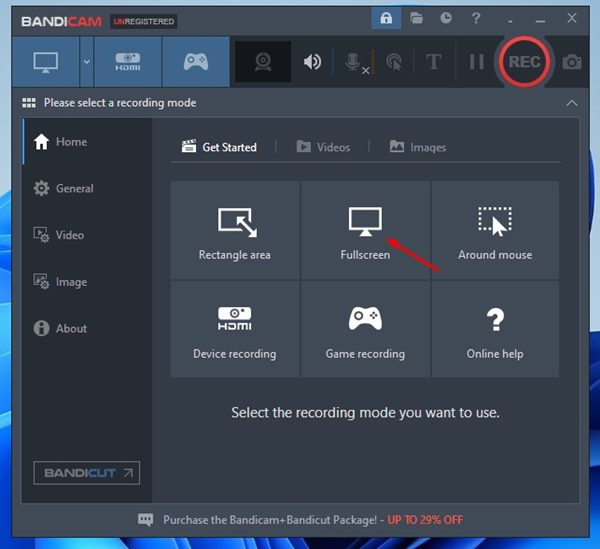
3. If you want to record the full screen, select the Fullscreen option.
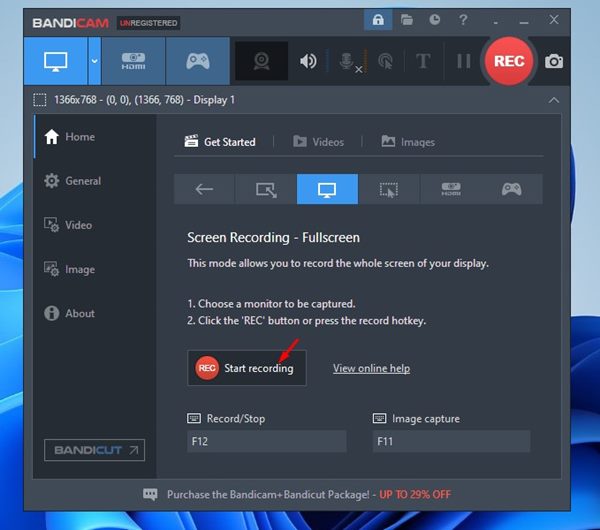
4. On the next screen, click on the Start recording option, as shown below.
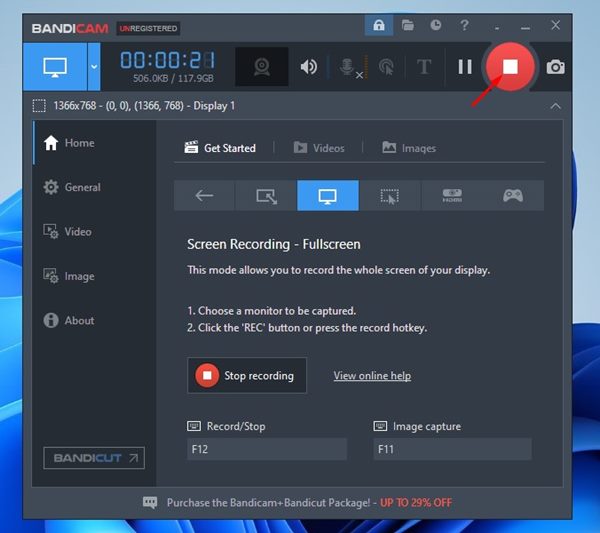
5. To stop the screen recording, click on the Stop button from the top bar.
6. The screen recording will be saved on the Document folder of your system installation drive.
That’s it! You are done. This is how you can use Bandicam free version to record Windows 11 screen.
It’s pretty easy to record screen on Windows 11, and you don’t need to use any premium tool. I hope this article helped you! Please share it with your friends also. If you have any doubts related to this, let us know in the comment box below.
The post How to Record Your Screen on Windows 11 (3 Methods) appeared first on TechViral.
from TechViral https://ift.tt/dkjSxaG


No comments:
Post a Comment