Microsoft has changed many things on its new Windows 11 operating system, but the one thing that remained unchanged is the error message ‘Undoing changes made to your computer’.
After installing Windows 11, many users reportedly get an error message that reads, ‘Undoing changes made to your computer’.
The error message generally appears while installing an update. And the worst thing is that this process gets stuck in a loop and keeps repeating itself.
You may find this guide helpful if you’ve recently encountered the Undoing changes made to your computer error on your Windows 11.
Fix ‘Undoing Changes Made to Your Computer’ In Windows 11
The ‘Undoing changes made to computer error’ is often accompanied by a BSOD error like 0x800f0922 or 0x800f0988. Below are the best methods to resolve the problem on Windows 11.
1) Uninstall the latest quality updates
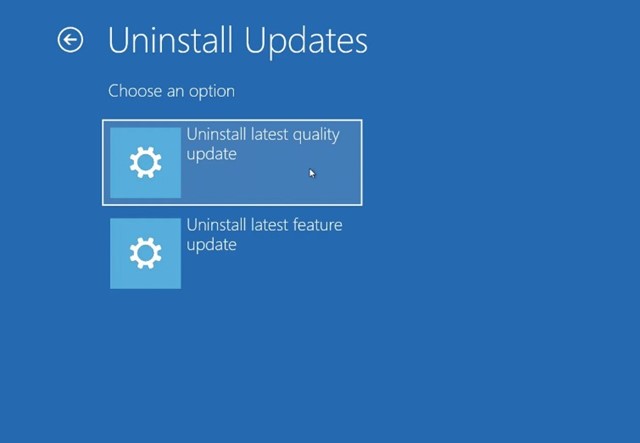
Since Windows 11 is stuck installing a particular update, you need to remove that specific update to resolve the issue. Here’s how you can uninstall the latest Quality update.
1. First, wait around 2-3 hours for the ‘Undoing changes made to your computer’ to complete. If nothing positive happens even after the long wait, you need to force shut down your PC.
2. After shutting down, press the F8 key during the boot screen to open the Recovery options. You may have to press the ESC or F11 keys in some motherboards. You can even press the ‘Shift + F8’ key to boot into the Recovery screen.
3. On the Choose an option screen, select Troubleshoot.
4. On the Advanced options, select Uninstall Updates.
5. Next, select the Uninstall latest quality update option.
That’s it! Now, wait until Windows 11 uninstalls the latest quality update.
2) Change the Startup type for App Readiness
This method will help you fix ‘Undoing changes made to computer error’ if it’s accompanied by either the 0x800f0922 or 0x800f0988 error. Here’s what you need to do.
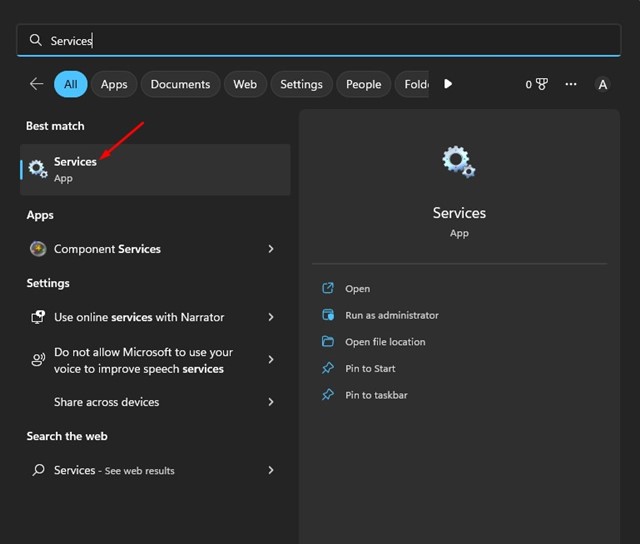
1. First, click on the Windows search and type Services. Next, open the Services app from the list of options.
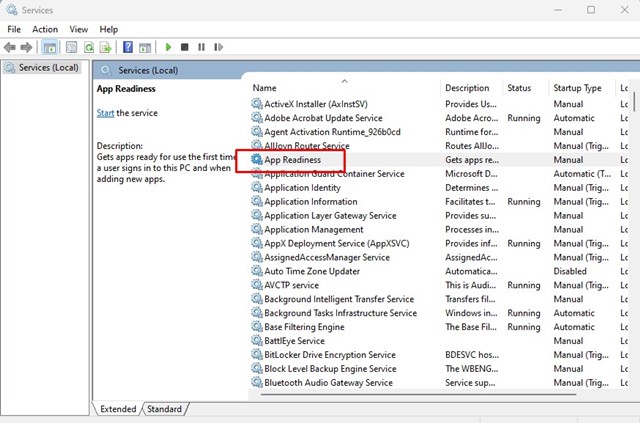
2. When the services app opens, scroll down and double-click on the App Readiness.
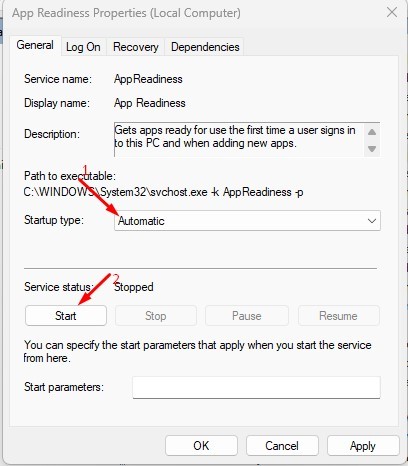
3. On the App Readiness Properties, select ‘Automatic‘ on the Startup type.
4. On the Services Status, click on ‘Start‘ (If available) and then click on the Ok button.
That’s it! Now go ahead and update your Windows 11 from the Settings app.
3) Clean up the WinSxS folder
If you don’t know, the WinSxS folder is where Windows stores its recovery files, files needed to install the updates, and previous versions of Windows components.
This folder helps the operating system revert to the previous state in case of software failure. Hence, you need to clean up this folder to force Windows 11 to rebuild the files again.
There are not one but multiple ways to clean up the WinSxS folder in Windows 11. And we have already shared a detailed guide in it. Make sure to follow that guide to clean up the WinSxS folder.
4) Fix ‘Undoing Changes Made to Your Computer’ via CMD
In this method, we will use the Command Prompt utility to fix undoing changes made to your computer. Here are some of the simple steps you need to follow.
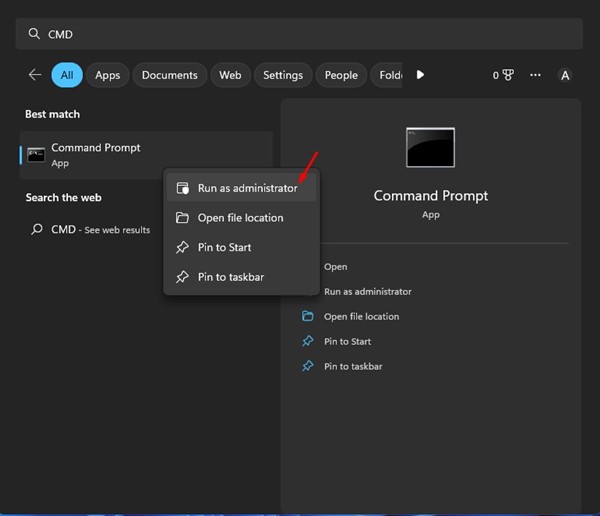
1. First, click on the Windows search and type in CMD. Right-click on the Command Prompt and select ‘Run as administrator’
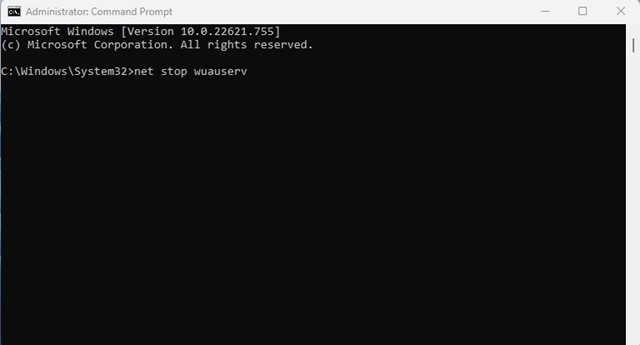
2. On the Command Prompt, execute all commands one by one.
net stop wuauservnet stop cryptSvcnet stop bitsnet stop msiserver
The commands will disable the Windows update services.
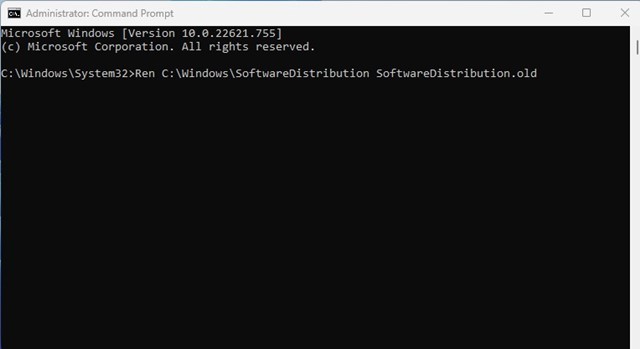
3. After executing the above commands, you need to execute the below commands
Ren C:\Windows\SoftwareDistribution SoftwareDistribution.old
Ren C:\Windows\System32\catroot2 Catroot2.old
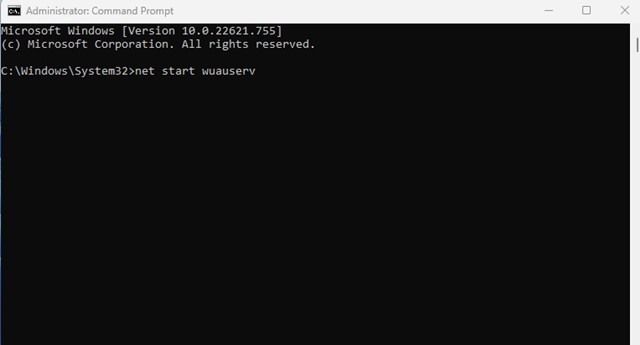
4. After executing the above commands, run these commands to restart the Windows Update services.
net start wuauserv
net start cryptSvc
net start bits
net start msiserver
That’s it! This may fix ‘Undoing changes made to computer error on your Windows 11.
5) Run the Windows Update Troubleshooter
In this method, we will run the Windows Update Troubleshooter to resolve the ‘Undoing changes made to computer’ error on Windows 11.
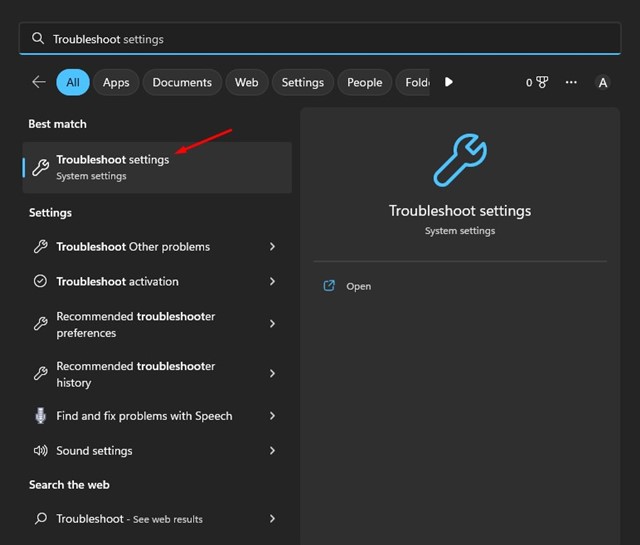
1. First, click on Windows search and type Troubleshoot. Next, open the Troubleshoot Settings from the list of available options.
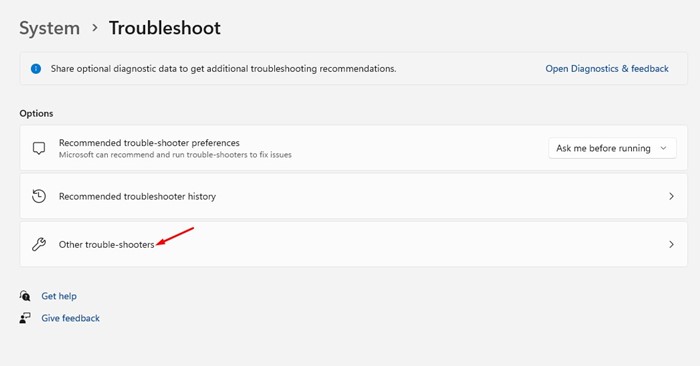
2. On the Troubleshoot screen, click on the Other trouble-shooters.
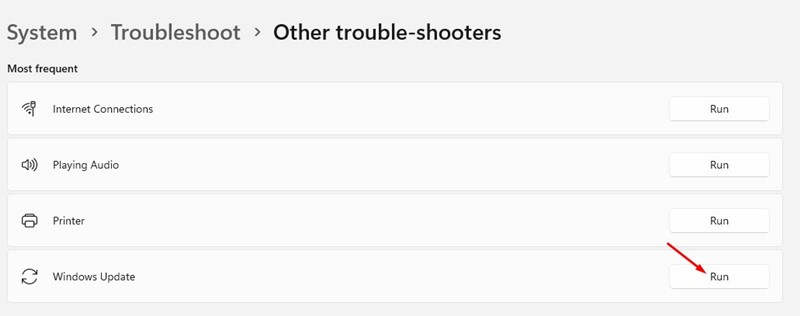
3. Now, find the Windows update and click on the Run button beside it.
4. This will run the Windows Update troubleshooter.
That’s it! You need to follow the on-screen instructions to complete the troubleshooting process.
6) Take the help of Windows Event Viewer
The Event Viewer keeps track of all errors. So, you can use Windows Event Viewer to find exactly what’s restricting your computer from installing the Windows 11 update.
You need to remember the time when your PC is stuck in the ‘Undoing changes made to computer’ error appears and follow these steps.
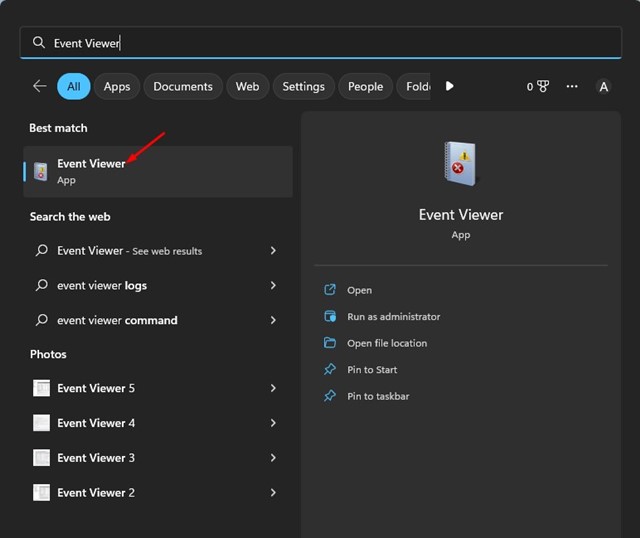
1. First, click on the Windows search and type Event Viewer. Next, open the Event Viewer app from the list of available options.
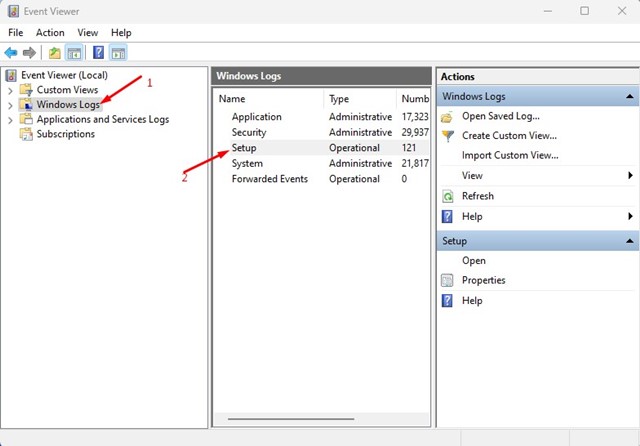
2. On the Event Viewer, navigate to the following path Windows Logs > Setup.
3. Now, under the Setup, you will find all recorded events. You need to go through the logs and check the date and time when it’s recorded.
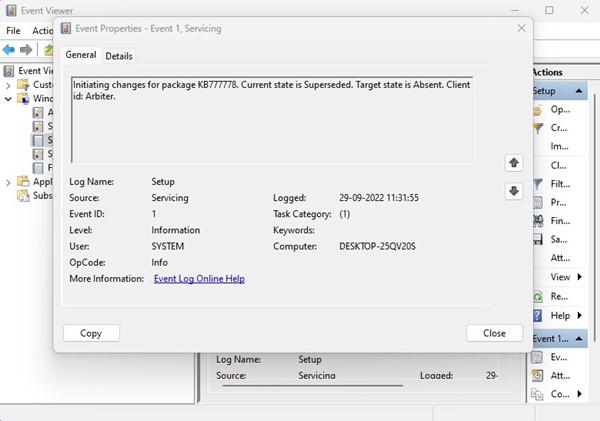
4. Once you find your timestamp, select it and check the actual cause under the General section.
5. You need to note down the error code and search for it on the internet to find a solution.
That’s it! This is how you can fix ‘Undoing changes made to your computer’ using Event viewer on Windows 11.
7) Run the SFC/DISM command
Sometimes, the undoing changes made to your computer result from corrupted system files. Hence, you must run the SFC, and DISM commands to resolve the issue. Here’s what you need to do.
1. First, click on the Windows search and type CMD. Next, right-click on the Command Prompt and select Run as administrator.
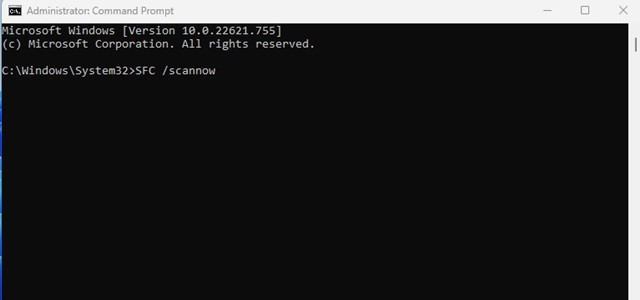
2. On the Command Prompt, run the SFC command:
SFC /scannow
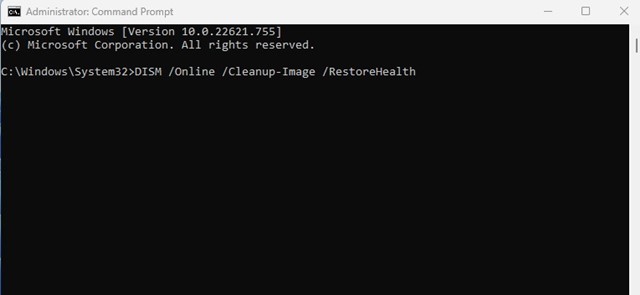
3. If you get any error, then run the DISM command:
DISM /Online /Cleanup-Image /RestoreHealth
That’s it! This is how you can run the SFC and DISM command on Windows 11 to fix Windows stuck in installing update.
8) Run the CHKDSK command
CHKDSK command in Windows is meant to find and fix disk-related problems. So, if there’s any problem with the disk drive on which you are installing the updates, you need to get it fixed by running the CHKDSK command.
1. First, click on the Windows search and type CMD. Next, right-click on the Command Prompt and select Run as administrator.
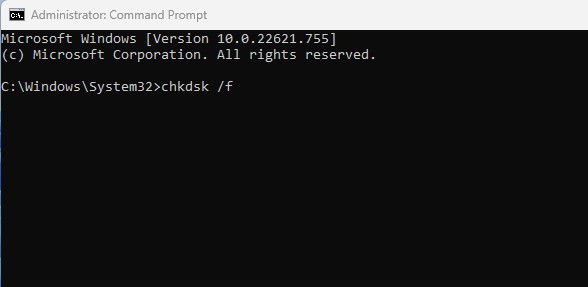
2. On the Command Prompt, run the CHKDSK command:
chkdsk /f
After executing the command, wait until the process completes. Once completed, restart your computer and attempt to install the Windows 11 update again.
9) Windows 11 Using Installation Assistant
If none of the methods managed to fix the Undoing changes made to your computer error, you need to download & install Windows 11 using the Installation assistant.
This is a method for manually installing Windows 11, but it’s a bit lengthy. We have shared a detailed guide on how to install Windows 11 via Installation Assistant.
Read that guide and install Windows 11 with the installation Assistant. This way, you will no longer encounter the ‘Undoing changes made to your computer’ error message.
There are other ways to install Windows 11, but the Installation Assistant one is the easiest. You can download & install Windows 11 Installation Assistant directly from the Microsoft’s official website.
10) Manually Install the Windows 11 update
Since the ‘Undoing changes made to your computer’ appears when Windows 11 automatically installs the update, you can easily eliminate that error by installing updates manually.
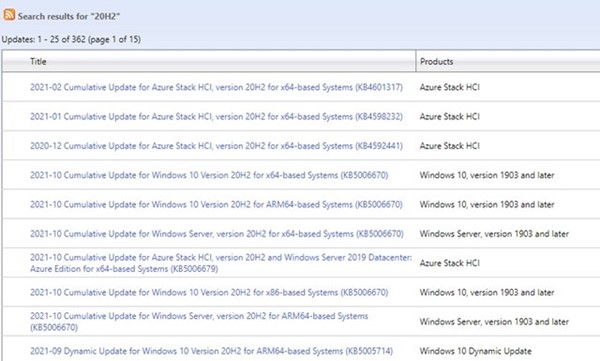
It’s easy to install the Windows 11 updates manually; you need to use the Microsoft update catalog website.
We have already shared a full guide on how to download & install Windows updates Manually. So, you need to follow the steps shared in the guide to manually install the problematic Windows 11 update.
11) Seek Help from Microsoft’s Forum
If the Undoing changes made to your computer still appear even after following all methods, you must raise a question in the Microsoft Forum.
Microsoft has a very active community forum where users can ask for solutions to various problems. In this case, you need to raise a question in the Windows 11 section of Microsoft Forum and wait for genuine advice.
Meanwhile, you can check out what worked for others in fixing the Undoing changes made to your computer on Windows 11.
So, these are some of the best methods to fix the ‘Undoing changes made to your computer’ problem on Windows 10. We are sure these methods would have fixed the problem already. If you need more help fixing the Windows 11 error, let us know in the comments below.
The post How to Fix ‘Undoing Changes Made to Your Computer’ In Windows 11 appeared first on TechViral.
from TechViral https://ift.tt/R8AH5um
No comments:
Post a Comment