
The latest Windows 10 and Windows 11 operating system builds provide you with multiple ways to sign in to your computer. While installing Windows, we were asked to set up a password.
Although password protection is the most preferred sign-in option, users can choose other ways to sign in to their PC. If we talk about the latest operating system from Microsoft – Windows 11, the operating system allows you various sign-in options.
For example, you can use PIN protection to sign in to your PC. Similarly, you can use a picture password as well. Picture password offers a way to sign in that’s easier than remembering and typing a long password.
It’s pretty easy to set up a Picture Password in both Windows 10 and Windows 11. So, if you are interested in setting up Picture Password in Windows 11, you are reading the right guide.
Also read: How to Set Up a PIN on your Windows 11 PC
Steps to Set Up a Picture Password in Windows 11
In this article, we will share a step-by-step guide on how to set up a Picture Password in Windows 11. Let’s check out.
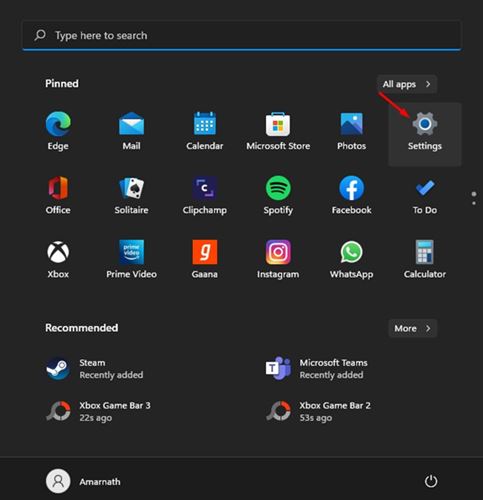
1. First of all, click on the Windows 11 Start button and select Settings.
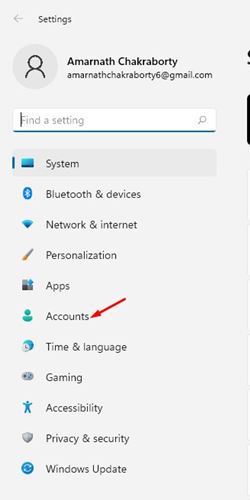
2. On the Settings page, click on the Accounts option, as shown in the screenshot below.
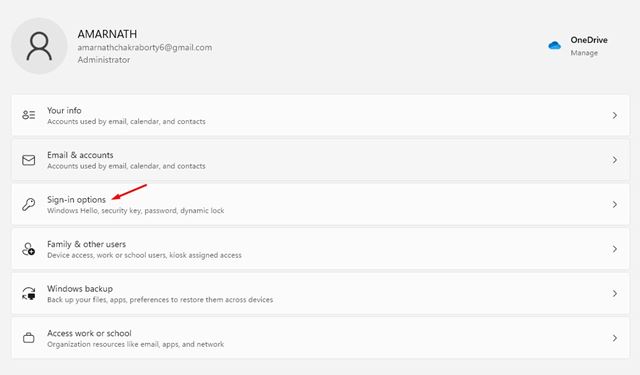
3. On the right pane, click on the Sign-in options.
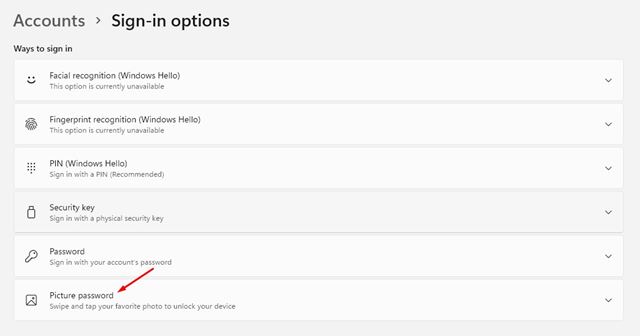
4. On the next page, click on the Picture Password option.
5. Next, click on the Add button located under the Picture Password.
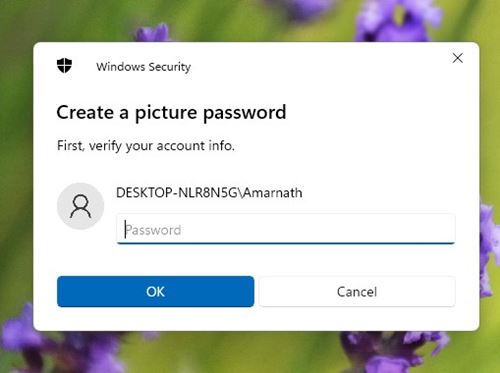
6. Now, you will be asked to verify your account. For that, enter your current password and click on the Ok button.
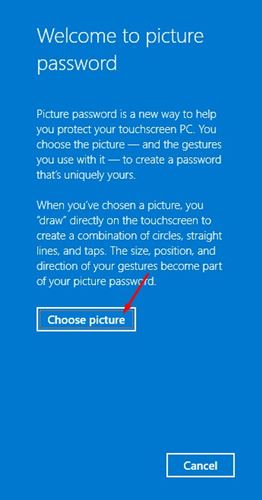
7. On the left pane, click on the Choose Picture button and select the image you want to set.
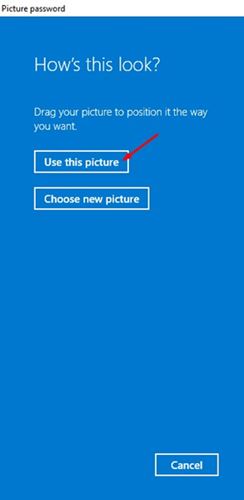
8. On the next screen, click on the Use this picture button.
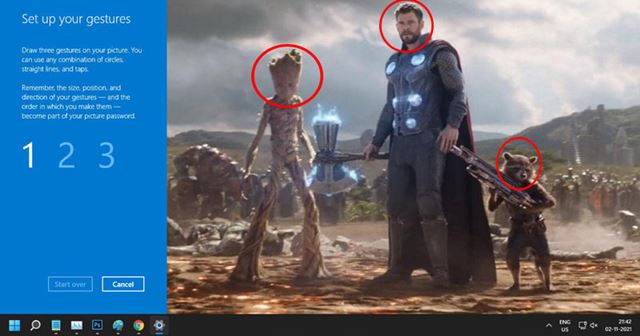
9. Now, you need to draw three gestures on the picture. You can draw simple shapes on the image. You can click anywhere in the picture to create a tap. As you draw the gesture, you will see the numbers move from one to three.
10. Once drawn, you need to confirm your gestures. Draw it again. For reference, you can check the gesture i have drawn in the image.
That’s it! You are done. Now press Windows Key + L button to lock your PC. Next, you will see the Picture Password screen. Here you need to draw the gestures on the photo to unlock your PC.
So, this guide is all about how to set up Picture Password in Windows 11. I hope this article helped you! Please share it with your friends also. If you have any doubts related to this, let us know in the comment box below.
The post How to Set Up a Picture Password in Windows 11 appeared first on TechViral.
from TechViral https://ift.tt/3k0Sa9i

No comments:
Post a Comment