Although Windows 10 is not meant for customization, it does allow customization to a great degree. With proper tools, you can customize Windows 10 to a certain level. We have already shared a few articles on Windows 10 customization. You can check out those articles to give your Windows 10 a new look.
As we all know, the Windows taskbar is the most important thing in the operating system. By default, Windows 10 allows you to pin your favorite apps and shortcuts to the Taskbar, but it doesn’t offer any advanced customization option.
Yes, you can modify the registry file to make some little Taskbar modification, but that would be a lengthy process. To ease the taskbar customization process, plenty of apps have been made, and out of all those, TaskBar X seems to be the best option.
Also Read: How to Hide & Lock Photos in Windows 10
Steps to Fully Customize the Windows 10 Taskbar
The TaskBar X is a taskbar customization tool that gives you control over your taskbar icons. With Taskbar X, you can choose to move the taskbar icons to the center in just one click. Also, the tool allows you to apply custom style and animation to the taskbar.
So, in this article, we are going to share a detailed guide on how to customize the taskbar in Windows 10 fully. Let’s check out.
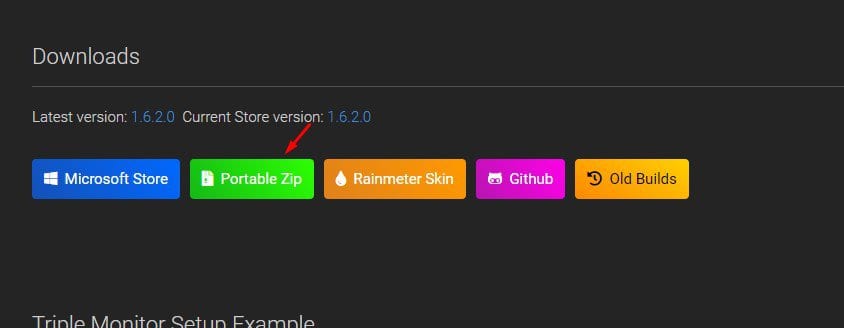
Step 1. First of all, download the TaskbarX zip file on your PC.
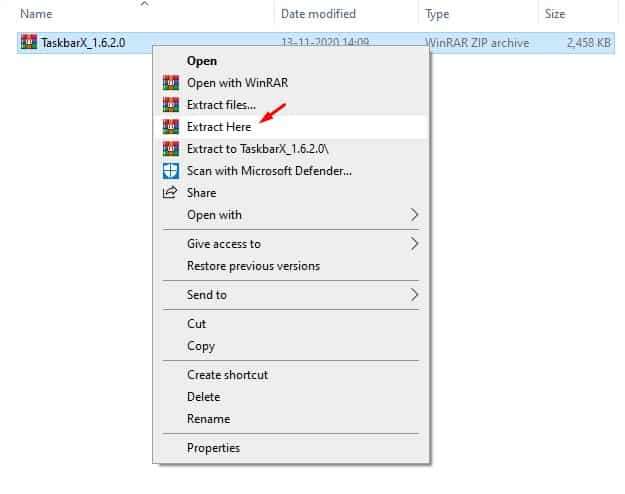
Step 2. Once downloaded, extract the zip file on your PC.
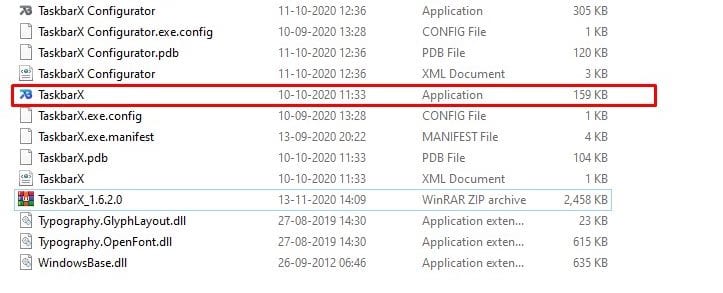
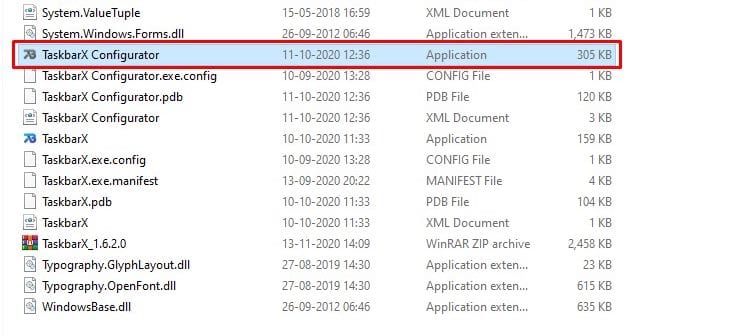
Step 3. Once extracted, you will find lots of files. Simply double click on the ‘TaskbarX’ .exe file.
Step 4. Now the taskbar icons will be moved to the middle of the Taskbar. Now on the extracted folder, double click on the ‘TaskbarX Configurator’ file.
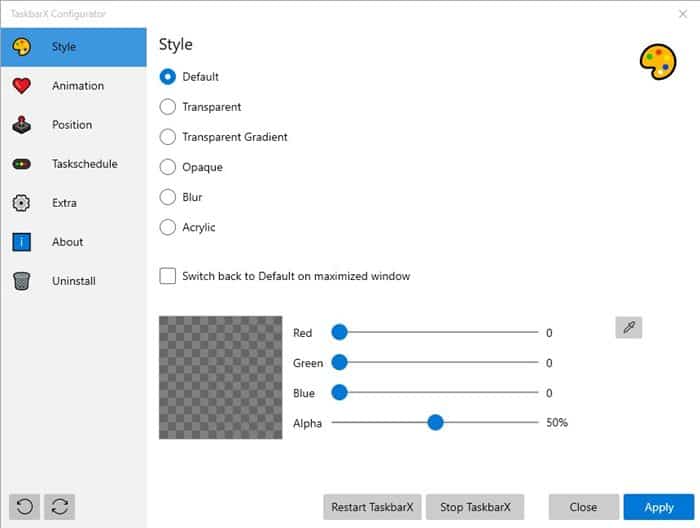
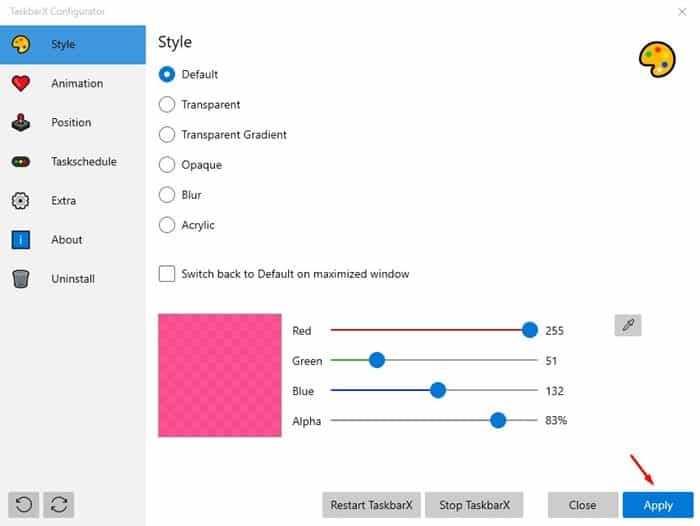
Step 5. Now you will see various taskbar customization options. In the Style section, you can customize the color and transparency of the taskbar.
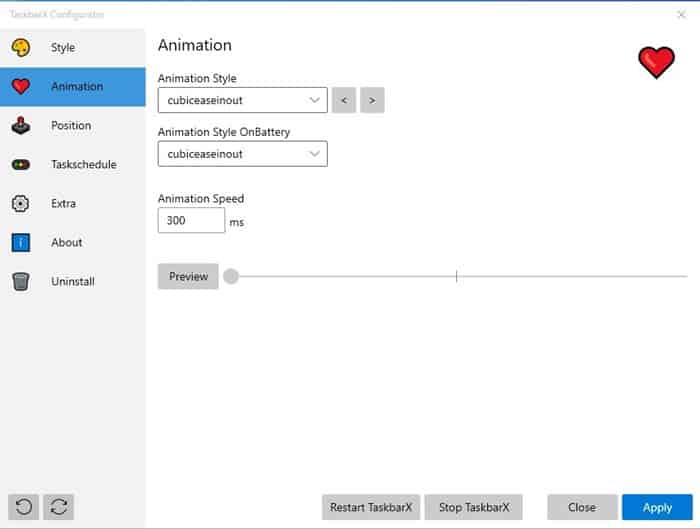
Step 6. In the Animation section, you can add a custom animation style to the taskbar. Before applying the animation, make sure to preview the changes.
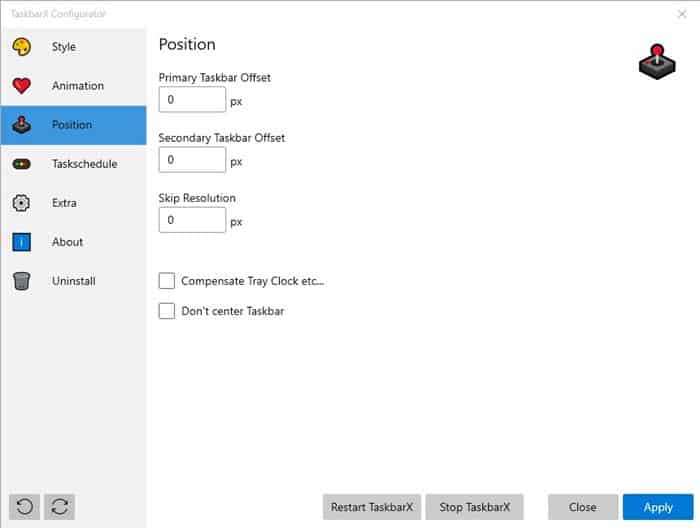
Step 7. On the Position, you can set the Taskbar Offset, Secondary taskbar offset, skip resolution, etc.
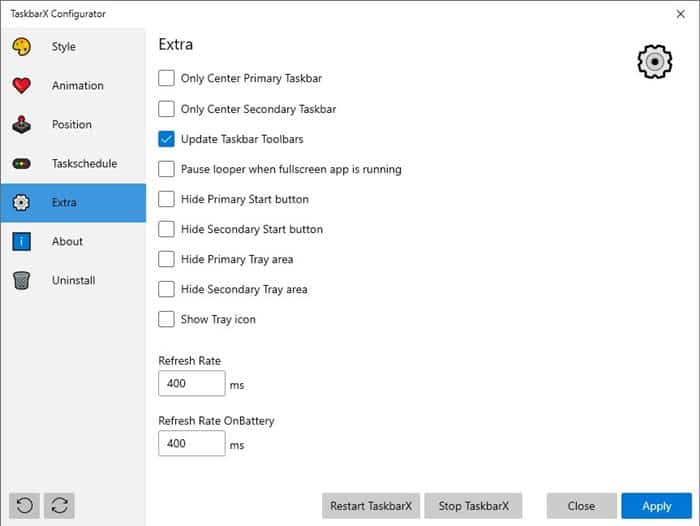
Step 8. Under Extra, you will find options to hide the primary start button, hide the primary tray area, Show system tray icons, etc.
Step 9. Once done with the customization, click on the ‘Apply’ button.
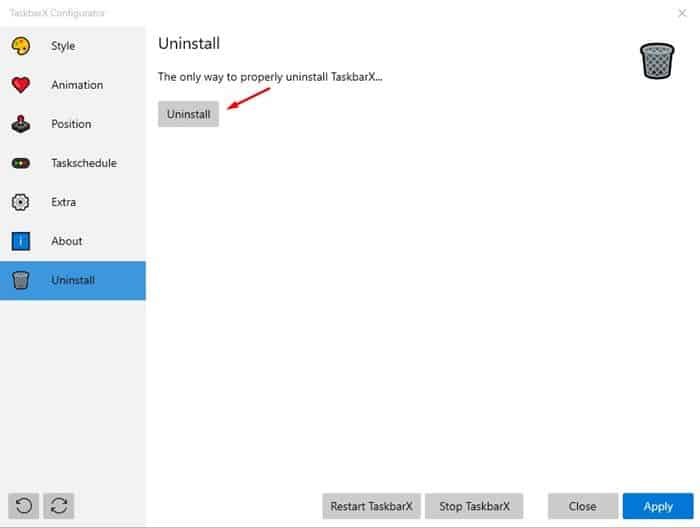
Step 10. If for any reason you want to uninstall the TaskbarX program, then open the TaskbarX Configurator and select the ‘Uninstall’ section. On the Uninstall menu, click on the ‘Uninstall’ button.
You just need to go through all settings to uncover all customization options.
So, this article is all about how to fully customize the taskbar on Windows 10. I hope this article helped you! Please share it with your friends also. If you have any doubts related to this, let us know in the comment box below.
The post How to Fully Customize the Windows 10 Taskbar appeared first on TechViral.
from TechViral https://ift.tt/2K47vGR
No comments:
Post a Comment